The Microsoft on-screen keyboard, better known as OSK, is available for people to use instead of the physical keyboard. Not many people opt to use the on-screen keyboard over the physical keyboard, but if ever there comes a time when you get stuck and cannot use the physical keyboard, the on-screen version is there to help you out.
The Windows on-screen keyboard is different than the keyboard you see on the screen when using the Windows operating system in tablet mode if you are using a Surface Book or a Surface Pro. You do not need to use the touchscreen on the tablet or laptop to use the OSK.
The Microsoft on-screen keyboard is available for desktops PC, the Surface Book, the Surface Pro and all laptops. There are many ways to open up the on-screen keyboard; we are demonstrating the select few that we think are the best ways.
Why Use the On-screen Keyboard
Apart from the obvious problem of your keyboard not working, there are some other reasons for wanting to have the on-screen keyboard readily available just in case you need to use it. One example is if you are downloading an ISO file, and perhaps the ISO file is in the United Kingdom version of English and not the United States version. Believe it or not, the changes between these two languages goes beyond different words when it comes to computers—the keyboard layout changes as well. So if you are used to a US keyboard but have a UK ISO file, you might find yourself unable to set up a Microsoft account because you cannot work out where the @ symbol is on the keyboard that you need to use in order to enter your email address. All Windows operating systems starting from Windows 8 require you to set up or sign in to your Microsoft account during the setup of the operating system. That’s just one example, and I’m sure there are many others.
The following tutorial demonstrates how to open and use the on-screen keyboard that is available in all versions of the Windows 10 operating system.
How to Open On-screen Keyboard in Windows 10
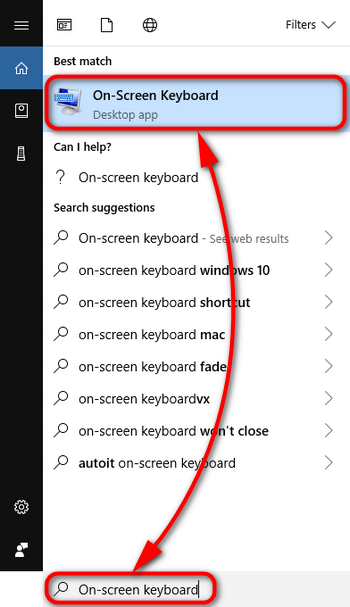
1. The quickest way to open up the on-screen keyboard is to type OSK into the search field in the taskbar and then click on the On-Screen Keyboard desktop application.
Note: If you aren’t able to use the search box that is located within the taskbar, you can follow the next way to open it instead.
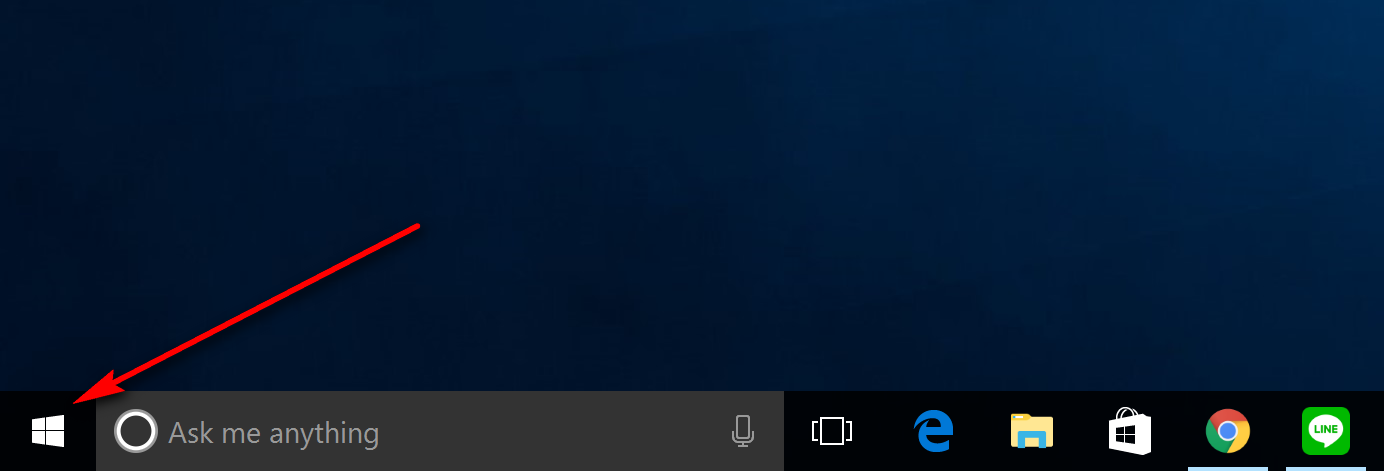
2. Click on the Start menu from the taskbar at the bottom of the computer’s display.
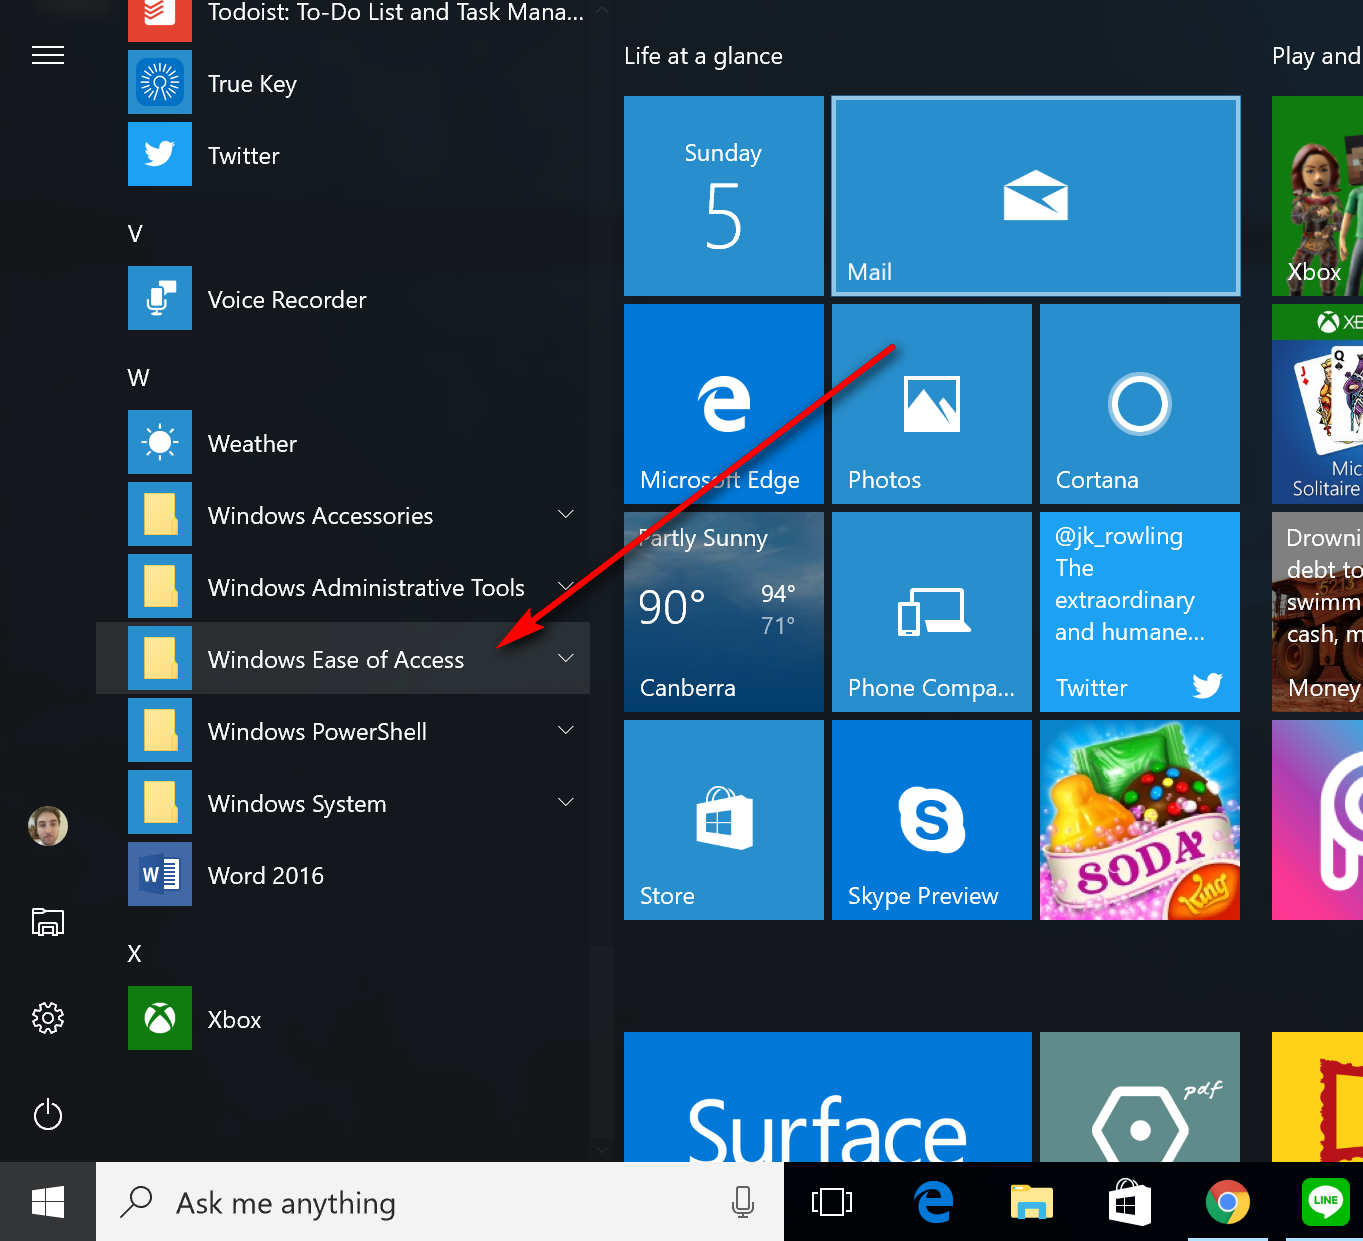
3. Scroll down the list of applications and stop when you get to the Windows Ease of Access link in the menu and then click on it.
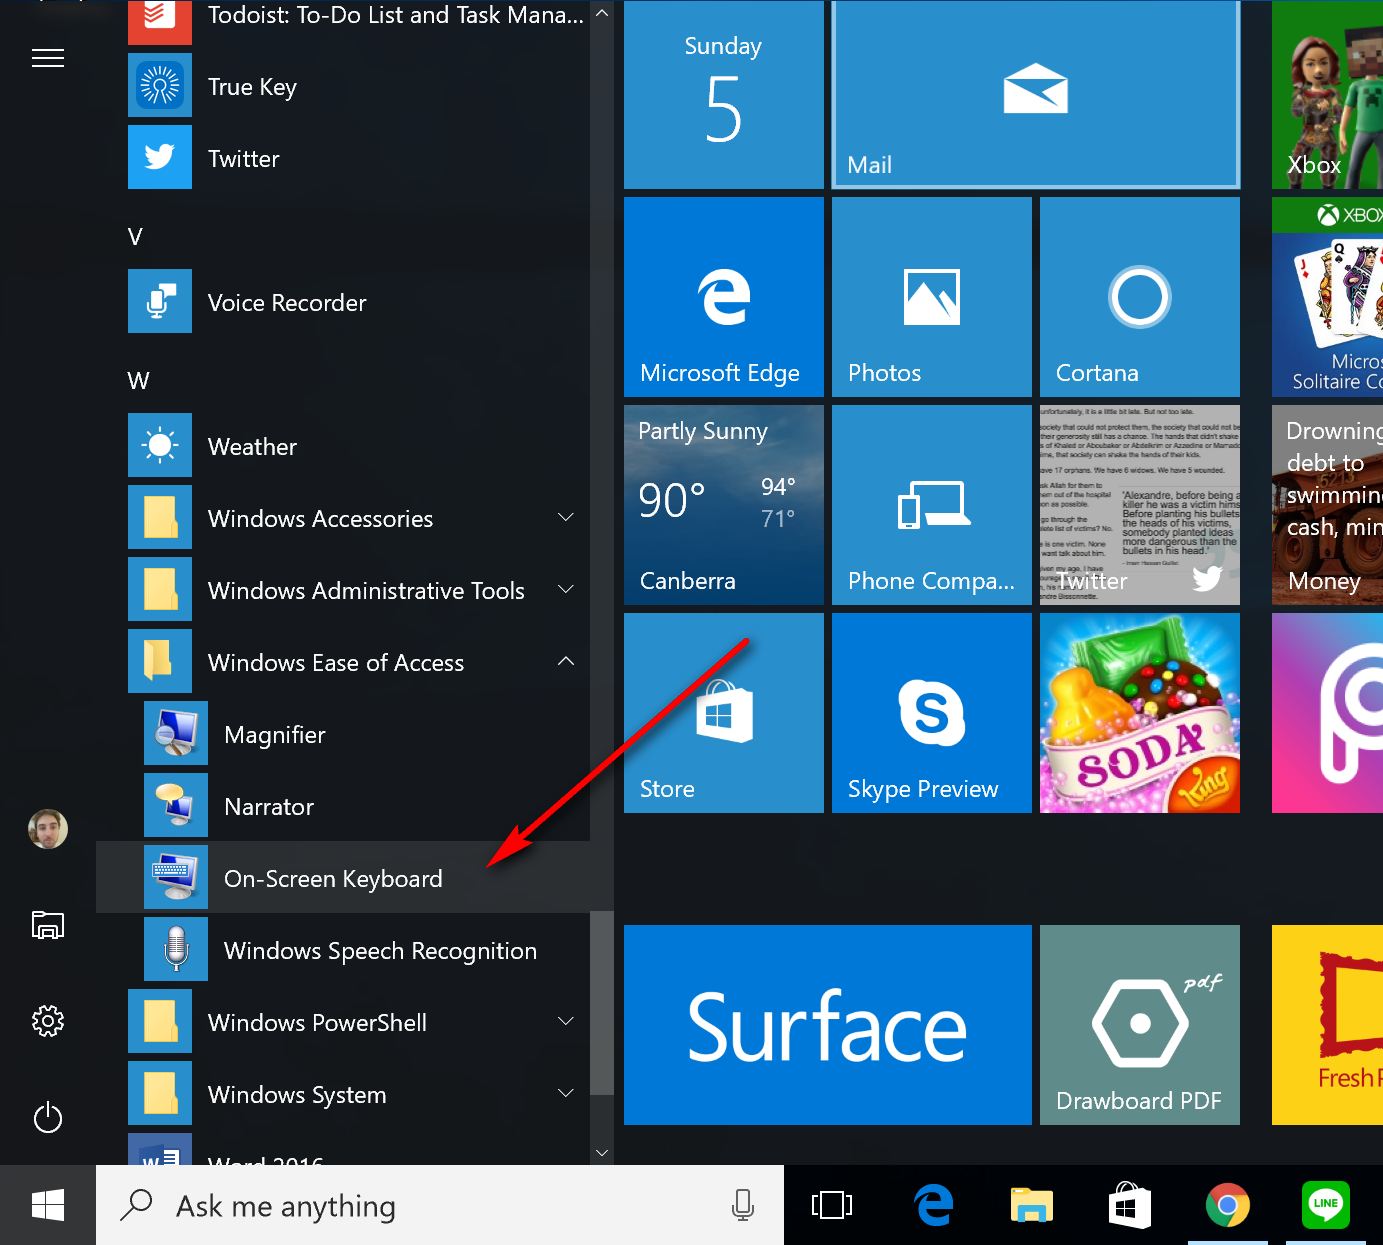
4. Doing so reveals a few more options in a sub-menu. Click on the one that says On-Screen Keyboard and the keyboard is then open on the computer’s display.
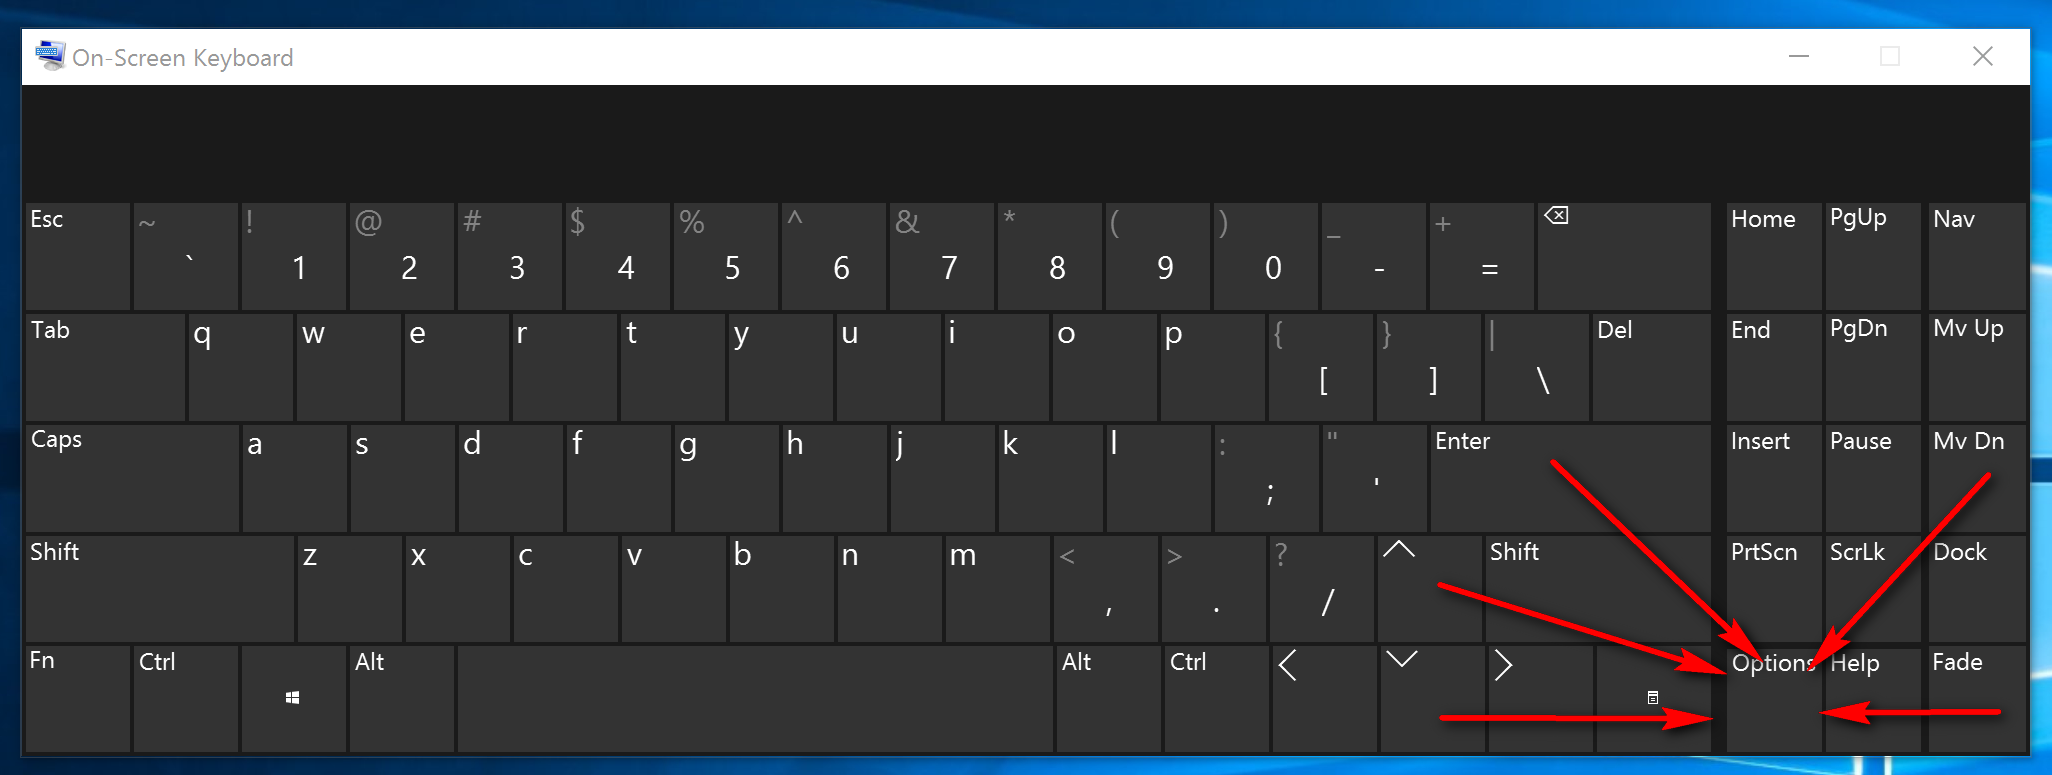
5. You can move the keyboard around wherever you want it by using the usual click and drag feature that Windows adopted for the first time a long time ago. Also, there is an Option key located on the keyboard.
Those are two of the best ways to access the On-Screen Keyboard in versions of Windows 10 operating systems. There are at least several more—but you shouldn’t ever have to resort to using any of them, and none of them are quicker than the options presented above.
This article was last updated on October 17, 2019.
October 17, 2019 @ 17:11
I’m able to get the on-screen keyboard to show up on my display, but I wish Microsoft made it larger.
It only comes in one default size, and when you are using a virtual machine on a standard 15-inch laptop, that size is very small. I basically have to lean forward and have my face right in front of the screen to see the keys. Virtual machines do not take up the full display of the laptop or desktop, and there is no choice with that either.
I can understand this being the default size, but I feel as though they should make it adjustable. The average person who is not a techie won’t fiddle with the size. It’s pretty much universally known what those icons mean in the top right corner of the Microsoft Windows box these days.