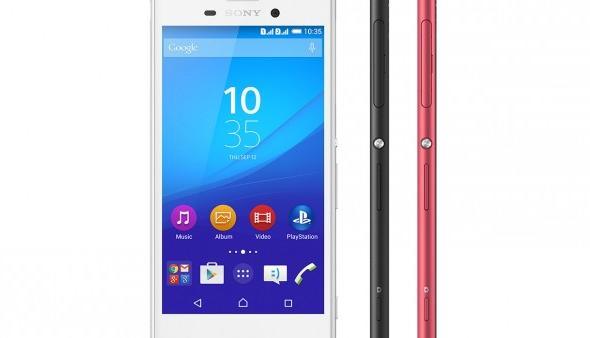
If you root your Sony Xperia M4 Aqua, you allow yourself to enjoy many of the great root-requiring apps on your phone. These apps are not those ordinary apps that run on any phone, these only work on rooted phones ’cause they require superuser permission to do their great tasks.
These apps let you do more customizations to your phone than anything else. From customizing your launcher to going as far as to editing the build.prop file, you can do everything when you’re rooted.

And if that sounds good to you and you wish to root your phone, here’s how you can do that:
The Files You Need
- The bootloader on your phone must be unlocked before you can do this tutorial. Please head over to the XDA Forums to learn how you can unlock the bootloader on your phone.
- You must have a custom recovery installed on your phone before you can do this tutorial. If you do not have one, flash one using the how to flash a custom recovery on the Sony Xperia M4 Aqua tutorial.
- This tutorial flashes the SuperSU package to gain root access on the phone.
- You should have Universal ADB drivers installed on your phone.
- Download ADB to your computer. It will help you execute commands on your phone.
- Download SuperSU to your computer. This is the file that will help you achieve root access on your phone.
Rooting the Sony Xperia M4 Aqua
- Right-click on ADB and select Extract here to extract the ADB files to your computer.
- Place the SuperSU file in the same folder as ADB files. SuperSU .zip and adb.exe should be in the same folder or the below steps will not work.
- On your phone, head to Menu->Settings and tap on About phone. On the menu that follows, tap on Build number for 8 times and it will unlock the developer menu for you.
- Go to Settings again and tap on Developer options. Turn on the option that says USB debugging.
- Connect your phone to your computer using a USB cable.
- Open a Command Prompt Window where adb.exe is located. To do so, open the folder containing adb.exe, hold down Shift on your keyboard and right-click on the screen and select Open command window here.
- Type in the following command into the Command Prompt Window and press Enter:
adb reboot recovery - Your phone should reboot into the custom recovery mode. If you have installed a recovery on your phone using our guide, you will reboot into TWRP Recovery mode.
- When your phone is in TWRP Recovery mode, type in the following command into the Command Prompt Window and hit Enter:
adb shell - You will have shell access to your phone.
- Type in these commands one by one into the Command Prompt Window and hit Enter:
mount -w /dev/block/platform/7824900.sdhci/by-name/system /system

mount -w /dev/block/platform/7824900.sdhci/by-name/userdata /data

mount -w /dev/block/platform/7824900.sdhci/by-name/cache /cache - You are now going to sideload SuperSU on your phone. To do that, type in the following command and hit Enter:
twrp sideload - Type in the following command into the Command Prompt Window and press Enter. Make sure to replace SuperSU.zip with the actual name of the SuperSU file that you have downloaded.
adb sideload SuperSU.zip - Wait for it to flash SuperSU on your phone. It should not take too long to do that.
- When it’s done flashing SuperSU, reboot your phone by issuing the following command:
adb reboot - Your phone should reboot into normal mode.
- And you are all done!
Your Sony Xperia M4 Aqua has been successfully rooted, all thanks to TWRP and SuperSU for making it possible.
Now that you have a recovery and root access on your phone, go ahead and flash out various custom ROMs on your phone and have fun.
You might also be interested in:
- How To Install Custom Recovery On Sony Xperia M4 Aqua
- How To Unroot Motorola Moto X Style (Pure Edition)
- How To Root Samsung Galaxy S6 Edge Plus On Android 5.1.1
- How To Unroot Samsung Galaxy S6 Edge Plus
- How To Install TWRP Recovery On Samsung Galaxy Grand 2
Have something to say? You can contribute to this tech article by leaving a comment below.
December 24, 2016 @ 05:19
After the following command -“mount -w /dev/block/platform/7824900.sdhci/by-name/cache /cache”
after typing twrp sideload , it is showing “/system/bin/sh: twrp: not found “