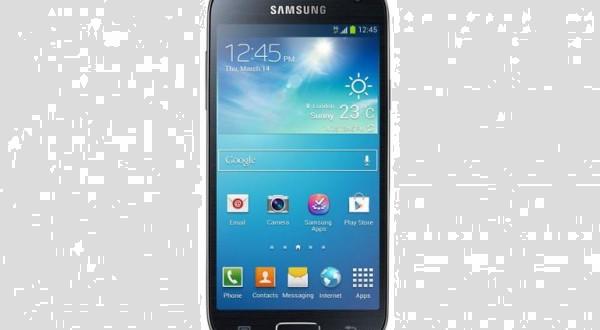
Samsung does a pretty good job at ‘trumping’ the competition such as Apple with the iPhone because their standard flagship is bigger and then they bring out a ‘mini’ model. It is anything but small and still roughly the same size as what the Cupertino company are making with the iPhone. The S4 Mini is 4.3-inches big and comes with the Android (4.2.2) TouchWiz Nature UX 2.0 UI. Nowadays that is old and it now can run a much newer KitKat build. Making matters even better is that it has been updated yet again to the Android 4.4.2 KitKat namely XXUBNB3 firmware and if you have already updated to that and are now looking to find the root I will show you how.
This guide is only working for the i9195 edition and will not work on the other model number i9190. You can check the box it came in to see what yours says. There might also be a number on the shell casing and if you need to check from the software that is an option too. Go to the Settings menu and scroll down to About Phone and check the model number from there.
Details of Note
- Turn of the Android security app if you have installed any from Google Play. Many people choose to run antivirus to keep their smartphone safe. You can never be too safe these days with so many malicious attacks happening in the cyber world. However, we trust the files we are using here so there is no need to have it running. Furthermore, they can interfere with the preceding and not cooperate with the Odin tool. It is our suggestion temporarily to disable these applications from the handset. Also, if you are running antivirus and malware protection on the computer, please disable it for them time being for the same reason.
- Always backup before starting something like this because it comes with the risk of data corruption if something goes wrong. Without a backup, you run the risk of losing everything you installed on the device from after you opened it out of the box and used it for the first time. Common data to lose includes call logs, contacts, SMS and MMS texts, pictures, video and music. These are exactly the same thing we want to back up. We also want to make a copy of the EFS folder. It is the number one thing to do after before root to play it safe with the device and not just your personal data. The internal storage was also small coming with 8 GB of built-in space. Keep in mind that a lot of that space is being used already with the Android OS. It leaves a maximum user storage of only 5 GB. If you find you do not have enough room to backup you have the option of buying a microSD, microSDHC, microSDXC storage expansion card of up to 64 GB. It should give ample room to most of you. The phone already comes with a built-in slot for this.
- Odin is a program that is made by official Samsung developers and they have made it only for Windows. There is no answer for why they decided to do that. It could be business reasons, but it is what it is. That means you will need a Windows-based operating system to use the Cf Auto Root. Mac OS X and Linux will not work. The same can be said for anything Ubuntu related. It does not matter how open source it gets nothing is going to help. The good news is that most people know of at least one friend who is running the Microsoft Windows because it is the most popular OS to use out there in people’s homes.
- Battery talk-time is only 12 hours and stand-by time is 12.5 days or 300 hours. It is a brand new and just about all owners will not get anywhere near this amount when using them in the real world. Make sure you have at least 60% battery power before starting in case the USB charging feature does not work. By default, it should start charging automatically as soon as it is plugged into the PC. However, depending on the system unit and other factors it may not work.
- Install the latest up to date Samsung USB drivers if you do not have them already. There are many sources for these including the Samsung developers website. They are a lot easier to use than they use to be. thanks to some nifty work by the developers we no longer do you have to find the particular device name or model number to get them to work for your device.
- Once you have those it is time to double-check that USB debugging is already enabled and if it isn’t we need to enable it. We can do this by visiting the Develop Options. Because this device started out with Android 4.2 and in Android 4.2 this menu was hidden by default we have to unlock it for everyone who hasn’t updated since they started using the software that it came with out of the box. Go to the Settings menu again and scroll down to About Device. Tap on the build number seven times with your finger and it will unlock. Now navigate your way back out to the About Device menu and it will be a new menu on this screen. Click the Develop options and inside enable the USB Debugging Mode.
- This S4 Mini came out for Verizon, US cellular, AT&T and Sprint in the United States. However, this is an international version and it will have different phone carriers. It will not matter which carrier network you are using. It will work for all of them.
How To Root The Samsung Galaxy S4 Mini International i9195 On Android 4.4.2 XXUBNB3 Firmware
1. Download ChainFire’s CF Auto Root for this firmware from this page.
2. Download the latest Odin 3.09 from the link on this page.
3. If you are running Vista through to Windows 8 download the files to the C: Drive. Go to Start and type the file name in the search box to find them. XP users will find it easier using the desktop. Cluttering the desktop results in longer loading times on start-up and should be avoided.
4. Unzip and open the Odin app on the desktop.
5. Plug the galaxy S4 Mini into the system unit of the PC with a USB cable.
Where do I find a USB cable? Check the phone charger as it is commonly used as the cord connecting to the charge pack.
6. Click the PDA button and upload the file with the extension of serranolte-serranoltexx-gti9195.tar.md5.’
7. Leave the default settings as they are. It already has two boxes marked as on with a tick in them. Nothing else needs to be marked.
8. Click the start button.
9. When finished it will give a message on the screen that says, “pass” and the ID: COM port will change a favorable color indicating success.
12. Proceed to close the program by clicking the “X” as you would with any Windows-based program.
12. Don’t unplug the mobile without disconnecting it properly to avoid data corruption. Move the mouse down to the task-bar and right-click on the “Safely remove hardware” icon. Now select to stop the USB Mass Storage device. It will prompt you when it is safe to disconnect.