Microsoft’s Cortana feature built into Windows was supposed to set the world alight with its breaking edge technology abilities to be a reliable virtual assistant. Unfortunately, things have not always seemed that cutting edge for many Microsoft users who would prefer Cortana was not just gone but gone for good.
From running when you do not want her running to collecting information about you even when you are not using her, Cortana has started to rub some people the wrong way. For all of those people, there is a way you can completely disable Cortana from Windows 10 operating systems.
Here’s how to do that:
How to Disable Cortana completely in Windows 10 using Windows Registry
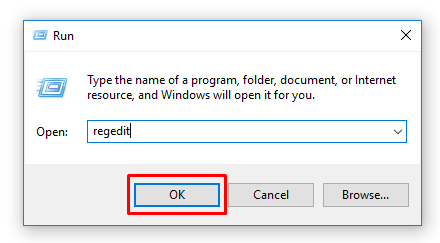
1. Type Run into the search box that is available in the Taskbar and then click on the Run desktop app.

2. Type Regedit into the box and then click on OK.
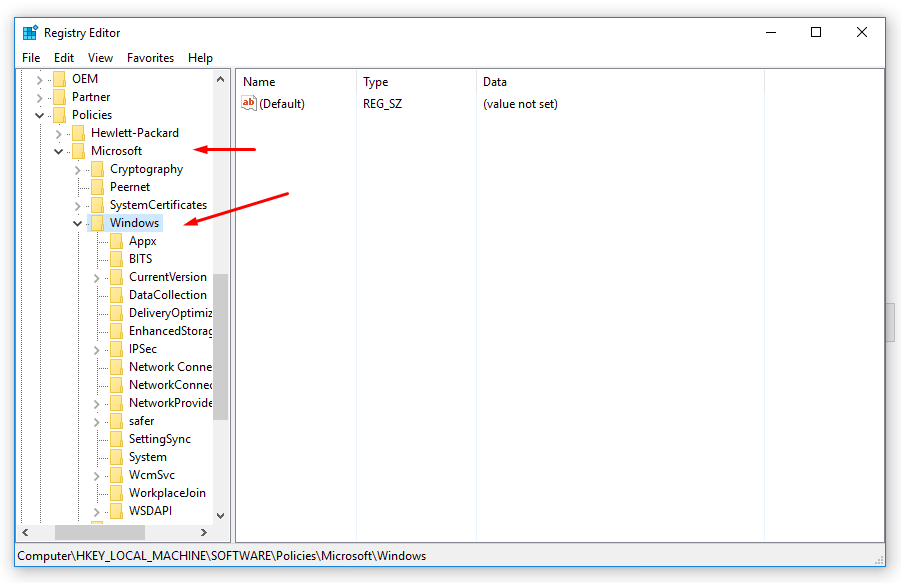
3. Open this path from the folders:
HKEY_LOCAL_MACHINE\SOFTWARE\Policies\Microsoft\Windows\
4. Right-click on the Windows and hover over New and then click on Key.
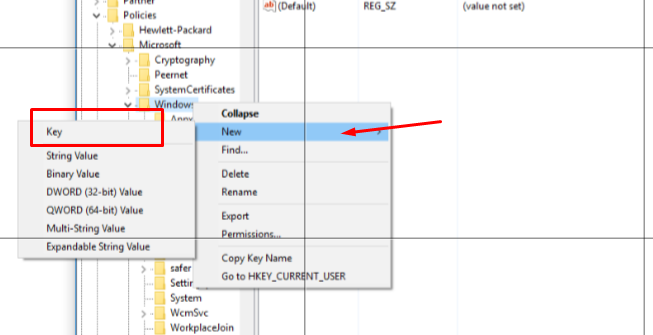
5. Call the new Key Windows Search. There is no need to create it again if you already have it there.

6. Now from the empty white area on the right side after Windows Search is highlighted, right-click the background and hover over New and choose the DWORD (32-bit) Value.
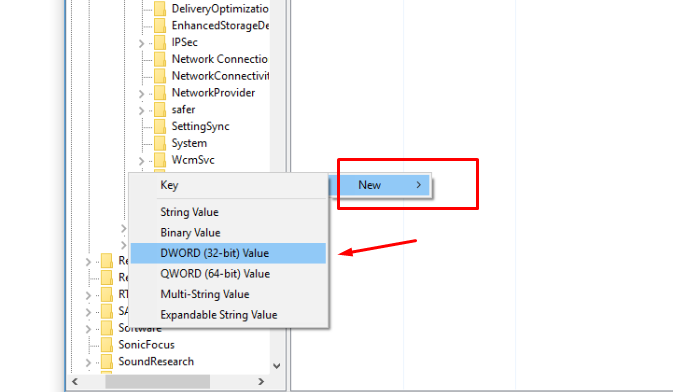
7. Name the value Enable Cortana.
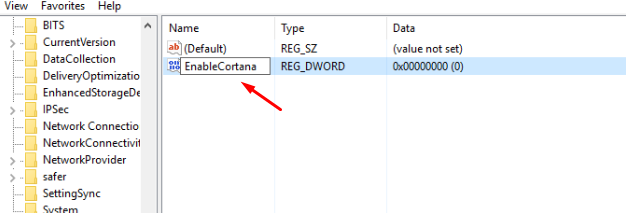
8. By default, the value should be set to zero which is what we want. However, just double check that is the case by double-clicking the mouse on the Enable Cortana value, and it should show zero from the box.
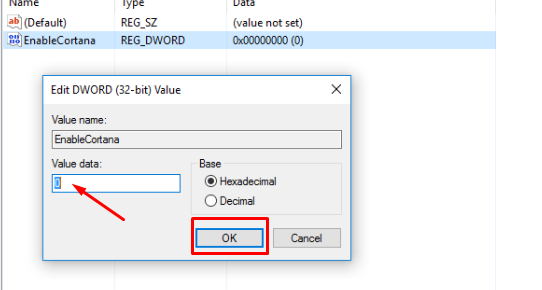
9. Restart the computer and the Cortana is disabled immediately.
In conclusion, that is how to disable Cortana completely in Windows 10 operating systems by using the Windows Registry. If you ever need to enable Cortana again, just go back into the registry and remove the Windows Search key that you created that holds the Cortana 0 value.