If you want to keep your data safe, the obvious choice is to back it up so if you lose it you can restore it again. Most people don’t realize how fragile their data sitting on their hard drives really is when they just don’t bother to back up those important files that they can ill afford to lose. It isn’t out of the question that your computer gets hit by lightning, or there’s some type of electrical surge that stops the motherboard from working, and it takes the hard drive along with it. If that happens and you don’t have your data backed up to anything at all, you’re looking at spending up to a few thousand dollars to get a recovery expert on the job to try to salvage it for you. The moral of the story: always backup your data that you can’t afford to lose. If you’re someone who has important work-related files that would prevent you from being able to do your job without them, that means you.
There are different ways you can back up your data in Windows 10 depending on what it is you want to be backed up. If you wanted to just backup some files, then there is a way to do that using Windows 10 built-in backup and recovery tools. Likewise, if you want to back up absolutely everything, then you can do that by creating a system image.
Taking a system image backup seems like the logical choice since it backs everything up, but it also means you can only restore everything as well. So you can’t just restore bits and pieces from a system restore. It gives you everything. And by everything we mean all the drives that the Windows operating system needs to run, the Windows 10 operating system, the files, the system settings, and all the programs currently installed. What’s more, the system image is going to require more space before you can take the backup since it is backing up more stuff than an ordinary backup.
There are times when people want to have the flexibility only to restore some things at a time, and those are the times you will want to look for other options.
It should be noted that the Windows developers haven’t put a lot of work into developing system images and subsequently their version of system image backups are not as good as what you can find from third-party tools. That’s not to say that you shouldn’t use the options that Windows has by default for creating the system image backups, but if you really wanted the crème de la crème of system image backups, you might want to look at other tools such as Macrium Reflect.
How to Create a System Image in Windows 10
You can create system image backups from the Control Panel in Windows 10 pretty easily. Here is how you can do that:
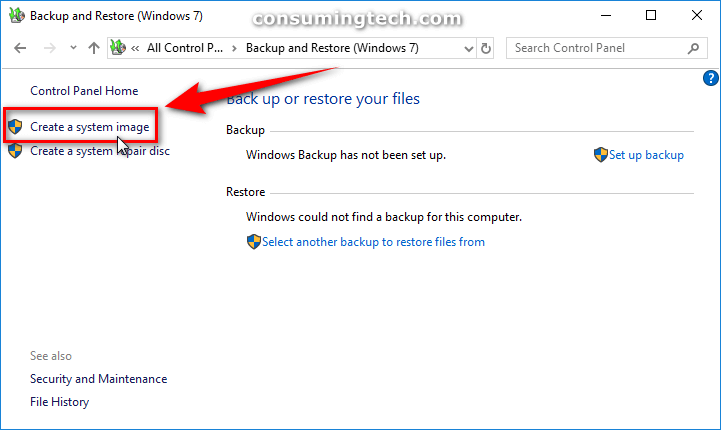
1. To get started, open the Control Panel so it’s showing its more classic view with the smaller icons and then click on the Backup and Restore (Windows 7) link from the list of all Control Panel items.
2. Next, click on the Create a system image link in the left side pane, as shown in the screenshot below.
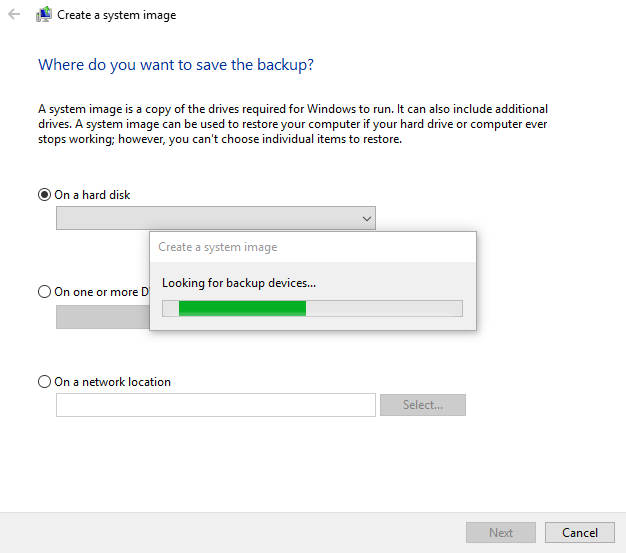
3. It’ll ask you where you want to save the backup and take a little while to search for devices that you may have attached to the computer.
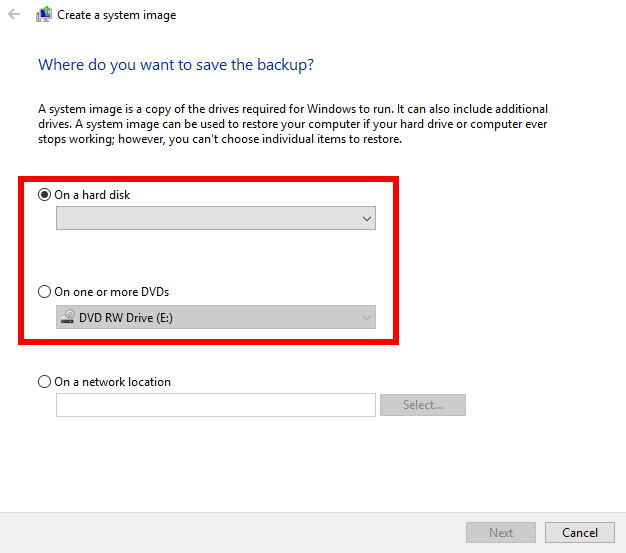
4. If you want to back up to the hard disk, then select that option, followed by the hard disk you want to back up to from the drop-down menu. Or if you have a DVD you would prefer backing up the system image to, then you can choose that option as well. Just be sure to insert the disk you are after so it can continue.
You should always backup the system image to a different drive than the one you are already imaging. The point is to back up that image so if something were to go wrong with it you’d be able to pull data from another location. If you try to back up to the same image, you’ll get a warning from Windows letting you know that that is the case, at which time you should look for alternative options.
5. After you’ve clicked on the Next button, you’ll then have to click on the Start backup button from the following window, at which time you can expect the imaging process to begin automatically. Since this is a full system image backup, it can take a while to complete.
It shows you a window once the backing up process is complete that lets you know that the backup completed successfully. Click on the Close button to close the window and continue suing the computer. If you’ve backed up to a disk then make sure you keep that same disk safe and out of harms way. And if you choose another drive on the computer then don’t forget about its existence.
Related Tutorials