Like many things with the Windows operating system, there is no option just to clear the cache of a thumbnail like you might have hoped from the Windows Settings screen. We can forgive Windows developers for this because it’s not something that many people want to do and they go out of their way to limit the amount of options you get built into the operating system, so things don’t get too confusing. Another reason they don’t give every little thing it’s own option from the settings is because there is already a way to do it by getting access to something else.
Third-party tools such as Thumbnail Database Cleaner can be installed on the computer, and that will help you clear the thumbnail cache in Windows 10. If you don’t want to install another tool on the computer you are using, you can still clear the thumbnail cache in Windows 10 by using the disk cleanup utility which comes with an option to clear the thumbnails from within its options before you run the program.
Here is how you go about clearing the thumbnail cache when using a version of the Windows 10 operating system:
How to delete thumbnail cache in Windows 10
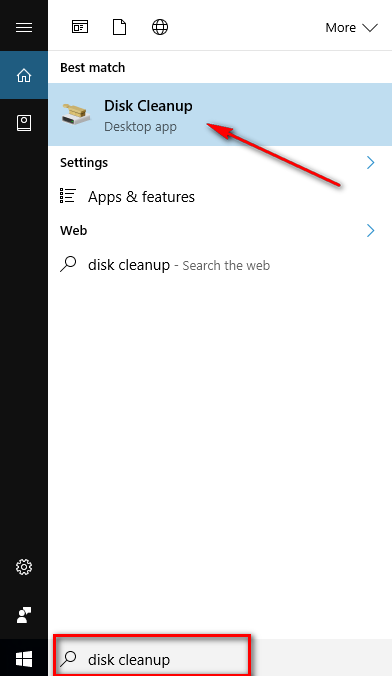
Click on the search field so you can type in it and then type the word “Disk Cleanup” to open the Disk Cleanup utility. (If you want to learn how to navigate the Windows 10 operating system better, you might also be interested to now that there are other ways of getting access to the Disk Cleanup utility. You can find out how to navigate to it without using the search bar if for whatever reason you do not have access to it in the future by checking out this post on how to automatically free up disk space in Windows 10.)
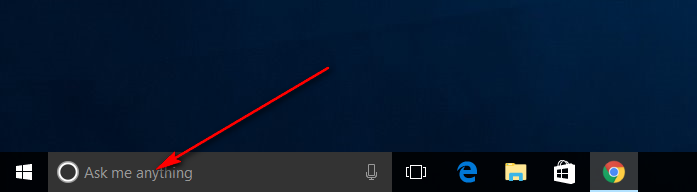
After typing your words into the search box located in the taskbar at the bottom of the computer’s screen, click on the “Disk Cleanup Desktop” application that appears under the “Best match” section.
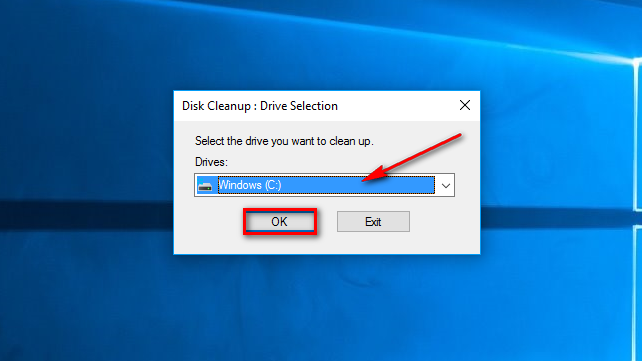
 Select the drive that you want to be cleaned and then click on the “OK” button.
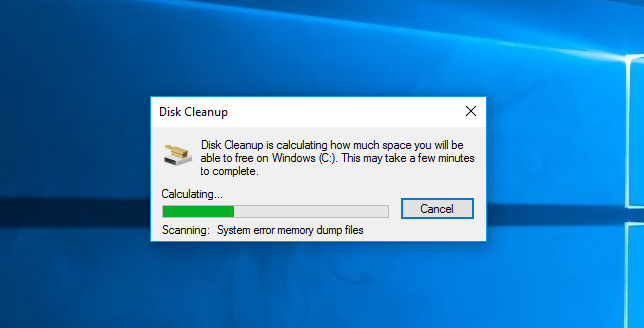
Here’s the most annoying part of the Disk Cleanup program that you need to go through: it takes some time calculating what it can do for you before it presents you with the set of options that you can choose to clean up. There is no way around this, and it might take a few minutes depending on what is stored on your computer. Those who use the computer more than others can expect those process to take longer.
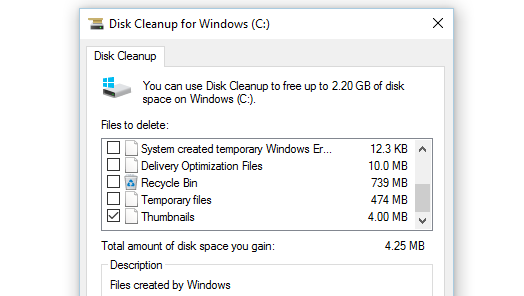
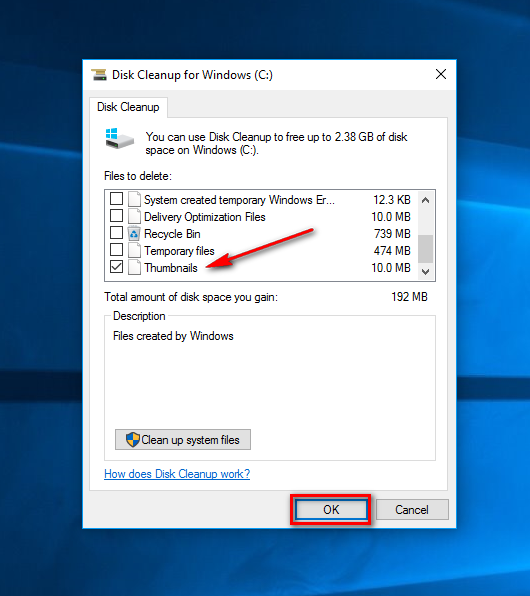
When the Disk Cleanup for Windows program is open, scroll down all the way to the very end of the list and then check the box that is available for “Thumbnails” so that when you choose to run the cleanup, it is going to clean those thumbnails that you wanted the cache deleted for.
If all you want to do is remove the old cached thumbnails in Windows 10, then you should remove the checkmarks from all other boxes not named “Thumbnail” so that it does not take a long time to complete the process when it runs.
As soon as that is done, click on the “OK” button at the bottom.
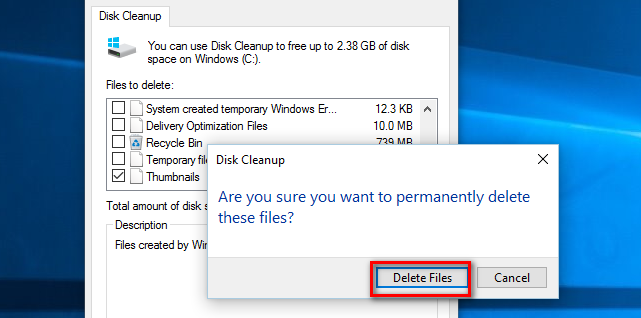
Windows then prompts you with a message before it runs the Disk Cleanup program asking you “are you sure you want to delete these files permanently?” Click on the button that says “Delete Files” to continue.
The Disk Cleanup utility is now removing the old a cached thumbnails, and when it is done, it will be showing the new ones that you wanted.

That is all you need to delete thumbnail cache in Windows 10 so that the thumbnails are no longer showing the older images instead of the updated versions.
You might also be interested in:
- How to Create Desktop Shortcuts to Programs in Windows 10
- How to Get a Full Battery Notification in Windows 10
- How to Use the On-Screen Keyboard in Windows 10
- How to Remove Programs from the Startup in Windows 10
- How to Create a Desktop Shortcut to a Website in Windows 10
Have something to say? You can contribute to this tech article by leaving a comment below.