Recovery mode is useful for applying a factory reset, applying a software update, wiping the cache partition and wiping the data. The way in which we access the recovery mode differs between manufacturers. For example, the way we enter recovery mode from the Google Nexus is different compared to the way we enter recovery mode for the Motorola devices. However they all do the same thing once we are inside the bootable partition we call recovery mode.
We can access the recovery mode using the buttons on the Google Nexus 7. Furthermore, we can use the same button combination on the Google nexus 7 to access the stock recovery and a custom recovery. Those of you who have no idea what the difference between a stock and custom recovery will likely have a stock recovery. We call them stock because they automatically come with our devices. A custom recovery is developed by the Android open source community and must be installed by you or someone you know or your device. You cannot get a custom recovery on your device when you bought it from the shops.
How To Boot Into Recovery Mode On The Google Nexus 7
- Hold down the Power button and choose to turn it off from the screen. If you have an unresponsive display, long-press the Power button until the Nexus device is off.
- Press the Volume Down + Power keys together.
- Wait until you see the Android logo on the display.
- Navigate through the next screen by using the Volume Up and Volume Down keys until you see the recovery option.
- When you can see the recovery Mode available in the top corner of the screen, press the Power button to select that option.
- Wait for the Android Logo to display once again before pressing the Power and Volume Up buttons for 3 three seconds.
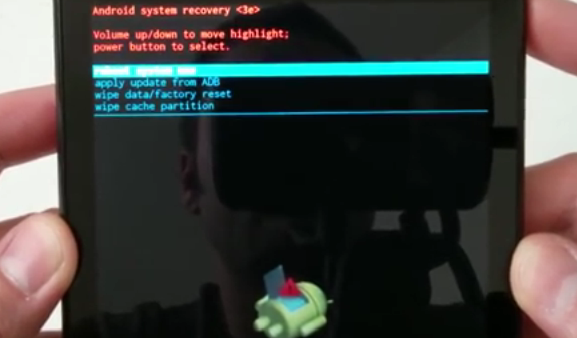
- You now have the recovery options available from the top of the screen. navigate through the options using the Volume Up and Volume Down buttons and confirm what you want to do by pressing the Power button.