Unlike the Recently Deleted items list in the Photos app on your iDevice that automatically gets deleted after a month, the Trash on the Macs doesn’t get emptied by itself. Whatever files that you delete from your Mac and send to the Trash, those files just never get automatically deleted from there, and they remain there forever, unless, of course, you manually open the Trash and hit the empty button.
With macOS Sierra, though, you now have an option that automatically deletes all the files in the Trash after thirty days. That way whatever files that you have moved to the Trash will be deleted after 30 days.
The feature is really useful as it just auto deletes the Trash contents without requiring any interaction from your side. Many of us just forget to empty the Trash and the feature just does that for us.
Here’s how you can go about enabling and using the feature on your Mac:
Automatically Emptying the Trash in the Macs that run macOS Sierra
The feature is built right into the OS so you don’t need a third-party app to do the job.
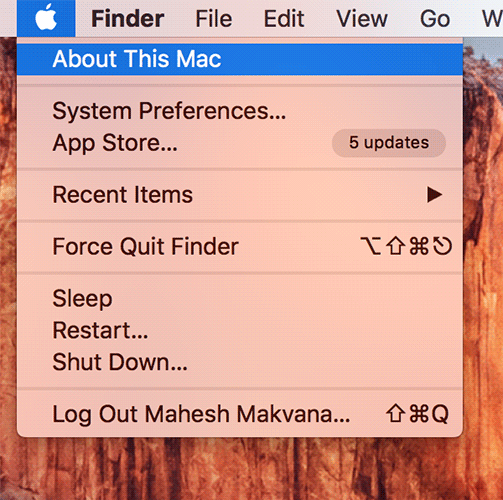
1. Click on the Apple logo in the top-left corner of your screen and select the option that says About This Mac. It will take you to the about panel for your Mac where you can see all the information for your Mac.
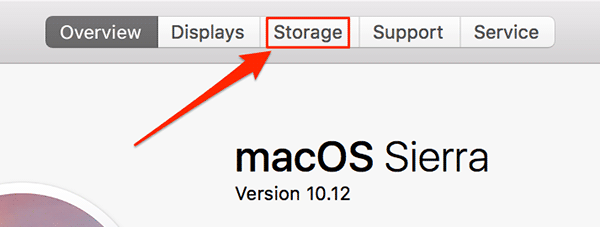
2. When the about panel opens, click on the Storage tab on the top to access storage panel.
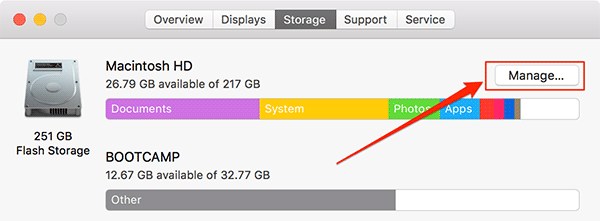
3. On the screen that follows, you’ll see a button named Manage next to your Macintosh HD hard drive. Click on the button to open storage management panel.
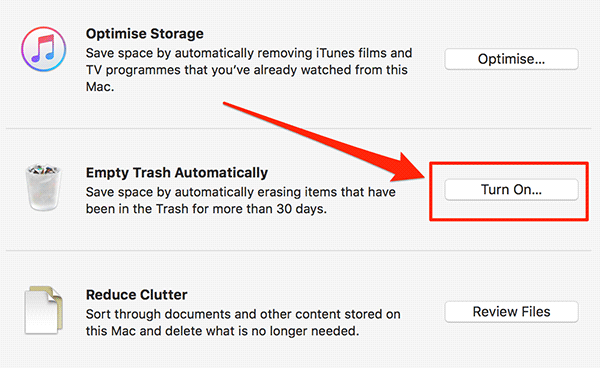
4. You will be taken to the panel from where you can change various settings related to your Mac storage. On that panel, you will find a section that says Empty Trash Automatically. And next to that section is a button that says Turn On. Click on the button to enable the Trash to automatically empty after thirty days.
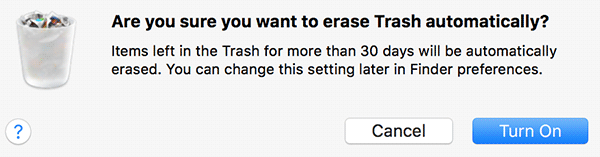
5. You will be prompted if you are sure you would like to enable the auto empty feature for the Trash. Click on Turn On to accept the prompt and enable the feature.
6. You should see the following on your screen when the feature has been turned on.

From now on, the Trash on your Mac will be automatically emptied after every thirty days.
In case you make your mind to disable the feature for your own reason, then you can do so using the following steps.
Disabling the Auto-Empty Feature for Trash in the Macs running macOS Sierra
You will notice that the button for disabling the feature isn’t available on the panel from where you enabled the feature. So, to find that button, you need to do the following:
1. Go to your desktop so that you are inside a Finder window.
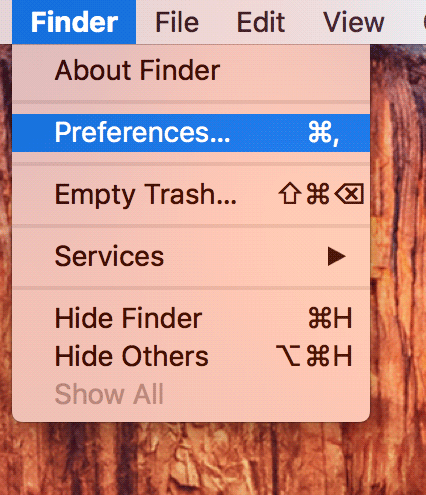
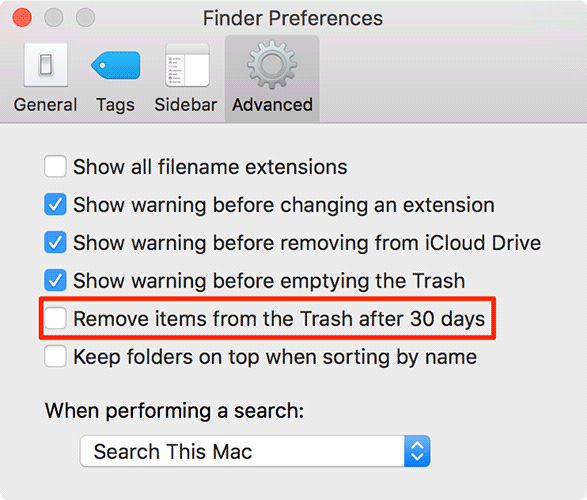
2. Click on the Finder menu at the top and select the option that says Preferences. It will take you to the preferences panel for the Finder.
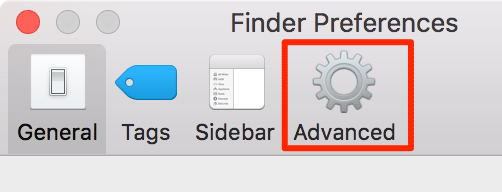
3. When the Finder preferences panel opens, click on the Advanced tab on the top to open advanced settings.
4. When the Advanced tab opens, uncheck the option that says Remove items from the Trash after 30 days. It should disable the feature for you.
You’re done.
The Trash on your Mac will no longer auto empty itself.
So, that was how you could enable a feature that empties the Trash automatically after a period of 30 days.
Let us know if this helped you by commenting below!