Libraries don’t get as much attention as they probably should in Windows 10. If you want to learn more about them, you can read more about how to add and how to remove folders from the libraries that you get with File Explorer.
You’ll get the libraries appearing in the navigation pane of File Explorer by default in all Windows 10 editions, but it’s also possible to choose to remove them, so they aren’t visible from there if you prefer.
Here’s what you need to add or remove the Libraries from the navigation pane that’s available within File Explorer when you’re using any version of the Windows 10 operating system.
How to Add or Remove Libraries in Navigation Pane of File Explorer Using Folder Options
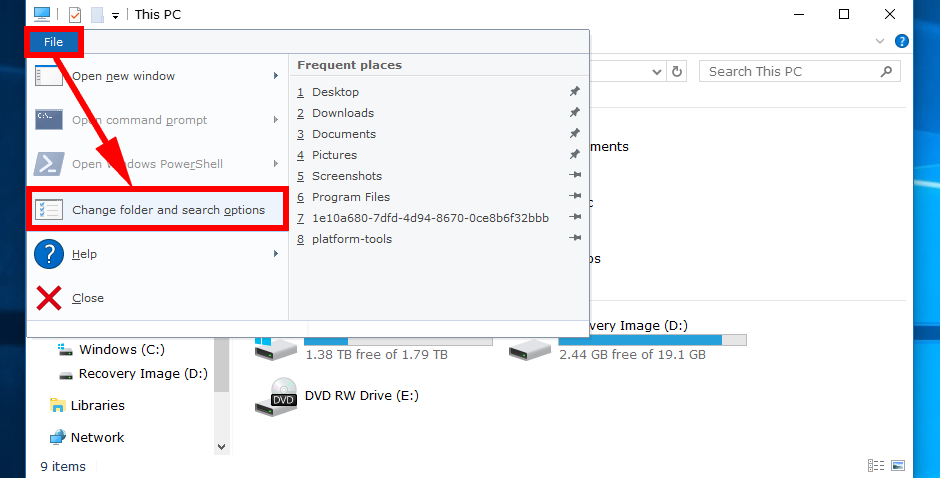
You can add or remove libraries from the navigation pane of File Explorer by using the Folder Options dialog box. To get there quickest, head to the Start menu > Settings gear from the Start menu’s far left side pane and then click on the File > Change folder and search options.
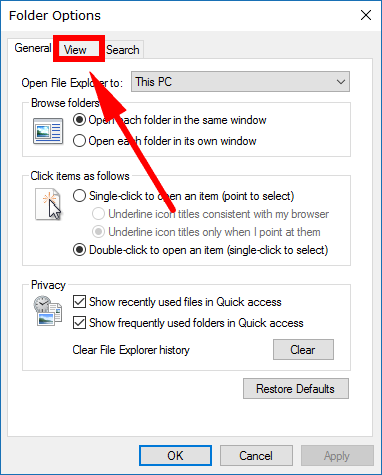
You’ll now have the Folder Options dialog box open. By default Windows 10 has it so that it opens up with the “General” tab first, so you’ll need to click on the “View” tab instead to get to the stuff that’s related to your viewing.
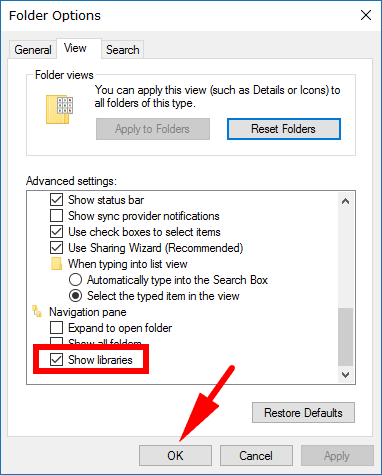
Now if you scroll all the way down the bottom of the “Advanced settings” section, you’ll see an option called “Show libraries.” That’s the one you want to select or deselect depending on what you want to do with the libraries. Deselect it if you want to no longer show the libraries in the navigation pane of File Explorer.
How to Add or Remove Libraries in Navigation Pane of File Explorer using File Explorer Ribbon
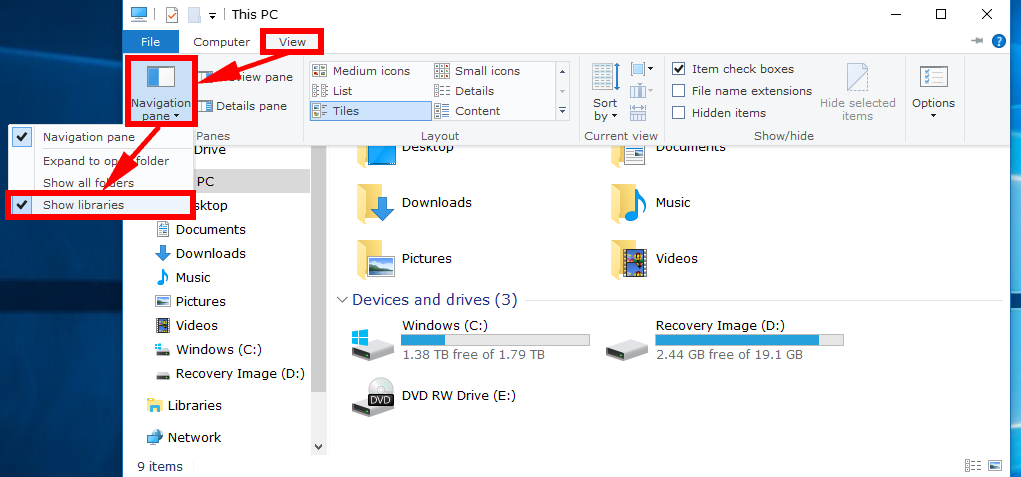
You can also choose to show or hide the libraries from the File Explorer ribbon—which, more simply put, is the menu at the top of the File Explorer window—if you like. To do it this way, open the File Explorer up again by heading to Start > File Explorer and then click on the View > Navigation pane > Show libraries. When the “Show libraries” has a tick next to it, that means it is turned on or set to show the libraries. Deselect it by clicking on it when you want to turn it off so that it will no longer show the libraries.
How to Add or Remove Libraries in Navigation Pane of File Explorer using File Explorer Navigation Pane
You can also add or remove libraries from the navigation pane in File Explorer by using the navigation pane itself. You can right-click on the navigation pane and then select or deselect the option to “Show libraries.” The trick with it is to right-click the mouse pointer at the very top of the navigation pane, just above where the first entry is and just before the File Explorer’s address bar. If you were to try it anywhere else, like on one of the entries or at the top of all entries, then it won’t work.

The navigation pane that File Explorer has is always the main access point for libraries when you are using them. Some people who are struggling to get used to using libraries are choosing to disable them entirely from the registry, but there’s no need to go to those kinds of extremities if you can avoid it. Using one of the three options above is the easier method, and all three come with no downside in comparison to venturing into the Registry Editor.
You might also be interested in:
- How To Disable “Set Up OneDrive” Popup In Windows 10
- How to Show/Hide Pop-Up Description for Folders and Desktop Items in Windows 10
- How to Show Encrypted or Compressed NTFS Files in Color in Windows 10
- How to Change Storage Save Locations in Windows 10
You can subscribe to our RSS, follow us on Twitter or like our Facebook page to keep on consuming more tech.