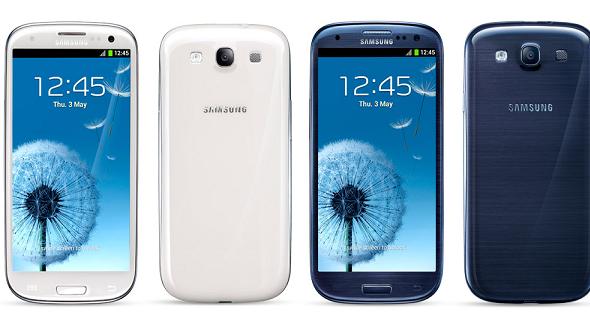
Over the weekend, I wrote on how the Note 2 was receiving the VLUDNF1, but I ran out of time to cover the S3. Yes, the Samsung Galaxy S3 is also updating in Canada to a later version of Android 4.4.2 KitKat namely VLUFNE6. It is rolling out to all of the same carriers and covering the Black Edition handsets that were rarer, but also cooler than the standard edition that came stock.
The S3 was made famous for its original TouchWiz UX UI that started off with Android 4.0.4 Ice Cream Sandwich. From there it saw Android 4.1.1 Jelly Bean, 4.1.2 and 4.3. In many respects, it is lucky to be seeing the latter stages of KitKat like we see here today even though Android 4.5 L is just around the corner, and we are starting to see Android 4.4.4 KitKat coming to many handsets as we speak. If we go back to the inception of the year, it was no certainty that the S3 will have KitKat at all and as the months went past rumors suggested that it wouldn’t. While there is no agreement on whether the forthcoming installments, don’t be surprised if it doesn’t get in on the Android L that many are assuming will be called Lollipop. There will come a point when it stops being supported as they want you to update the handset instead.
This update is still fresh, so if you don’t want to update manually, it’s OK to wait it out for the OTA. Everyone expects to find an announcement coming in alerting them that it is ready for installation. If you want to check that manually instead there’s always the option of tapping Settings > More > About device > Software updates > Check for software on the display, and it will ping back the results. If it isn’t there yet don’t stress and think, it isn’t coming because they can take weeks before the reach everybody. That is the main reason that Samsung and the phone carriers release this file so that people can skip the waiting period that usually applies as it rolls out one by one to everyone. Of course, there are other reasons involved too such as people who customize their devices with a custom ROM will no longer see any notification coming in because it can’t communicate like it usually would. The verdict is still out on whether Android does this on purpose as a way of deterring people from installing a custom ROM or if it just one of the things that hackers can’t help because there is no way around it.
During this guide, we will be using the Odin application, and it needs a Windows PC to work. The Sammy developers did not release this tool for Mac OS X or Linux. Some smart developers out of XDA did come up with a means that flashes file on the other operating systems mentioned, but it’s unknown if this still works. Nonetheless, it isn’t going to use Odin if you do find it works, and we only give the guides for that app. If you want to research some more, do a quick Google search on how to flash the firmware using the other OS, and the thread should present itself nicely for you.
Backup photos, video, call logs, SMS text, MMS text and more to the internal storage or external SD card if you prefer to use that instead. There is 32 GB of built-in space on offer to back up the data and a further 64 GB available via the microSD, microSDHC or microSDXC card option. The slot is mount is there for it. All you must do is go out and buy the card itself. If those options didn’t tickle your fancy take a look at Google Drive because it offers another 15 GB of space to store photos, documents and other data free of charge. Users can access even more space, but it will come at a cost. If space isn’t your issue and you just find it difficult to back up, try using an app from the Google Play Store such as helium. If you have root access already then, you will prefer Titanium.
The battery inside this smartphone is 2100 mAh and gives 22 hours of talk time and 34 days of standby time. That is a reasonable amount of time, but as we all know as these battery’s age, they tend to lose their longevity. We all know each device varies so only the individual owner will be able to accurately estimate how much battery they need in order to assure themselves of it not turning off during the guide. That is the critical point to make here because we don’t want it to switch off. It’s my estimation to say save yourself over 55% battery power, and you should be OK. For most humanities, it won’t be a predicament because the Samsung Galaxy S3 Black Edition comes with USB charging. That feature means that when plugged into the PC system unit via the USB cable out of the box it will start charging the battery like it would use a real phone charger. If you ever can’t find or misplace your phone charger then just use the USB cable and plug it into the computer or laptop, and it works a treat. However, for some people, this won’t be working and in that case, make sure you have adequate power left by looking at the battery icon on the status bar on the display when on so you can see it.
Don’t start unless you have USB Debugging enabled by visiting the Develop Options menu from the Settings app. Also make sure you have up to date Samsung USB Drivers, download it from this link here.
How to Install I747MVLUFNE6 Android 4.4.2 KitKat on Samsung Galaxy S3 Black Edition
1. Download the Download the I747MVLUFNE6 firmware for Bell Mobile, Rogers, Fido, TELUS, SaskTel or Kodoo Mobile depending on the company you are subscribed to.
2. Download Odin 3.09 if you don’t have to store on your C: Drive already.
– you can do that this time if you wish or you can save it to the desktop and delete it after you finish. That will stop any unnecessary desktop clutter that results in slower loading times on start-up.
3. Open the Odin app, so it is working on the screen and leave it open for now until we come back to it in a moment.
– the reason I like to open it early is so that when we plug the smartphone in it will pick it up and see it.
4. Boot the smartphone in Download Mode.
– press and hold Volume Down + Power + the Home button all at the same time to achieve this
– Don’t let go until you see the Android logo appear
5. Plug the smartphone into the PC using the USB cable and look in Odin
– Odin will show the ID: COM port changing color
– A message saying added will appear on the screen
If none of the above worked try downloading the USB drivers that you likely skipped over during the prerequisites
6. Click the AP button in the program on the screen from the PC monitor
7. Upload the I747MVLUFNE6 tar.md5 file and wait until you can see the file extension before continuing.
8. Leave the default settings as they are
– You will see Auto reboot check
– You will see F Reset Time check
– The Re-partition box should have nothing inside
9. Click the start button and the flashing will commence.
10. Wait until it finishes before touching anything.
11. Look for a pass message on the screen of the PC monitor before shutting down the application.
12. Move the mouse down to the system tray, and click on the safely remove hardware icon. Put a stop to the USB Mass Storage device and unplug when it says it is safe.
– The image can look different depending on what version of Microsoft Windows you are using. If it is XP it shows a green arrow, Vista shows a green tick.
That’s it.