Google has been working on implementing native Chrome notifications for the Windows 10 operating system for a while now. Those notifications have now officially become available for people to see.
The Google Chrome notifications—which can include inline replies, progress bars, images, lists, and more—that you can see appear close to where your Action Center is, and don’t look too dissimilar to traditional push notification that you get after accepting them from websites, only they do appear to look much more native to the Windows environment.
The new Google Chrome notifications are bundled as part of the “flags” experience and can be found from the chrome://flags page. Some of these flag experiences can come enabled or disabled. Chrome’s native notifications are at this stage disabled by default. That could change in future, but for now it means you’ll need to head to the flags page using the guide below to enable them. They’re just as easy to disable from the flags page also, which we will also demonstrate in the guide below.
Chrome’s Windows 10 Notifications Means They’ll Use Focus Assist
You might remember one of the original features to come with Windows 10 was Quiet Hours—a setting that let you tweak the hours that the computer would be allowed to send you notifications; should a notification arrive outside of those hours then it would be a silent notification. Quiet Hours was later rebranded as Focus Assist.
Anyone who uses Focus Assist should be welcoming the inclusion of native Chrome notifications because it means they’ll flow through the same Windows settings and abide by those same Focus Assist rules that you’ve set.
Here’s what you need to enable or disable the native Google Chrome notifications that are now available for all versions of the Windows 10 operating system.
How to Enable or Disable Native Google Chrome Notifications in Windows 10
1. Open the Google Chrome web browser (if you can’t find it, just type “Chrome” into Cortana search) and then copy and past the following text into the address bar at the top of the browser window and hit the “Enter” key: chrome://flags/#enable-native-notifications
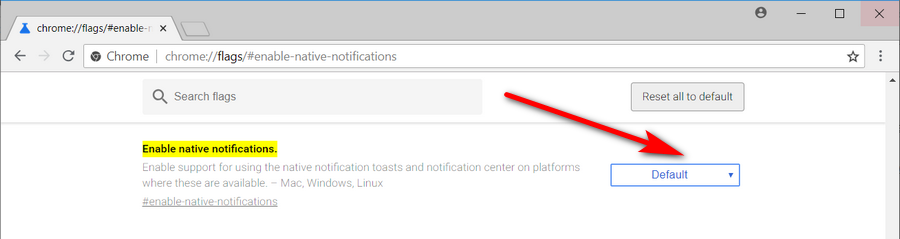
2. Wait for the Chrome browser to now load the flags page and point you to the relevant setting for the native notifications.
3, You’ll see that native Google Chrome notifications are currently on their default setting, which at this time means disabled.

4. To enable it, click on the “Default” button to bring up the menu with more options available on it.
5. Select the “Enabled” option so it is now showing on the button.
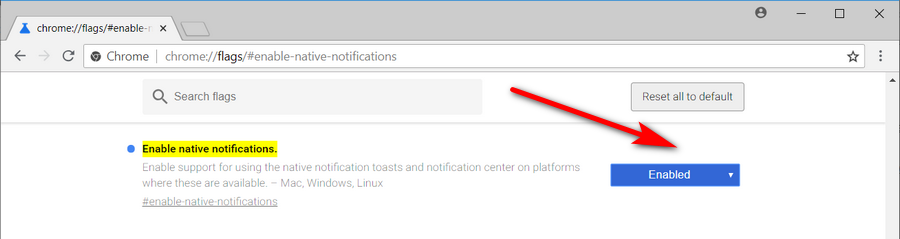
6. Head to the bottom of the same window and click on the “Relaunch Now” button.

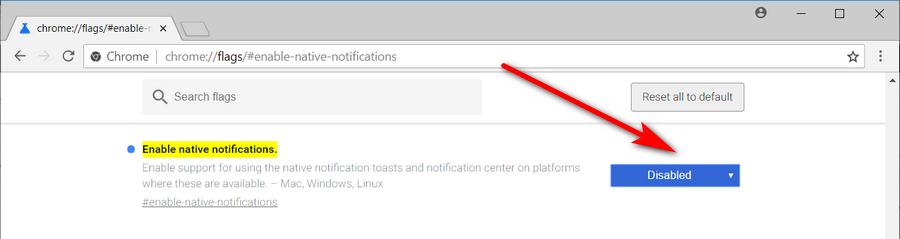
1. You’ll now have the native Google Chrome notifications working. If you ever want to disable it again, you can do it one of two ways. Both require you to open Chrome and type: chrome://flags/#enable-native-notifications into the browser address bar and hit “Enter” again.
2. Change where it shows the “Enabled” button for native notifications to “Disabled” if you never want to receive the notifications.
Alternatively, you can select the “Default” button which means it will always have it set to what the Windows operating system would choose for it to be on depending on what version of the operating system you’re running. As mentioned, as it currently stands, Windows has it disabled so that would mean it would have it as disabled also.
That’s it.
Related Tutorials
- Import Favorites from Microsoft Edge to Chrome in Windows 10
- How to Make Google Chrome Faster in Windows 10
- How to Set Google Chrome as Default Browser in Windows 10
- How to Disable Hardware Acceleration in Windows 10 Photos App
- How to Manage Audio Focus Across Tabs in Google Chrome
- How to Enable Rich Search Suggestions in Google Chrome
- How to Disable Not Secure Badge for HTTP Web Sites in Google Chrome
- How to Enable Picture-in-Picture Mode in Google Chrome