Microsoft Edge is a new web browser developed by Microsoft. It is the default web browser available in Windows 10. Internet Explorer is still made available in Windows 10, but it is advised to start using Edge as soon as you feel comfortable with it because IE is no longer being developed and therefore isn’t as good. Internet Explorer will eventually become less secure than the Edge browser since it is Edge that continually receives updates.
One of the new features you get with Microsoft Edge starting from Windows 10 version 17704 is the chance to disable autoplay for media. Some people may find it annoying when they open webpages, and they automatically start playing videos. This new setting now gives you the chance to enable and disable media autoplay in Edge as you see fit.
The following tutorial demonstrates how to enable and disable the media autoplay in Microsoft Edge when you’re using a version of the Windows 10 operating system starting from version 17704.
Method One: How to Control Audio and Video Playing Automatically in Microsoft Edge in Windows 10
Since Microsoft Edge is the default browser in Windows 10 and owned by Microsoft, you don’t have to worry about what version of Edge is running on your computer. All you need to do is make sure you’re running on at least Windows 10 version 1809, and this feature will be available from Edge’s settings. Here’s where you can find it:
Note: You need to be running on at least Windows 10 build 17704 to find this option available.
1. Open the Microsoft Edge web browser by clicking on the Edge icon in the taskbar.
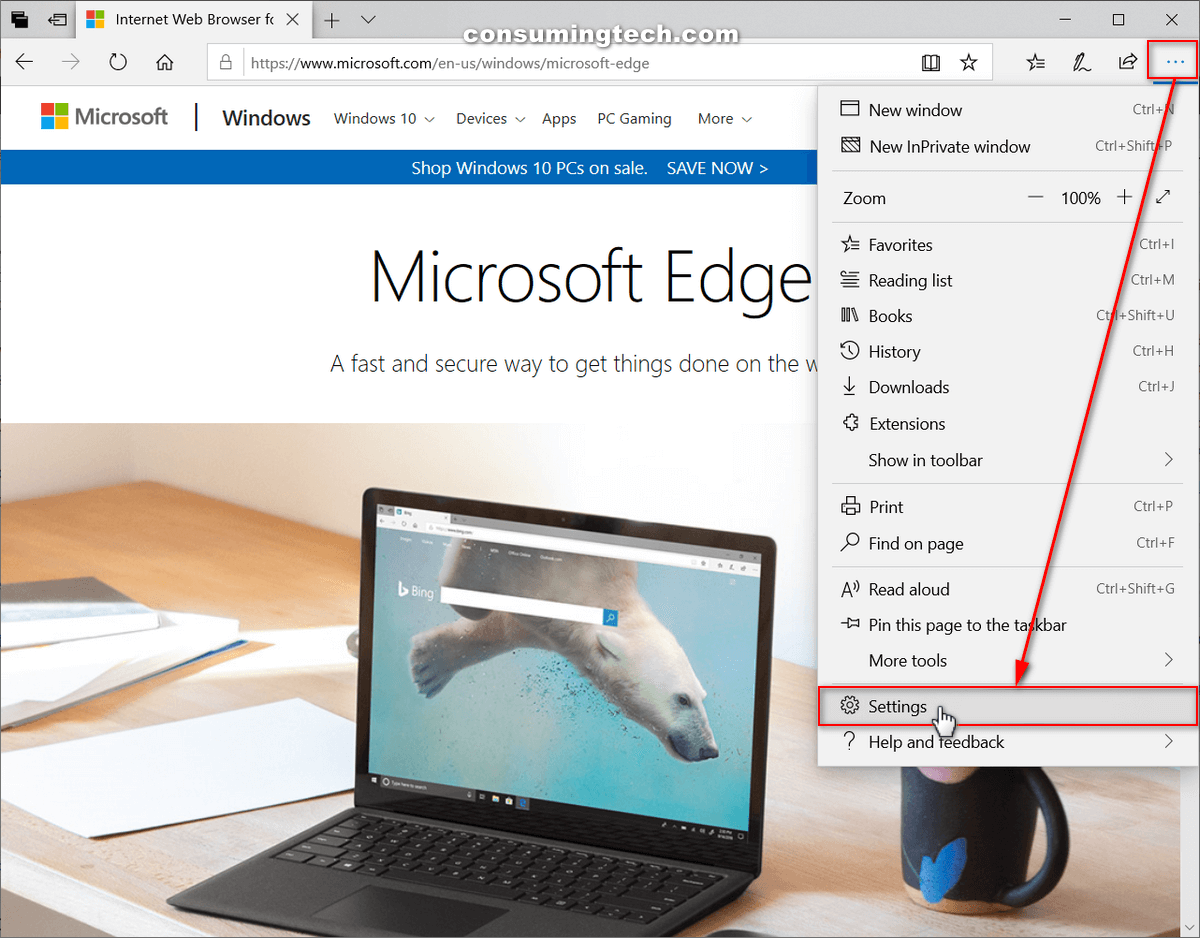
2. Click on the Settings and more button in the top right corner of the browser window, and then click on the Settings link at the bottom of the menu. (click to enlarge screenshot below)
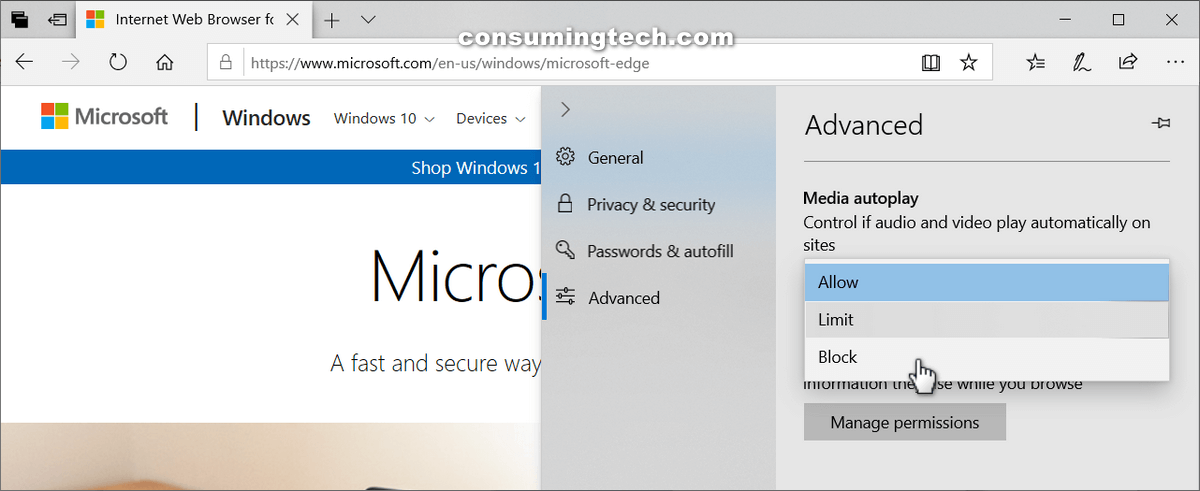
3. Click on Advanced and then under the Media autoplay heading click on the drop-down menu and select either Allow, Limit, or Block. (click to enlarge screenshot below)

4. Select either Allow, Limit, or Block from the menu. (click to enlarge screenshot below)
You can now close the Microsoft Edge settings and continue using your web browser if you like.
Method Two: How to Control Video and Audio Playing Permissions for Individual Sites in Microsoft Edge
If you don’t want to set media autoplay settings as universal across all websites, you can also set AutoPlay settings on a per-site basis. Here is how you can do that:
Note: You need to be running on at least Windows 10 build 17713 to find this option available.
1. Open the Microsoft Edge web browser by clicking on the Edge icon in the taskbar.
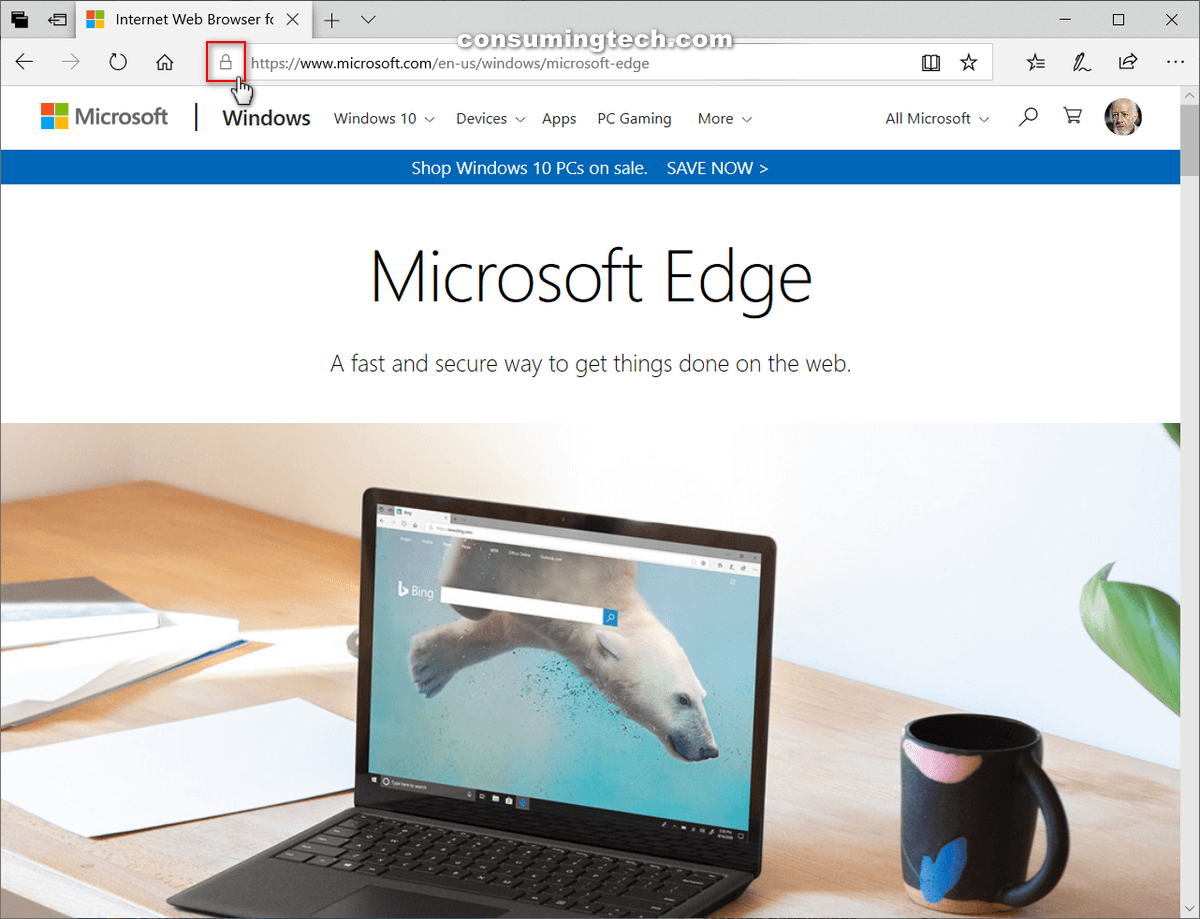
2. Click on the Show site information icon. (click to enlarge screenshot below)
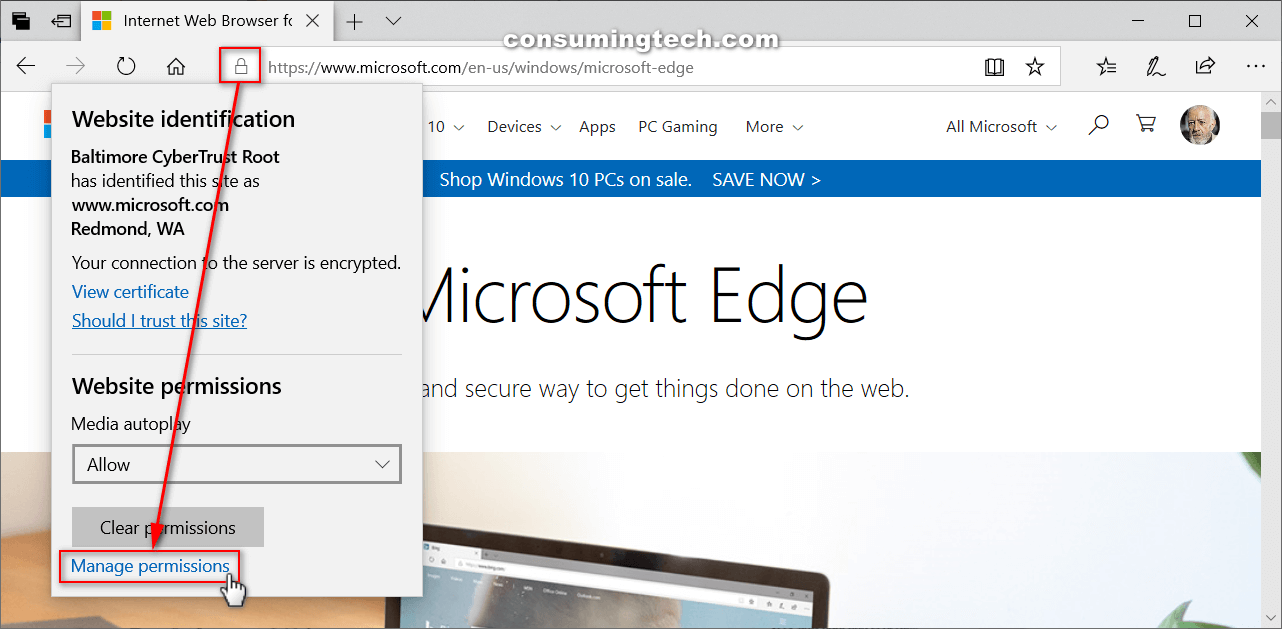
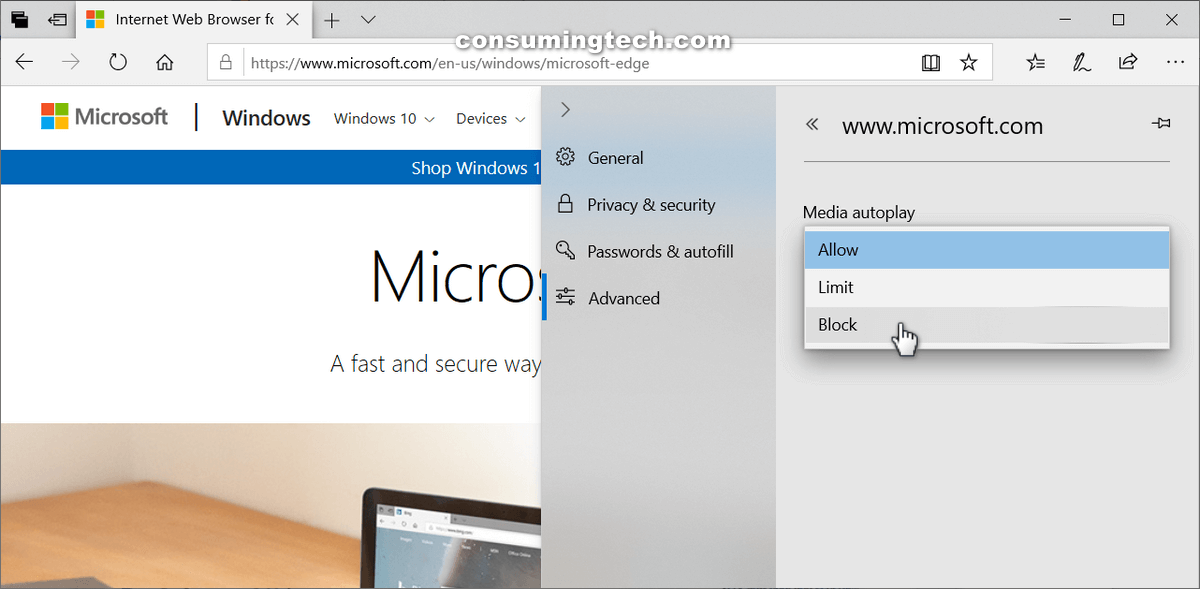
3. Under the Website permissions heading, click on the drop-down menu to choose the Media autoplay settings by selecting either Allow, Limit, or Block. (click to enlarge screenshot below)

OR
4. Under the Website permissions heading, click on the Manage permissions link. (click to enlarge screenshot below)
5. Select the website you want to manage the permissions for. (click to enlarge screenshot below)

6. Select either Allow, Limit, or Block from the menu. (click to enlarge screenshot below)
You can now close the Microsoft Edge settings and continue using your web browser if you like.
That’s all.