Google Chrome is now ten years old. Google has marked this anniversary with a huge release called Chrome 69. It’s been a while since we’ve seen a Chrome release with as many features as this.
The one that everyone notices first is the new material design, or what people commonly refer to as the feature that makes the new Chrome now look rounded—from the curved address bar all the way down to the rounded favicons that appear on the front page as suggests for webpages that you might want to load based on past experiences, known as shortcuts. You can also create custom shortcuts so the favicons for websites that you see are based on what you want to see rather than Google picking them based on what it knows is your most visited sites.
Chrome 69 comes with some other cool features, such as the chance to select custom picture backgrounds for new tab pages so you don’t have to just look at the same old basic Chrome white background. This is a feature that isn’t enabled by default because it requires you to add the pictures that you want to see for the custom backgrounds, but it is there for when you want it. There are other useful features, such as the built-in password manager that can autogenerate new password for websites and save them so you don’t have to re-enter them, too. The Chrome password manager isn’t new, neither is the option to save passwords, but automatically generating new passwords is usually functionality reserved for the websites that you’re using and not something that a browser could control. You’ll still find more goodies jampacked inside as well, like the revamped Omnibox that shows details when you start typing, a built-in ad blocker for blocking selected ads from sites that Google deems to be unnecessarily hindering people’s user-experience online, Ease of Access now available on mobile, a simpler padlock for SSL that no longer feels the need to let you know if a site is secure or insecure in writing, plus quite a few other features as well.
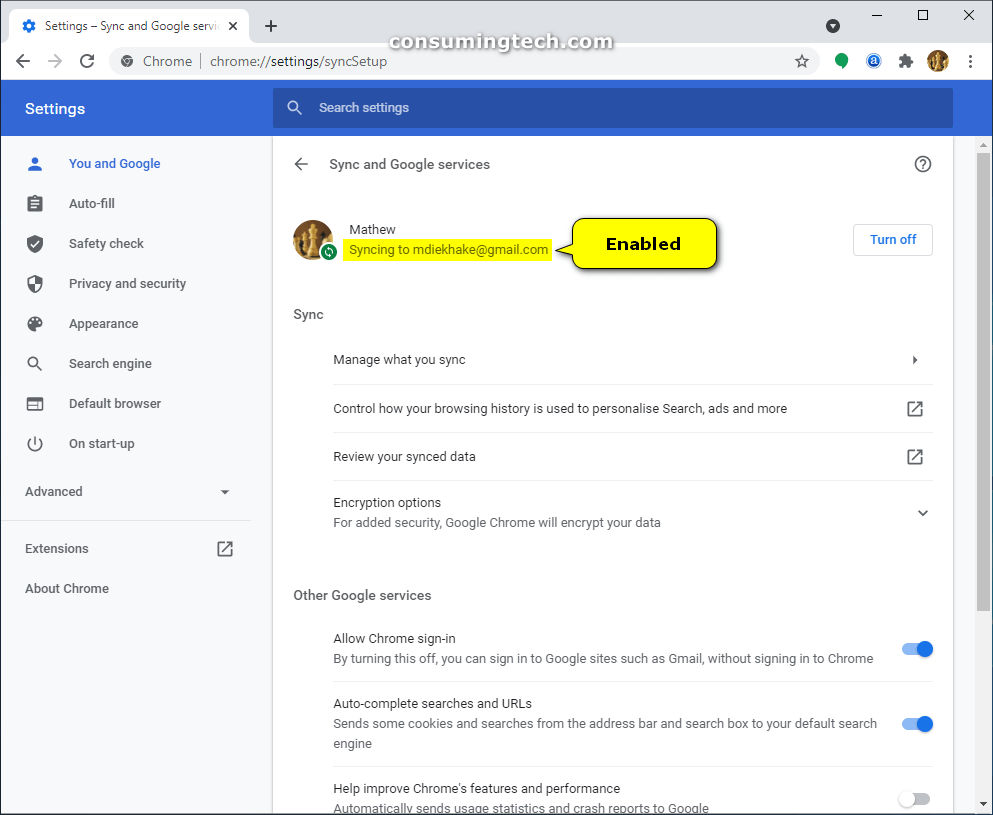
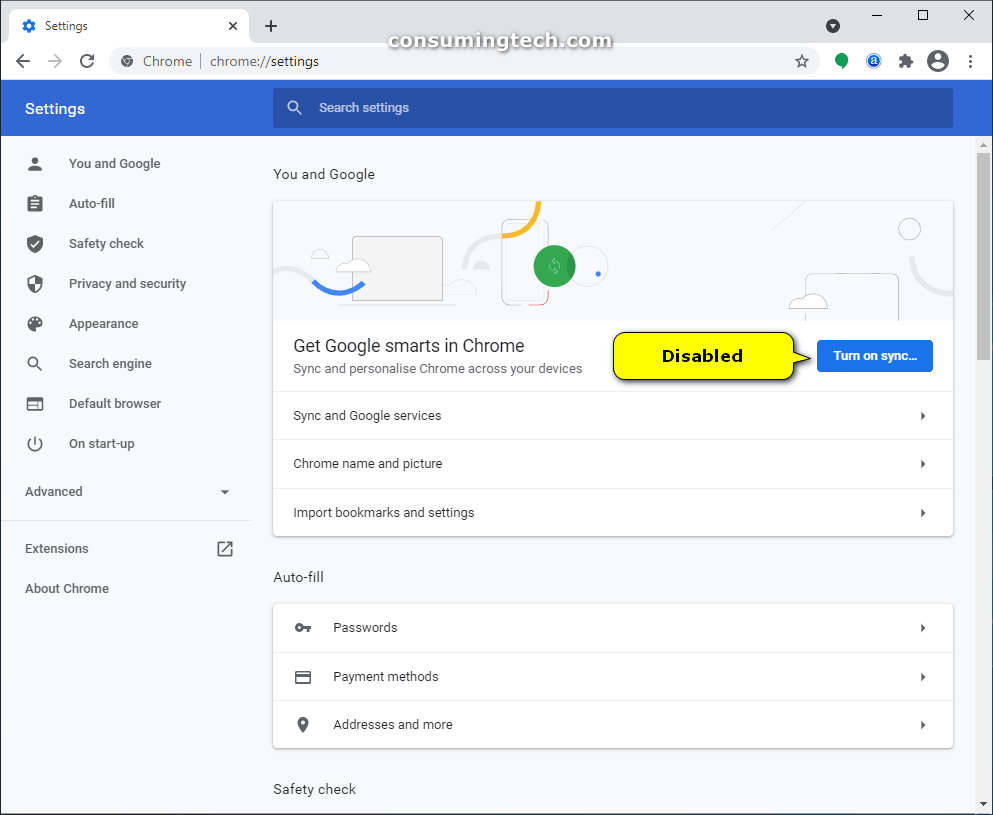
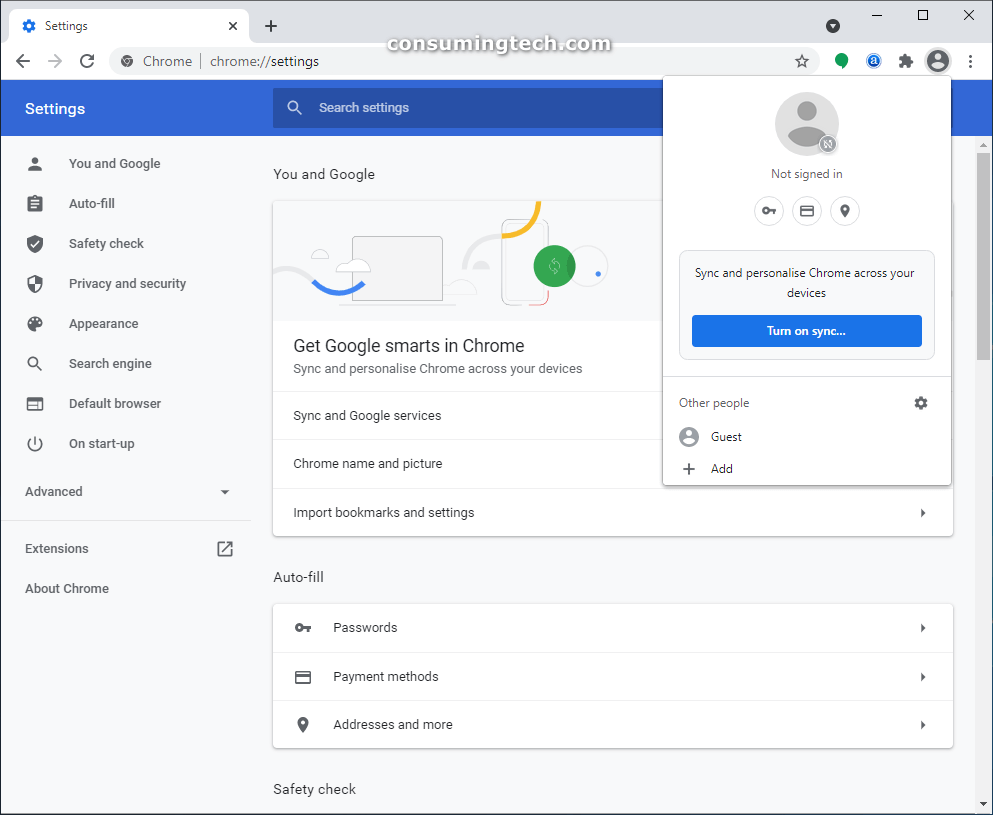
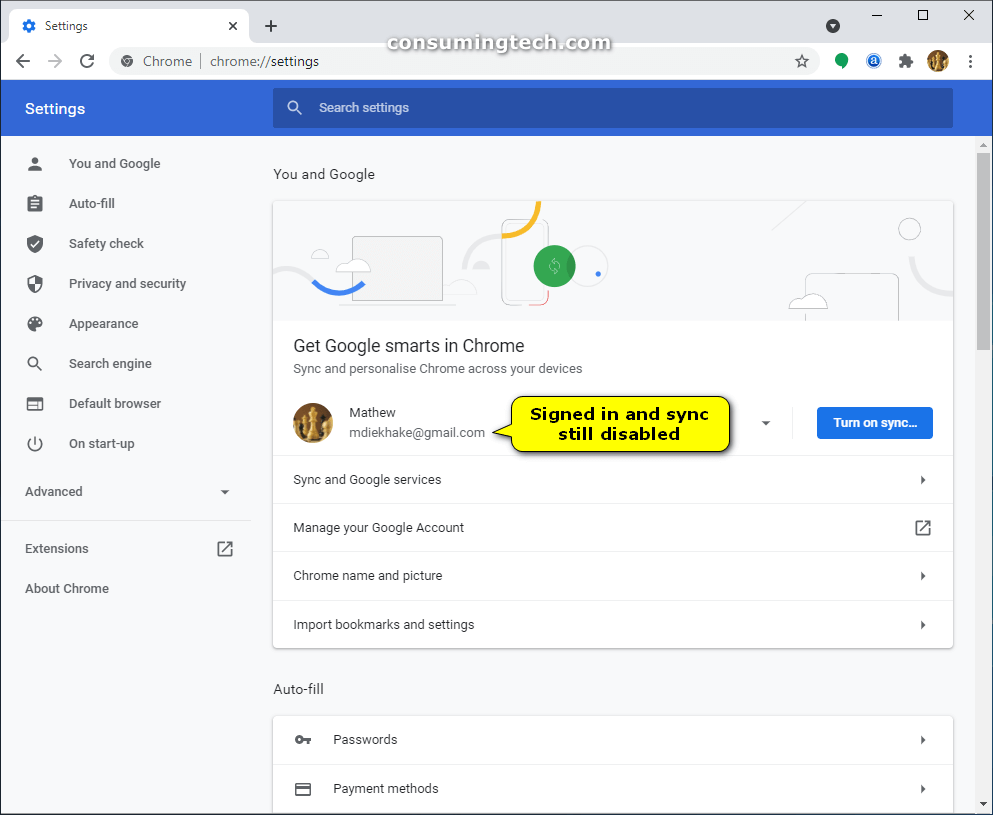
Google Chrome allows you to save your information to your Google account by turning on its sync feature. Likewise, you can also turn off syncing so Google doesn’t share your information between devices. While the way in which you achieve this is a little confusing, you can also still sign in to Google and have sync turned off. You can check the following screenshots to see how syncing when signed in and out works.
An example of sync in Google Chrome being enabled and disabled

How to Enable/Disable Sync in Google Chrome in Windows 10 via Registry Editor
1. Open the Registry Editor application. This article demonstrates all the different ways in which you can open the Registry Editor app in Windows 10: How to Open and Use Registry Editor in Windows 10
2. Navigate to the following path in the Registry Editor’s left side pane:
HKEY_LOCAL_MACHINE\SOFTWARE\Policies\Google\Chrome
3. From the right side of the expanded Chrome window, create a new 32-Bit DWORD value and call it SyncDisabled.
4. Double-click to open the new DWORD and type 0 to enable or 1 to disable in the available field, and then click OK to save the new value.
You can now close the Registry Editor app. You may need to restart Windows for the changes to take effect.
How to Enable/Disable Sync in Google Chrome in Windows with Registration Entry
You can download one of the following registration entries to automatically enable or disable sync in Google Chrome for all users. When you download these files, it modifies the DWORD value in the registry which you can locate at the following path: HKEY_LOCAL_MACHINE\SOFTWARE\Policies\Google\Chrome
1. To Enable Sync in Google Chrome for All Users
a. Download the registration entry below to download it to your computer.
b. Click on the registration file to merge it after it has finished downloading in your browser.
c. If prompted by User Account Control, click on the Yes button to accept the merge of the registration file.
d. Close and reopen the browser window to save the changes.
2. To Disable Sync in Google Chrome for All Users
a. Download the registration entry below to download it to your computer.
b. Click on the registration file to merge it after it has finished downloading in your browser.
c. If prompted by User Account Control, click on the Yes button to accept the merge of the registration file.
d. Close and reopen the browser window to save the changes.
That’s all.
(This article was last updated on November 29, 2020.)
Related Tutorials
- How to Turn On/Off Potentially Unwanted App Protection in Microsoft Edge
- How to Choose What Pages Shown from Windows Settings App in Windows 10
- How to Mute and Unmute Tabs Without Right-click in Google Chrome
- How to Remove Sticky Banner Ads Firefox Shows by Default Called Ad Snippets
- How to Pin Email Folder or Full Email Account to Start Menu in Windows 10
- How to Load Blank Page as New Tab Page and Prevent Web Content Loading in Microsoft Edge in Windows 10
- How to Preload Start and New Tab Pages in Microsoft Edge Every Time You Sign in to Windows and Close Microsoft Edge
- How to Change Mail App’s Default Font for Sending Emails in Windows 10
- How to Change Theme in Google Chrome
- How to Show Cortana Web Search Results in Microsoft Edge or Internet Explorer
- How to Enable/Disable Microsoft Edge Pre-launching in Windows 10
- How to Control Audio and Video Playing Automatically in Microsoft Edge in Windows 10
- How to Choose What New Tabs Show by Default in Microsoft Edge in Windows 10