The KingRoot one-click rooting tool can get root privileges on the Android operating system to just about any Android software version. The only difference is that the KingRoot team constantly need to update the files so that they work with the newer versions of Android.
KingRoot is a one-click rooting tool which means you don’t flash it from a custom recovery image like you would something else such as Chainfire’s SuperSU. Instead, you install the APK file directly on the mobile device and open the application, or you download the version that is made for Windows PCs and connect your device to the computer and run the program on the computer. Both methods involve nothing more than you clicking one button with the program open and then the only thing you need to do is sit back and wait for the tool to give your device the root access it needs for you to use the root applications.
There is no difference between using the KingRoot one-click rooting tool and SuperSU when it comes to the number of applications that you can run. The same several thousand root apps can always run, no matter what way you chose to become the root user over the Android operating system.
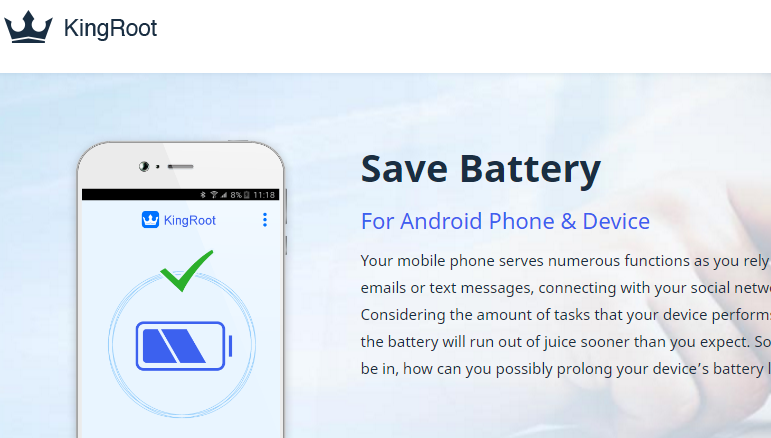
Even though many tools can make you the root user of Android and there are thousands of apps you can technically install, the same main reasons are almost always there for everyone. Most people get root access to Android so they can make the battery last longer, increase the speed of the operating system, remove the stock applications known as bloatware, use better backup tools, customize the OS and remove ads from web browsers. All of those same things are available to you after you use the KingRoot tool, regardless of if you use the Windows PC version or the APK file.
Download KingRoot Android 7.0 APK For Windows PC Installation
Open up the official KingRoot website and then click on the large blue button that says “Download for Windows” to download the version of the rooting tool that is made for your Windows computer.

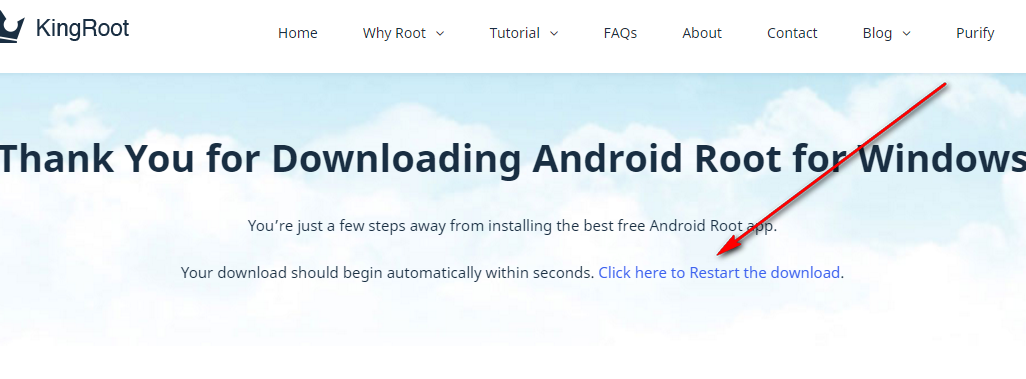
You should see your file downloading above the taskbar in a matter of seconds. If that does not happen for you, then you need to click on the blue link that says “click here to Restart the download.” (Note that you will only see the KingRoot file downloading above the taskbar if you have the browser open. If you minimize the web browser, then the file does not appear above the taskbar even though the taskbar is still on the screen. That’s because it is the browser that is helping download the file.)
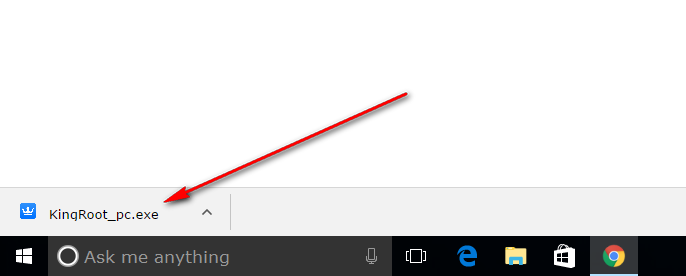
Click on the KingRoot executable file once the download completes. You can tell the download is completed because it is no longer showing you the amount of time elapsing on the file and it just shows you the file name instead.
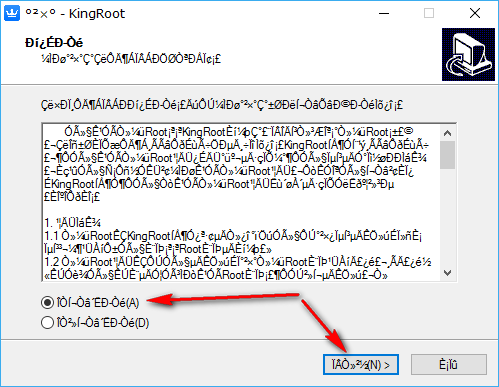
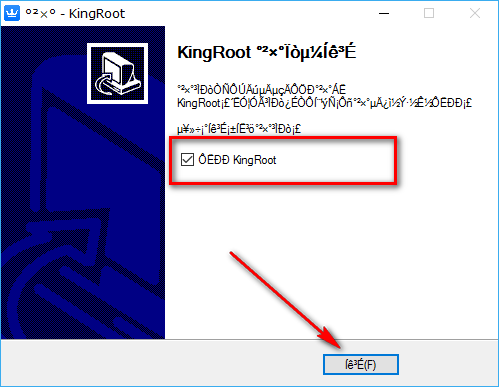
The first page you get is the terms and conditions. By default, it is set to not accept them, so you need to change the settings to accept them by moving the checkmark from the bottom box to the top box.
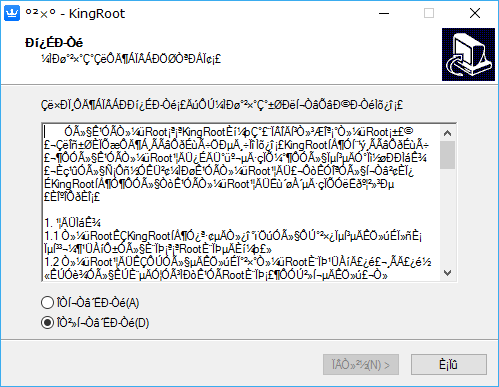
Once you have changed the checkmark to be in the top box as pictured below, click on the button to the left-hand side to continue. (The button to the far right is the “Exit” button that closes the program.)
Keep the checkmark in this box if you want to have a desktop icon created for the KingRoot tool. By setting up the desktop icon for the program, you will see the icon on the desktop each time you turn on the computer. The idea behind the desktop icon is to give you an easy way to get access to the rooting tool because sometimes people have a hard time trying to find it when navigating the operating system.
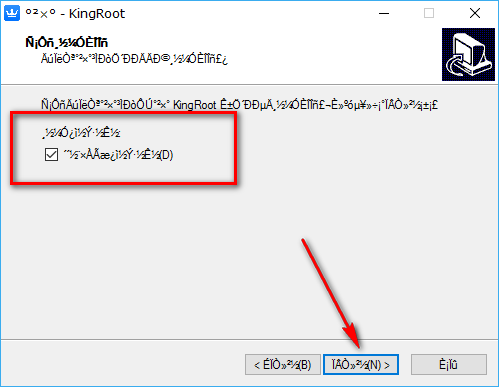
Click on the middle button from the following screen to proceed to the next steps. (The button on the left allows you to go back to the previous screen and the button on the far right exits the setup wizard.)
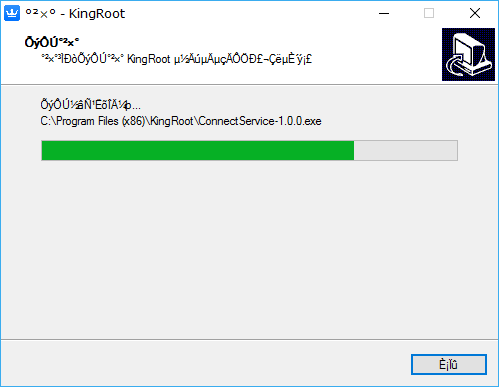
Once you have clicked on that middle button, the KingRoot application is being installed on the computer.
Wait for the progress bar to reach the other side of the screen. When it does, you get another screen showing up.
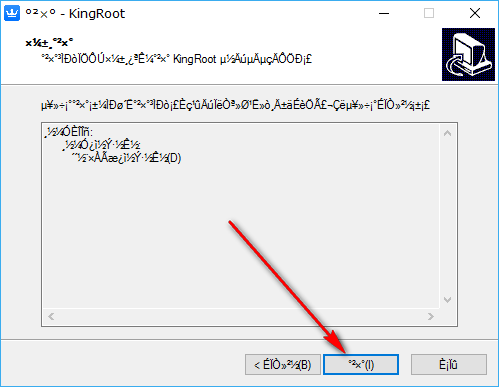
Leave the box checked if you want to launch the KingRoot tool once you exit the setup wizard. Conversely, uncheck it if you don’t want it opening. Anyone who plans on using the rooting tool right way will want it to open.
Once you have made your choice, click on the button at the bottom of the computer’s screen to exit the setup.
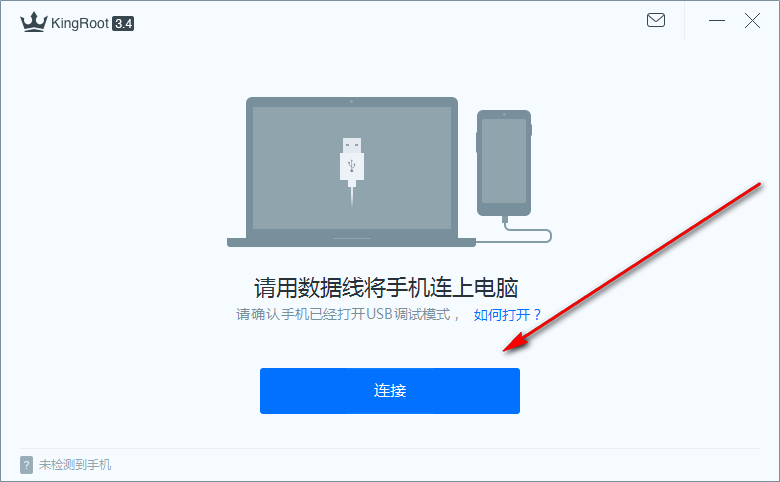
Now that the KingRoot tool is open on the computer connect the smartphone or tablet that you wanted to get rooted to the computer with the USB cable. Make sure that you have the USB Debugging Mode enabled from its Settings on the Android operating system or else you cannot use the tool.
When you have that done, click on the large blue button to check if your device can be rooted with the KingRoot one-click rooting tool made for Windows PCs. If the answer is no, you get a message letting you know that it could not work. The devices that can get rooted will automatically begin the rooting process. You know the rooting process is completed when you see a big green tick on the programs display.
Your Android device is now rooted by using the KingRoot tool for Windows PCs.
October 14, 2018 @ 05:16
sir my micromax c1, phone is not rooting it shows rooting process is fail and i tried for so many times but it is not working so please give me some solution to root my phone .
October 14, 2018 @ 18:38
Hello Rohit,
It sounds like the KingRoot tool isn’t currently compatible with your device.
You can try other one-click rooting tools such as KingoRoot.
Otherwise, you might want to look into installing a custom recovery image such as TWRP recovery and then flashing SuperSU from the custom recovery.