Most people who are into Android have heard about this thing called rooting the Android operating system. Some people choose to avoid it because they don’t have any confidence in being able to get root access without creating problems or even bricking the device, so they need to buy another one.
Thankfully today rooting the Android operating system is a lot less risky. Things become next to risk-free when you choose to get root access with a one-click rooting tool such as KingRoot. The KingRoot one-click rooting tool can be installed directly on the mobile device as an APK file, or it can be downloaded and installed on a Windows-based computer, and then you can connect your device to the computer and try rooting it from there. If things work out, then the rooting tool lets you know that your device can be rooted using the program. If it can’t, then it just lets you know that there is nothing it can do for your device and then you close down the program and uninstall it. There is not going to be any bricking when you try to find out whether to not the KingRoot tool can root your device.
You won’t get a custom ROM installed without having a custom recovery image installed first, but there are loads of things that you can do to your Android operating system after you have gotten root access by using the KingRoot tool. Some of the main things include being able to give your device a speed boost, remove the bloatware, save the battery life, use better backup applications, remove advertisements from your web browser experience and tweak the UI with things like Xposed Framework.
If you want to increase the sped performance of the device, then you can install the Purify application. Made by the same people who produced the KingRoot rooting tool, Purify offers an easy way to speed up Android once you have finished getting root access with the KingRoot tool.
Download KingRoot Android 4.4.3 APK For Windows PC Installation
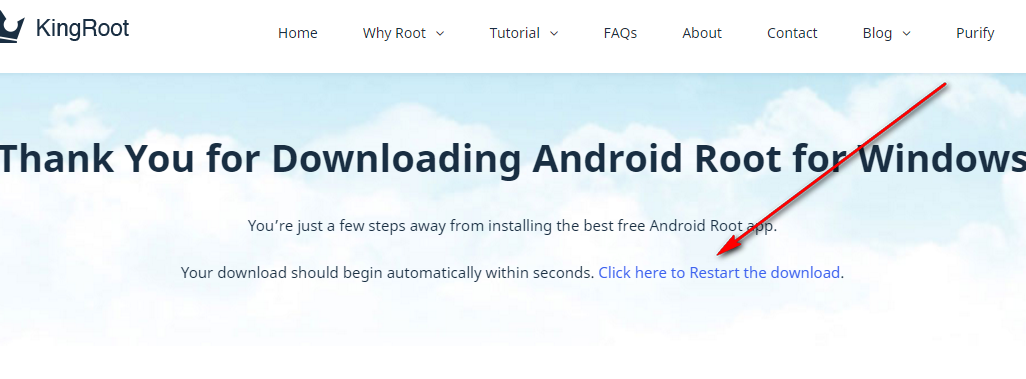
Head to the KingRoot website and then click on the large blue button from the download page that says “Download for Windows” to get the file downloaded onto your computer.

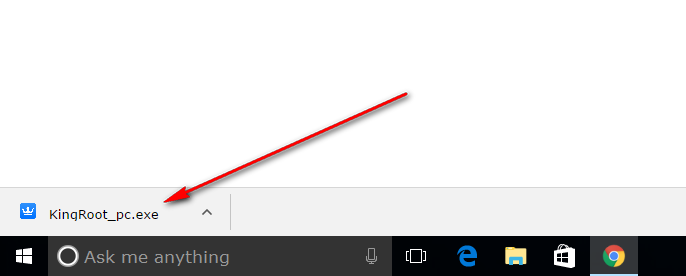
The KingRoot file should automatically begin downloading directly above the taskbar where you always see your files downloading. If you do not see it there, it might have gotten stuck. If that happens, then wait for the KingRoot page to begin to display an alternate link that you can choose. The link you want to look for says “Click here to Restart the download” and then the file will definitely download the second time around.
Now everything should see the KingRoot file downloading above the taskbar just like it shows in the screenshot below.
Once you have clicked on the KingRoot file, you then get the beginning of the setup wizard. You’ll notice the button you need to click to continue is currently grayed out at the bottom of the screen.
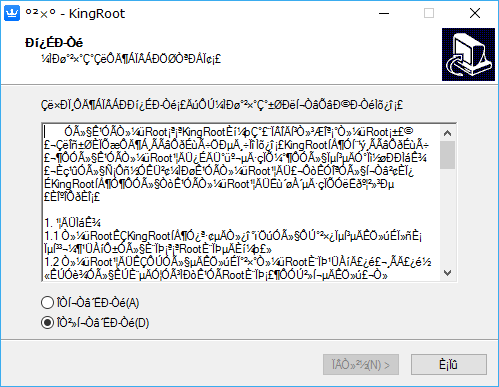
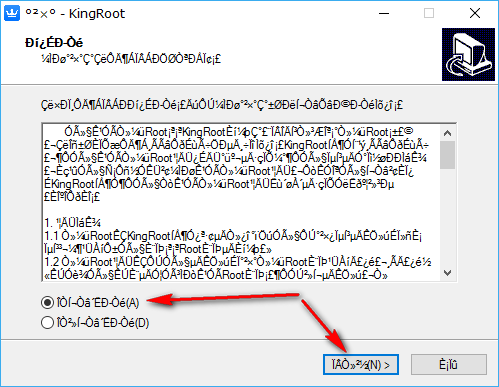
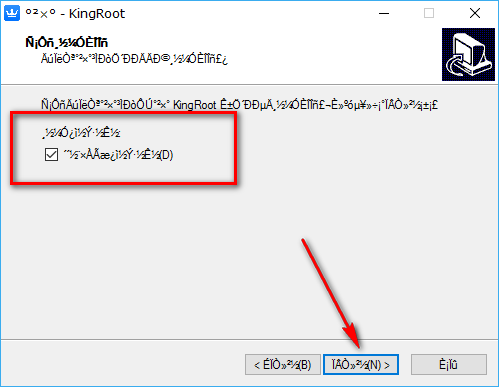
That’s because you need to swap the checkmark that is in the bottom box to the top box and then you can click on the button to continue.
By changing the checkmark, all you are doing is agreeing to the terms and conditions of the KingRoot tool.
The next screen shows you another checkmark in a checkbox. This checkbox is there to give you the chance to choose whether or not you want to have a KingRoot desktop icon available on the computer, so the KingRoot tool is readily available each time you turn on the computer. It doesn’t matter too much for most people because after they root their devices with the KingRoot tool, they usually delete it from the computer. As long as you know how to delete the tool from the Downloads folder and delete the desktop icon (by right-clicking on it), then you shouldn’t mind creating the desktop icon now so you can use the tool easily when you are ready.
Click on the middle button once you have decided if you want the KingRoot desktop icon to continue with the setup wizard.
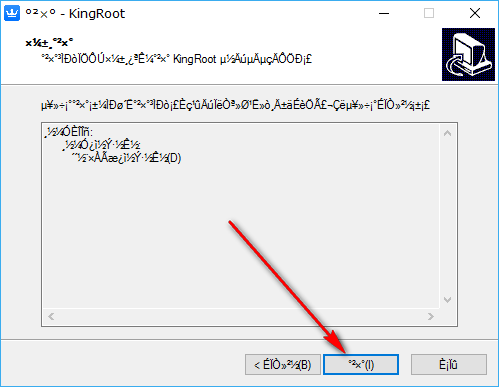
No one I know is quite sure about what this next screen says, but you need to click on the middle button to continue. It used to be the part where it gave you the option of clicking on the “Browse” button so you could choose where your file ends up on the computer. That option is now gone, and it might be telling you where about’s on the computer the file will be stored. There’s also a chance that the Browse button comes back in a future version of the tool when you follow this guide. If that’s the case, then you can swap it from the default Downloads folder to something different.
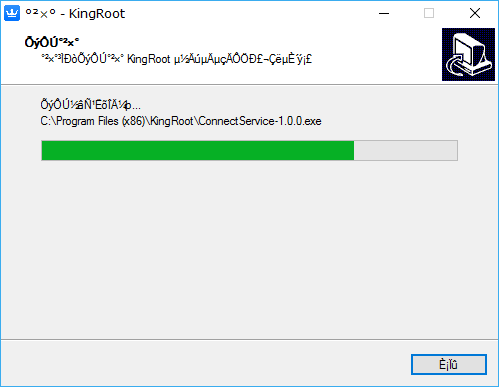
In just a few moments, the KingRoot tool will be installed on the computer. All you need to do is wait for the green progress bar to make its way to the other side of the screen and then wait for the screen to change automatically and bring up the exit screen.
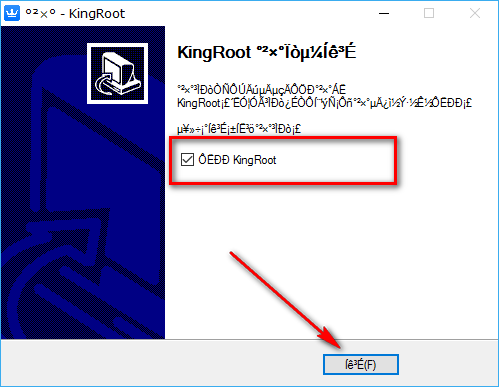
When you get to the exit screen of the setup wizard, you get one last checkmark in a box. This checkbox is there to give you the option of running the KingRoot tool as soon as the installation wizard closes.
If you aren’t using the KingRoot tool now and you opted not to create the desktop shortcut, then you need to navigate to the Start button > File Explorer > This PC and then click on the “Downloads” folder to find your KingRoot executable program file. Clicking on it from there will open up the tool so you can use it.
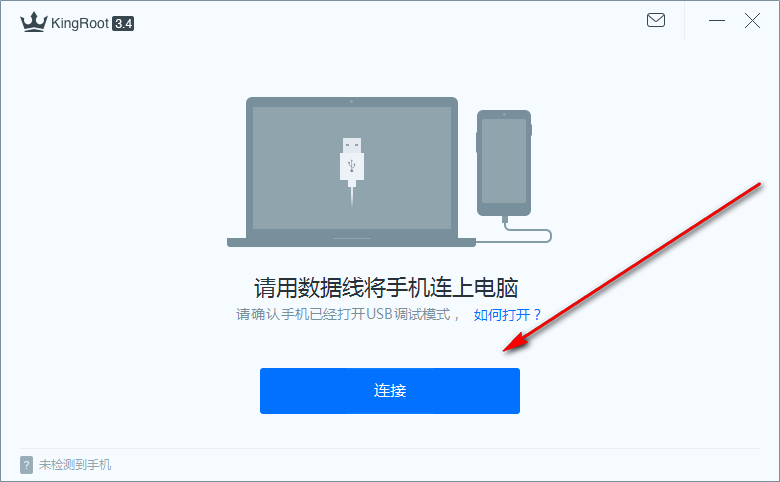
Once you do open up the KingRoot tool, using it is relatively straightforward. All you need to do is make sure that your Android device has the USB Debugging Mode already enabled on it and then connect it to the computer with the USB cable.
As long as you have the USB Debugging turned on, you can then click on the big blue button from the KingRoot user interface, and the tool will then do everything in its power to find a working rooting method. If it does find a working rooting method, it doesn’t notify you of this. It just begins to root your device, and it will let you know when it is finished by showing you a large green tick on the computer’s display.
Those who aren’t so lucky will get a message letting them know that KingRoot could not find a working rooting method at this time.
That’s all you need to root your device that is running on a version of the Android 4.4.3 KitKat software update. You can now start checking out what root applications are available for you to install on your device. It doesn’t matter what rooting method you use to get root access over the Android operating system, they all give you the same opportunity to run the same amount of root apps. So, KingRoot lets you run the Viper4Android, ROM Manager, Flashify, Link2SD, Greenify and all of the other root apps that you might know about.
Understanding what can be done with root access can be tricky business for a beginner because they aren’t able to browse the Google Play Store and see what apps are popular for the root apps. Google hosts heaps of the root apps on the same Google Play Store, but it doesn’t showcase any apps that cannot be run without having root access. Thus, the only way to find out the names of the root apps is by knowing them already before you begin using the Google Play Store.
Furthermore, sometimes you can find root apps that are used by many people but aren’t on the Google Play Store. Just because a root app isn’t on the Google Play Store does not mean that it is a bad application or will harm your device. It just means that Google took a particular stance against that app because they might have thought it was not in their best interest to display it. The Viper4Android app is one of the most popular root apps that is not available from the Google Play Store, for example.