The Windows SmartScreen filter is still a relatively new feature for the Windows environment. The idea behind it being to make your computer more secure by not allowing applications and programs that it suspects might be malware to run on your operating system.
Windows SmartScreen was first introduced back in Windows 7 and would add an extra layer of protection over the old Internet Explorer web browser. It was integrated into Internet Explorer 8 and 9 as a successor to the Phishing filter that was available in Internet Explorer 7.
The way SmartScreen works is actually petty impressive: when enabled, it will send the data attached to the applications that you install back to the Windows servers on Microsoft’s end. Microsoft keeps a list of harmful files and if it comes up a match, the SmartScreen will prevent it from running on your computer.
Most people are pretty happy up until this point, but where it begins to become an annoyance for some is when Microsoft doesn’t have any data on the file. Instead of assuming it is safe, Microsoft assumes the file to be dangerous and thus if you ever have a file that you know you want to install but Microsoft doesn’t have any data on it, Windows will not let it run. Those are the times when you want to go looking for a way around the SmartScreen.
This guide needs to be split into two parts because the Windows 10 Creators Update made some changes to the way users must disable SmartScreen. So part of the guide is suitable for anyone running an update before the Creators Update—even if you’re running an older edition of Windows such as Windows 7—while everyone else will need to follow the part for after the Creators Update.
How to Disable Windows SmartScreen in Windows 10
1. To disable the SmartScreen, you first need to open the Windows Security Center. You can do this directly from your system tray in the taskbar. Look for the small arrow in the bottom right corner of your screen. Once clicked you’ll see a shield icon, which is your Security Center.
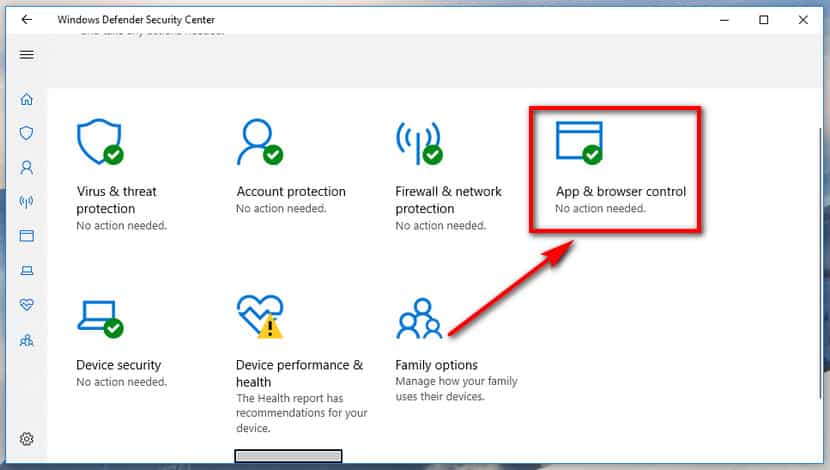
2. From the main Windows Security Center page, click on the “Apps and browser control” button.
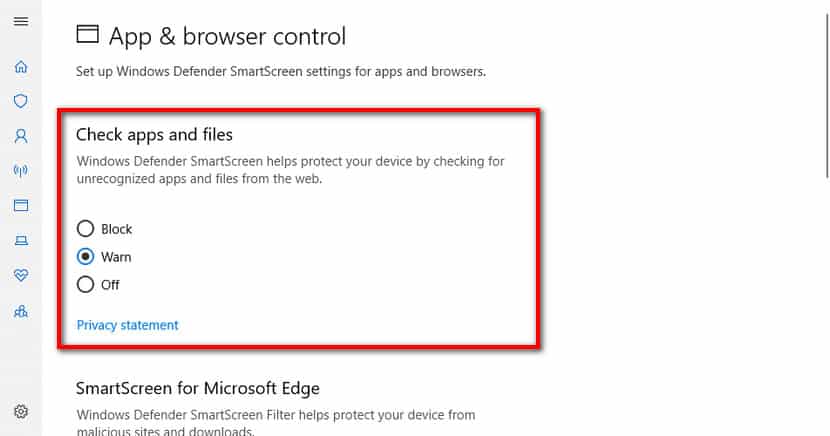
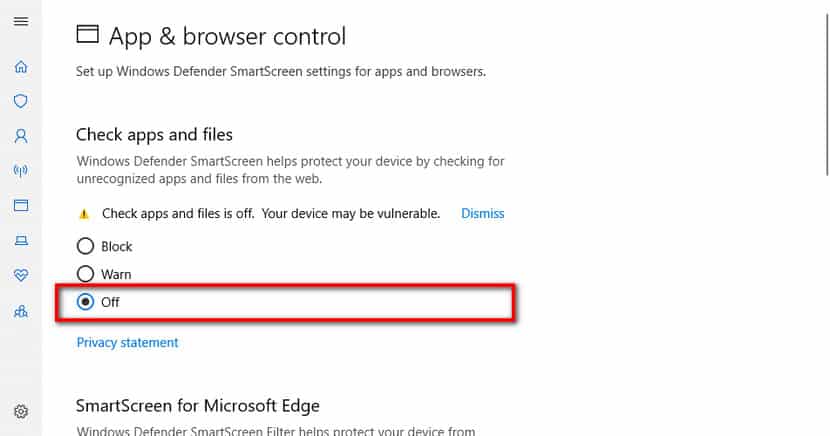
3. You’ll now see the Check apps and files heading, and assuming you haven’t yet changed it from its default, will be set to show a warning. To disable the SmartScreen for the apps and files, change this to the “Off” position.
4. Once you’ve turned it off, you’ll see a warning message letting you know that the device may be vulnerable. Read our article instruction to make sure you understand the implications to this and what exactly it means.
5. Scrolling down the same page a bit further will also give you the chance to turn off the SmartScreen for the Microsoft Edge web browser if you like.

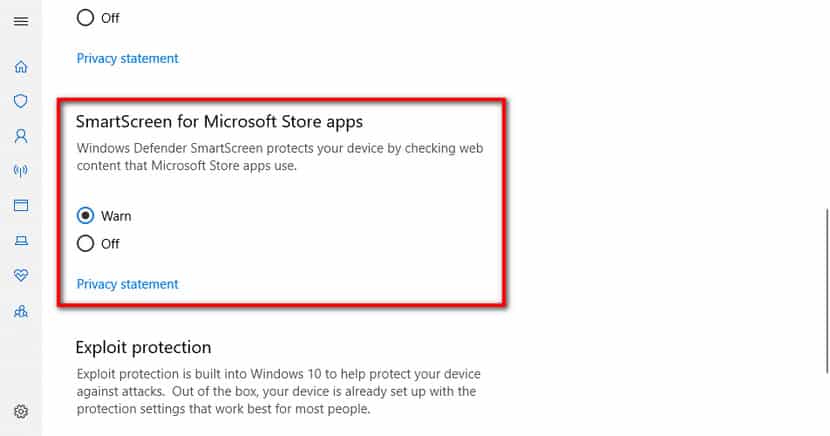
6. Scrolling down further again will give you the option to disable the SmartScreen for the Store applications. This is similar to the original apps and files option, but will always allow applications from the Microsoft Store if you’ve got it off.
7. Switching off the Windows SmartScreen with all three options above will disable it as much as possible.
Related Tutorials
- Disable Cortana in Microsoft Edge in Windows 10
- How to Disable Telemetry and Data Collection in Windows 10
- How to Turn Off Windows 10 S Mode
- How to Turn Off and Disable UAC in Windows 10
- Microsoft Says No More Unexpected Update Reboots Starting from 2019
- Add or Remove People Icon from Taskbar in Windows 10
- How to Enable Windows Photo Viewer in Windows 10