All versions of the Windows operating system come with services. These services differ from other applications and programs in the sense that you can’t actually open and use any type of user interface and they’re always just running in the background. One thing a service does have in common with an app or program, however, is that it can also be set up so that it automatically starts once the operating system is booted up.
You can at any time check what services are currently running on the computer just like you can see what apps and programs are being used; however, the way in which you do it is different.
Since you don’t get the chance to open services like you would apps or programs, they also have a different reason for existing. A service is there to provide core operating system features such as handling any event logging that will be done periodically, adding extra layers of security with the Windows Firewall service and handling any error reporting that is done with the Windows error reporting service.
The following tutorial demonstrates how to delete a service from a version of Windows 7, Windows 8, and Windows 10 operating systems.
How to Delete a Service in Windows 7, Windows 8, and Windows 10
To Delete a Service from Command Prompt
You can delete a service from Windows 10 by using the Command Prompt. Here is how you can do that:
1. To get started, open the Run dialog by pressing the Windows logo key + R on your keyboard and then type Services.msc to find your list of services.
2. Scroll through the list of services until you see the one you want to be deleted, and then right-click on it and click on Properties from its context menu.

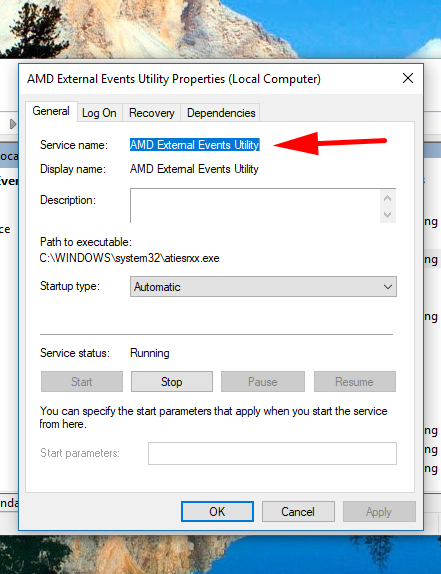
3. You’ll then have the Properties dialog open for that particular service—in my case, that’s the AMD External Utility Properties dialog. You can make sure you’ve opened the right one by reading the name at the top of the dialog box that’s open. Just beneath the tabs at the top of the dialog is the Service name and that’s the official name of the service without any other junk around it.
Copy that name because you’ll need to paste it into the command line exactly as is.
4. Now, using the Cortana search field, type CMD and then click on the Command Prompt desktop application so you now have the Command Prompt window open, ready for you to type commands. Type sc delete and then paste the name of the service that you copied from its dialog box in the steps above and make sure you put quote marks either side of the service name, just like in the example below.
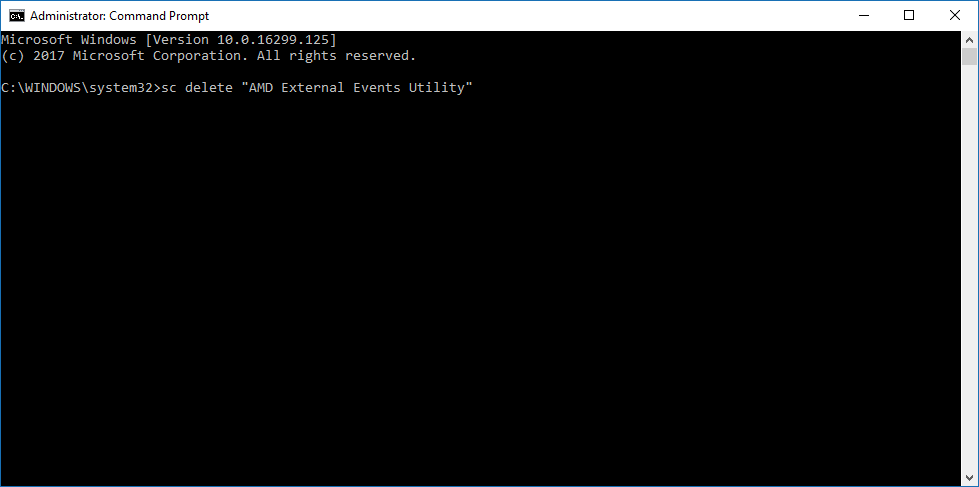
The service will now be deleted from the Windows 10 operating system you are using, and you can close the Command Prompt window.
To Delete a Service from Registry Editor
It’s also possible to use the Registry Editor for deleting a service from Windows 10 instead of the Command Prompt. Here’s how you can do that:
1. To do it this way, follow the same steps as above to find out the name of the service from within its dialog box, but then instead of opening the Command Prompt, open the Registry Editor. You can do that by opening the Run dialog (Win+R) and typing Regedit to get the Registry Editor open.
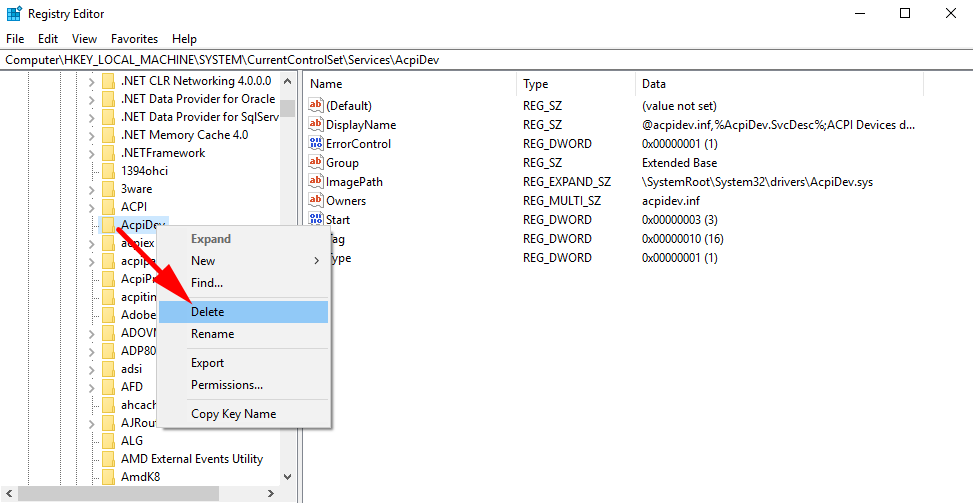
2. Now navigate to the HKEY_LOCAL_MACHINE\SYSTEM\CurrentControlSet\Services path by using the keys in the left side of the window. When you get there, you’ll then see all the services listed in the left side pane. Find the service you want to be deleted and then right-click on it and select the Delete option from the menu.
Processes have long been a part of the Windows operating system and it’s no different with Windows 10. Always make sure you do adequate research before deleting a process, so you aren’t deleting anything that your operating system needs.
That’s all.
This article was last updated on May 21, 2019.
Related Tutorials