For years Microsoft has offered a reasonably easy way for people to run more than one operating system. Since the birth of Windows 10, users have been able to turn on an optional feature from the settings called Hyper-V that allows you to run another operating system on your Windows 10 computer in a virtual machine environment.
This is useful for IT professionals, software developers, and just all around technology enthusiasts who don’t want to spend big on buying another computer purely for the sake of being able to use a second operating system. Most people still don’t use virtual machines very often because they go to take a look at it and see that it looks rather complicated, so they leave it alone. But Hyper-V is actually pretty easy to get the hang of and setting it up isn’t that hard either. It’s about as easy as it could ever be these days.
Up until now, Hyper-V was used to run older versions of Windows—say if you were running Windows 10 as your main operating system and wanted to go back and try some features on Windows 7 out of size. But now Microsoft has kindly added support for Linux—in particular, the ever so popular Ubuntu gets its own virtual machine with the Hyper-V Quick Create feature. This means anyone with Windows 10 can now setup Hyper-V and use Ubuntu as a secondary operating system on the same computer.
Note: You’ll want to have a computer with at least 16 GB of RAM to handle a virtual machine environment running on top of your existing operating system. It’s possible to use from 8 GB of RAM machines, but your RAM will almost max out in the process. If you were stretching the capabilities of your computer out while using the virtual machine, don’t forget to turn off Hyper-V again once you’re done, otherwise, even if you do close the virtual machine, it’ll still keep your RAM usage up. Monitor it from Task Manager to see how it’s going.
How to Create Ubuntu Virtual Machines with Hyper-V Quick Create
You can create a virtual machine running on Linux Ubuntu with the Hyper-V Quick Create feature.
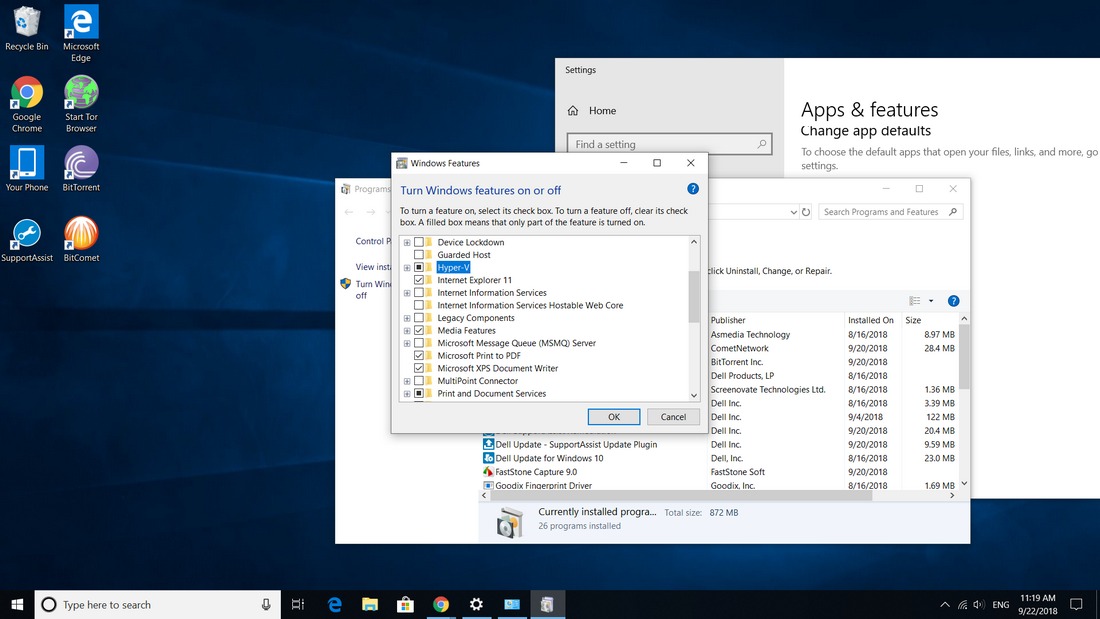
If you’re starting from fresh, you’ll first need to head to the optional features in Windows and turn on Hyper-V.
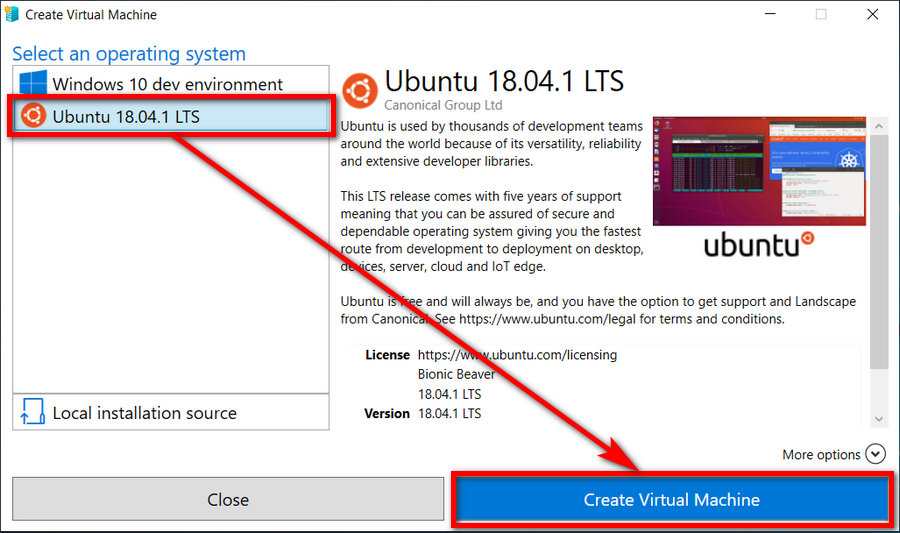
You’ll see the available operating systems to choose from in the left pane. Click on the “Ubuntu” OS and then click on the “Create Virtual Machine” button.
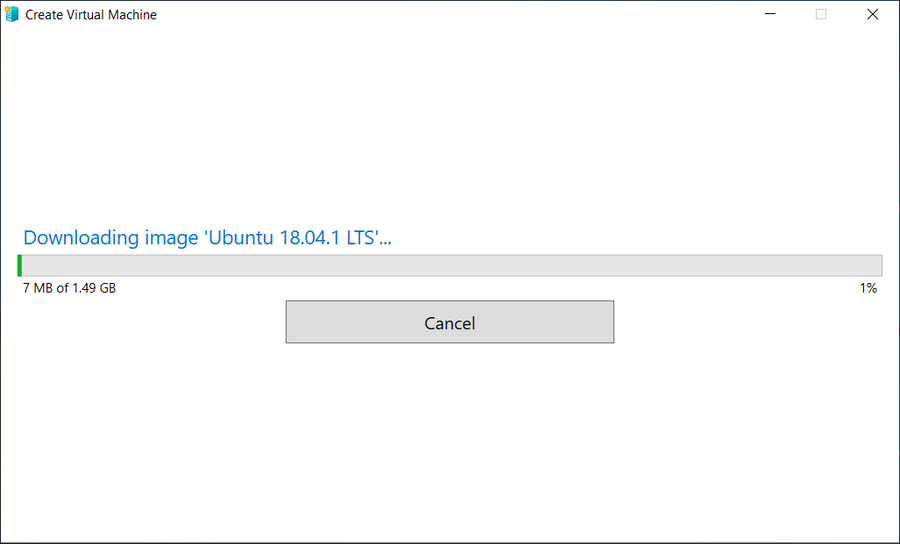
The pre-made virtual hard disk is downloaded onto your computer.
You can choose between editing the settings or connecting once it’s done. When you’re ready to use Ubuntu, click on the “Connect” button.

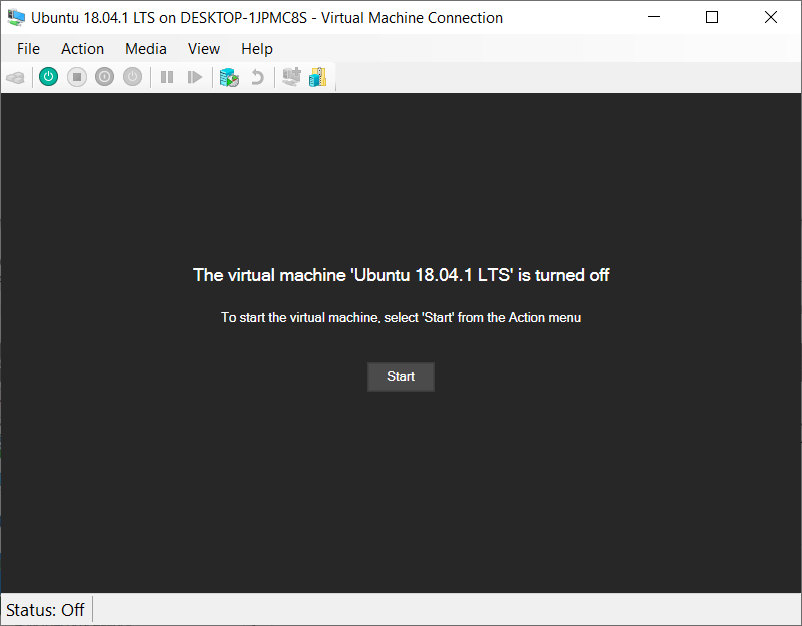
You’ll find the virtual machine is turned off when you go to use it for the first time. Click on the “Start” button.
How to Set Up Ubuntu
Now you’ll see the first signs of Ubuntu appearing in your virtual machine environment.
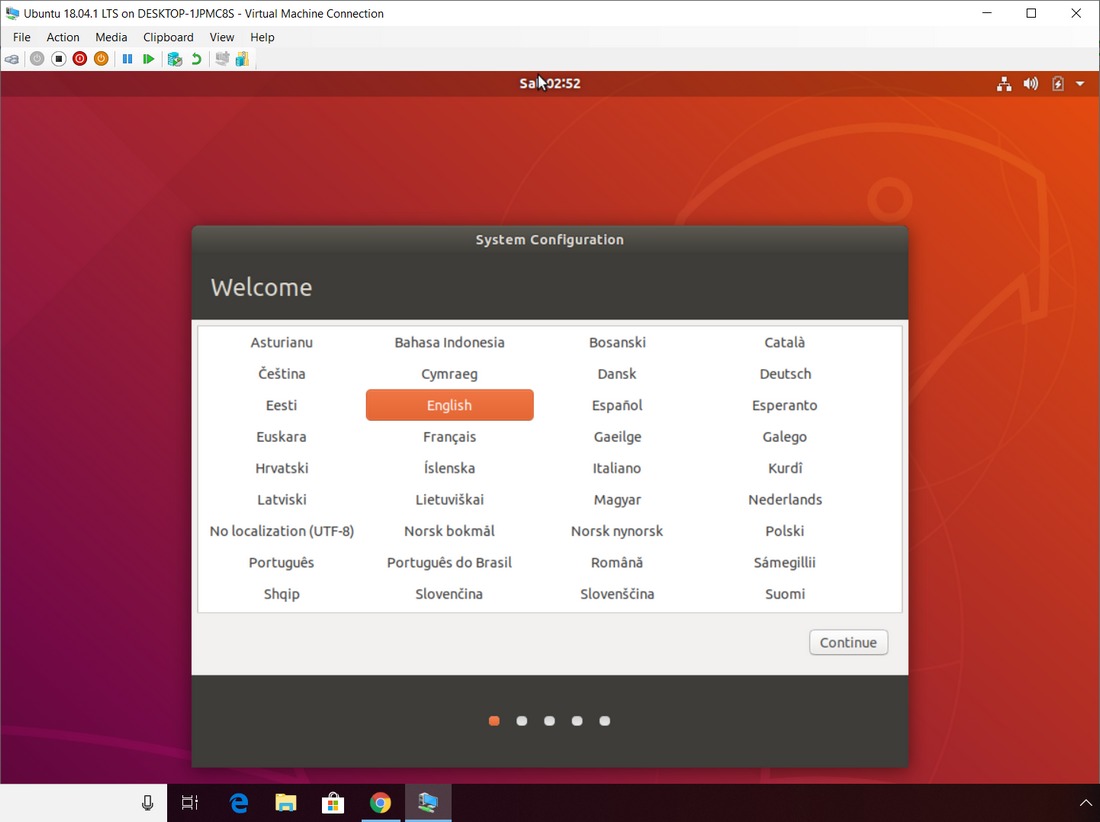
Choose your language from the menu and then click on the “Continue” button.
Choose your keyboard layout and then click on the “Continue” button.

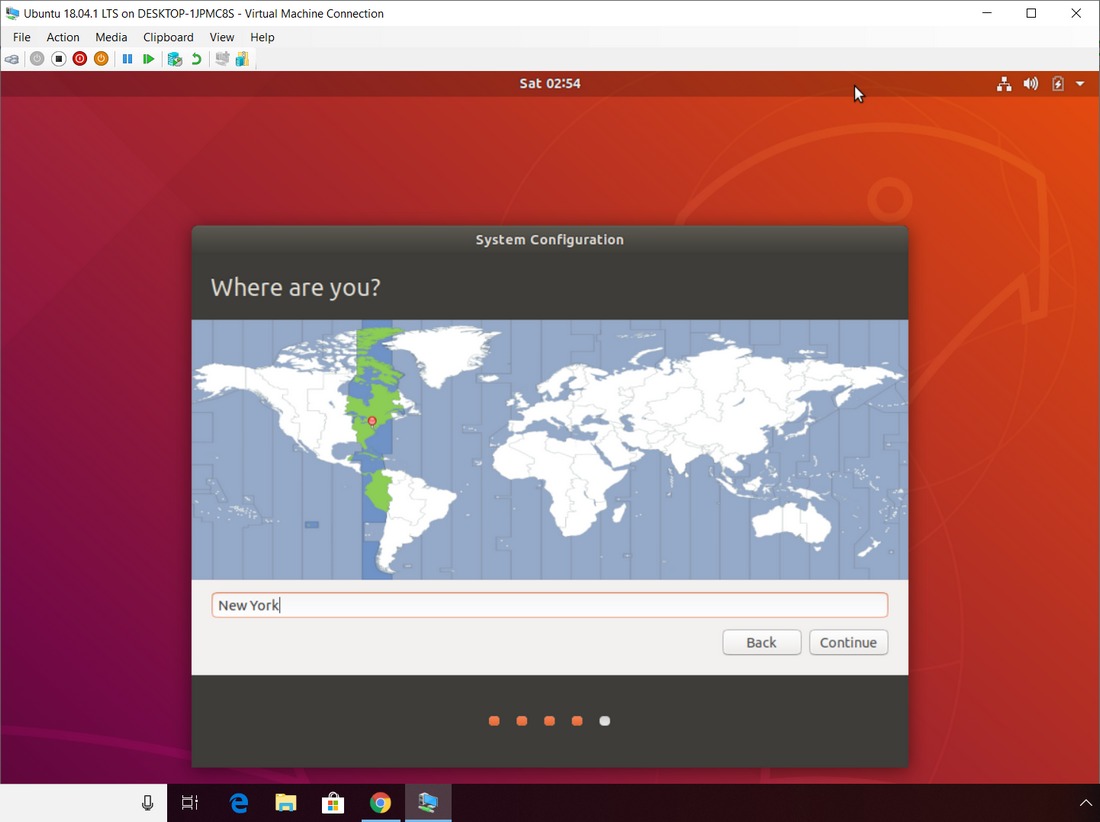
Next you’ll need to enter your location, which is for time zone purposes, and then click on the “Continue” button when you’re done.
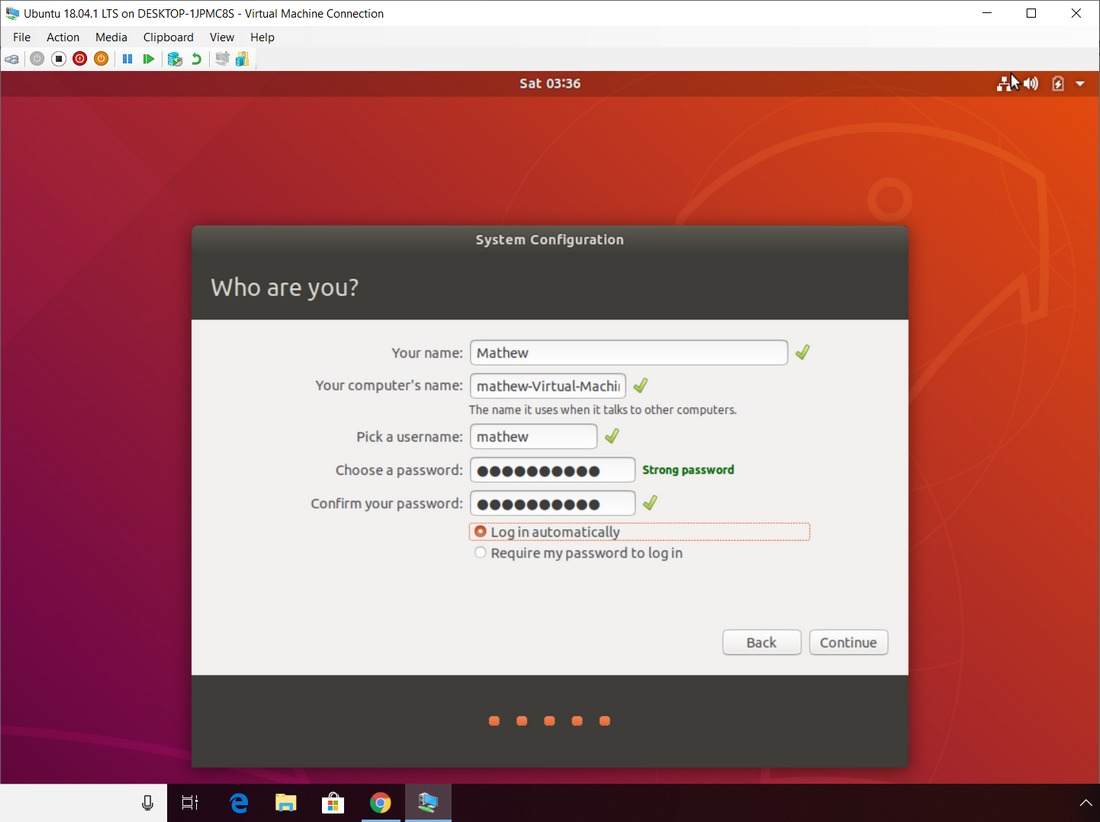
Enter your name and then it’ll fill out the rest of your details. (Note how it’s assigned you a lowercase letter for the beginning of your username. You’ll need to use that case sensitive username to log in.)
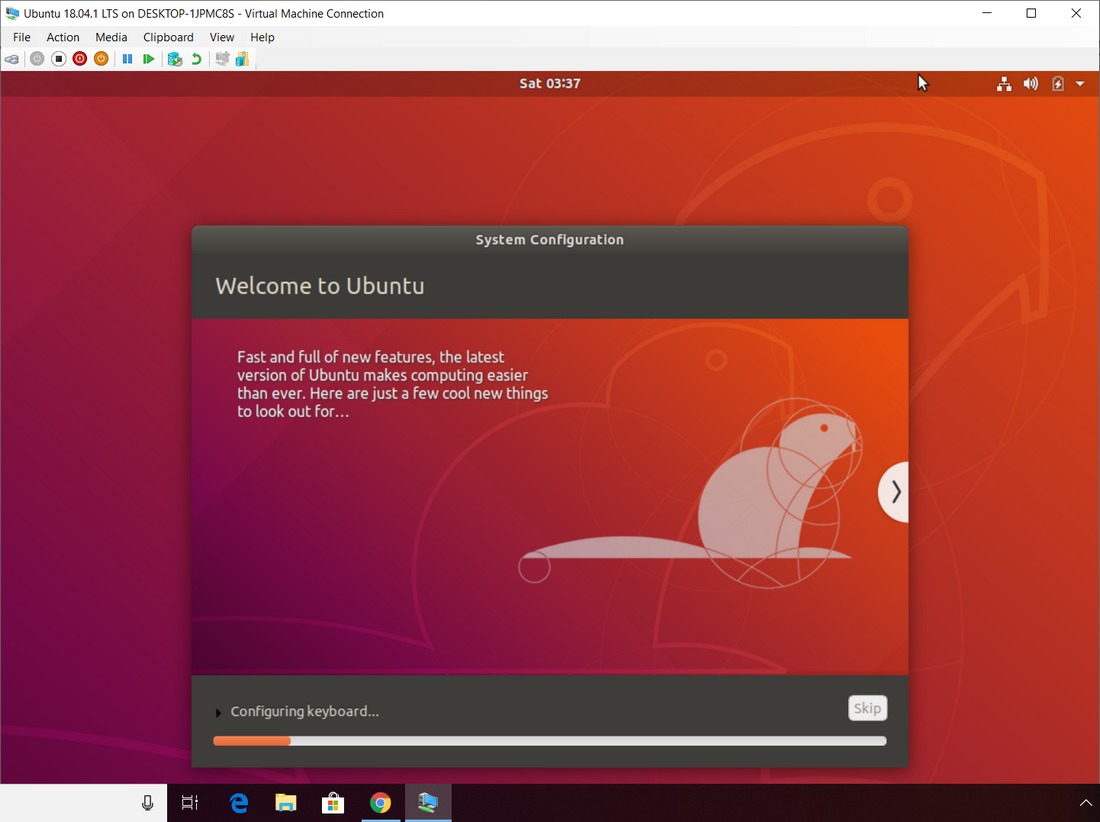
Wait for the welcome screen to disappear.
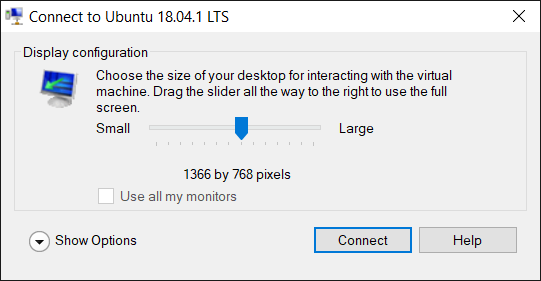
Choose how you would like for your display to be configured and then click on the “Connect” button.
Enter your username and the password that you created a few steps back and then click on the “OK” button.

It takes a while for you to start seeing the Ubuntu operating system—ours hung on a blue screen for a few minutes and just as we were about to give up, Ubuntu appeared.
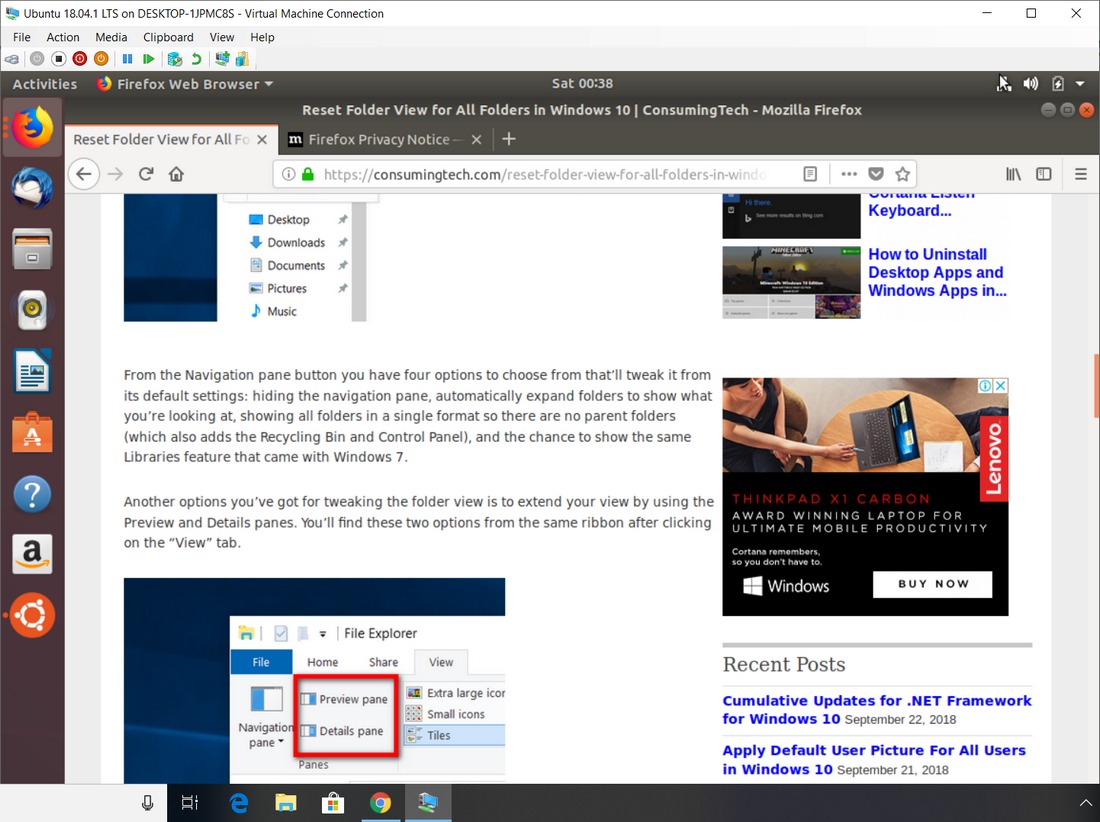
Our first thoughts of Ubuntu was oh my god followed by why is this browser not loading our fonts correctly? It’s both alarming and refreshing at the same time to see a modern day operating system and web browser struggle to piece together what I often feel is too simple of a website. But seeing Ubuntu’s Firefox struggle to load our fonts gives us comfort that our site doesn’t yet need a facelift after all.
That’s it.
Related Tutorials
- Ubuntu 32-Bit Desktop ISO Images No Longer Available from 17.10 Release
- Ubuntu Available to Install from Windows Store for Windows 10 Editions
- How to Install Ubuntu on Windows 10
- How to Change Your Default Web Browser on Ubuntu
- Ubuntu Touch 13.10 (Saucy Salamander) Now finished, Will Commence Shipments To devices
- Ubuntu Touch OS Walkthrough Video Now Out
- Download Ubuntu Lockscreen 1.2 for Android
- New Ubuntu Edge Mobile Looks the Part if Nothing Else
- How to Check the Ubuntu Hard Drive for Bad Sectors in Terminal
- How to Set up and Use Hyper-V Virtual Machine
- Optimize Performance Using Virtual Memory in Windows 10
September 22, 2018 @ 19:49
You shouldn’t have any problems running a virtual machine on an 8 GB of RAM computer. It sounds like you might have a memory leak somewhere.
September 22, 2018 @ 19:55
Memory demand for the Ubuntu virtual server is around 6.28 gigabytes. Naturally, this isn’t going to leave a lot of space left to work with. I’ve taken my virtual memory off now and Hyper-V is no longer enabled and my memory is hovering at around 50% just with Google Chrome open. That to me seems a bit higher than usual but taking a look at my processes it’s not all that surprising. The rest of my processes are just related to the OS or manufacturer that were all already running on this machine when I first started using it.
September 22, 2018 @ 20:00
I have run Ubuntu on a virtual machine before. Earlier in the year, you could run Ubuntu 18.04 in Enhanced Mode in Hyper-V. I managed to do that with a 4 GB of RAM laptop without any problems at all.
September 22, 2018 @ 20:15
It’s possible.
Just looking at the math though it’s not really all that surprising. It’s not uncommon for Chrome to use a lot of memory.
It’s also possible I still had Chrome open in the background while I was using the virtual machine.
September 22, 2018 @ 06:10
I am unable to login with the details that I used to create the account. (And all of this even when I selected for it to log me in automatically!)
September 22, 2018 @ 06:14
I had this same problem as well when I first tried to log in.
It seems there is a slight inconsistency in the development side of the virtual machine.
After you input your name, it fills out the rest of your details but puts your name in all lower cases.
Rather than it being a genuine inconsistency, it is likely that you need to have all lower case letters as the username to be able to sign in to the virtual machine, although I haven’t double checked that as fact.
There is also a goof in my guide where it shows I am logging in with the capital M as the username when in fact I had to retype it with the lower case m.