VPN stands for Virtual Private Network that allows you to exchange data securely while you are using a public network. Using a public WiFi network without any security options is not good as any data that you transmit through their network can easily be revealed and third-party can access and use it for their good.
VPN helps you make sure all the data that your device transmits through a public network is secured and that any middle guys cannot access the data. It does so by routing your data with some mechanisms so that the network you are connected to cannot see your data.
Not only that, but a VPN also helps you access the websites that are blocked in your country. For instance, if Google is blocked in your country, you can connect your device to a VPN and then you will be able to access that site although it’s blocked as the data will be transmitted through the VPN servers and the original ISP will not be able to find out what websites you are accessing.
Most popular VPN providers do have their apps for smartphones, so it’s easy to get and use them on your phones. However, there are still some providers that have not got an app yet, but they are incredibly very useful. Setting up these VPNs on an Android device may not be a one-click task, but it can be done if you know how to do that.
In the following guide, we are going to show you how you can connect to a VPN on your Android smartphone. It will help you get those VPN to run on your device that doesn’t have an app yet.
Here you go, folks:
Connecting to a VPN on an Android Device
What you are going to do in the following steps is use the stock functionality of your Android smartphone to connect to a VPN. The Android OS does include an option that allows you to manually connect to a VPN without requiring an app to be downloaded from the Play Store or a third-party website.
Before you get started, make sure you have a VPN you can use and that you have their details which you input in one of the following steps.
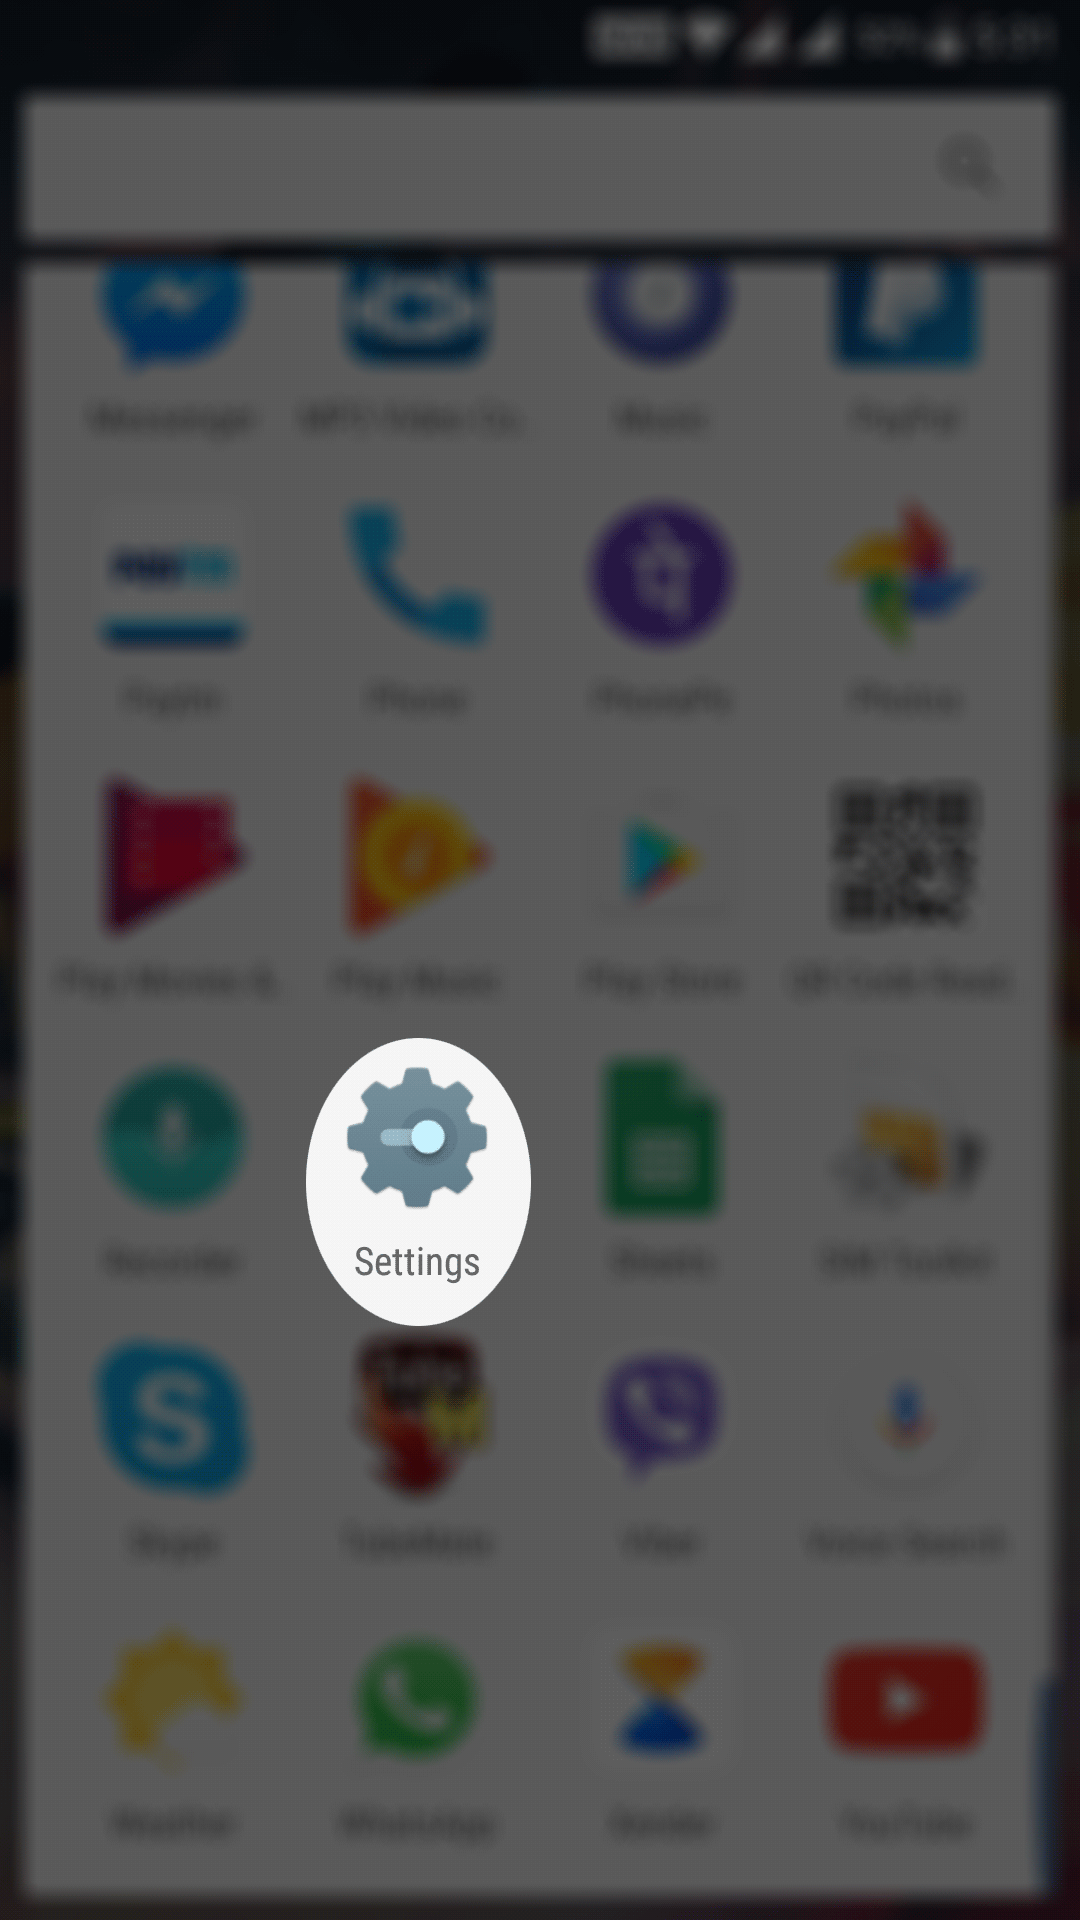
Open the App Drawer on your device and tap on “Settings” to launch the settings panel for your Android device. You can also quickly launch settings by pulling down the notifications bar and tapping on the gear icon which is the settings icon.
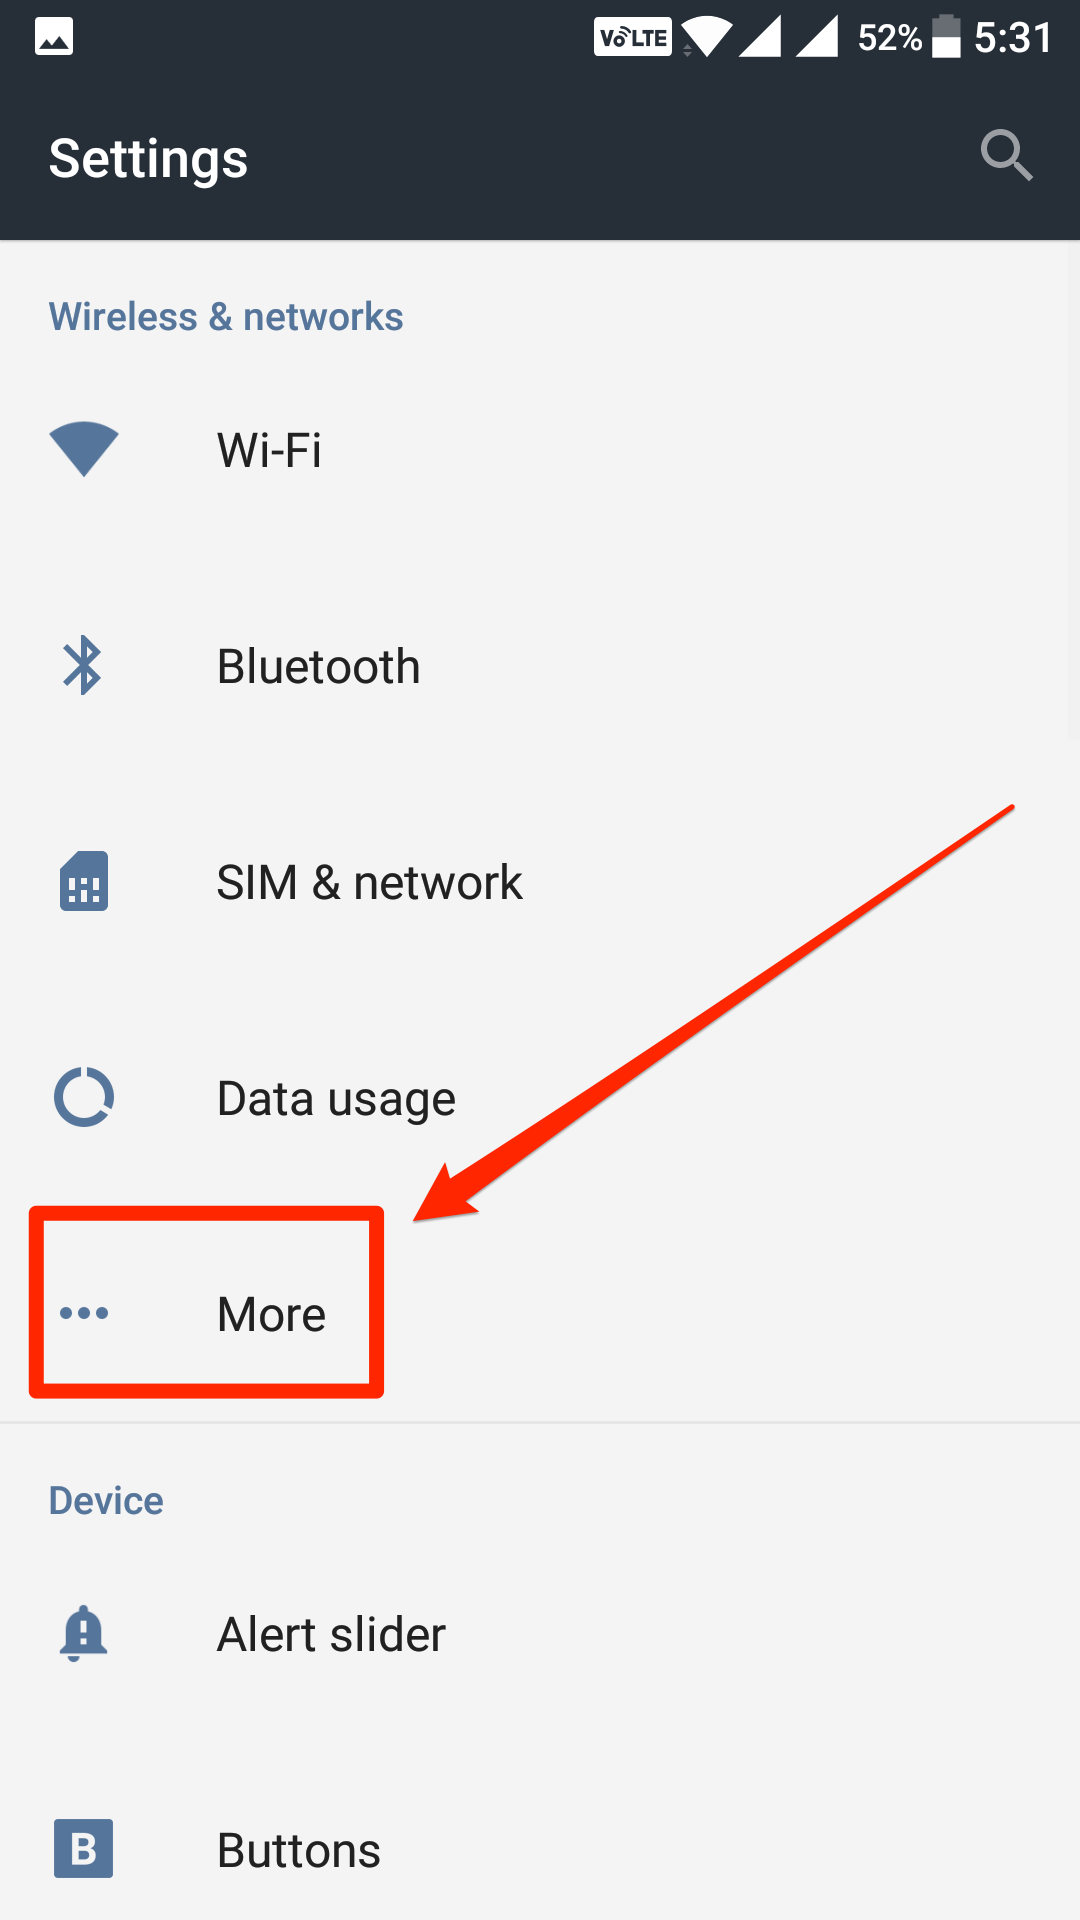
When the settings menu launches, find the section named as Wireless & networks. It should be the first section in the settings menu on most Android phones.
When you find that, you then need to locate the option that says “More.” The “More” option expands the section and lets you see more options, and that’s where the option we want (VPN) is located. So, tap on “More.”
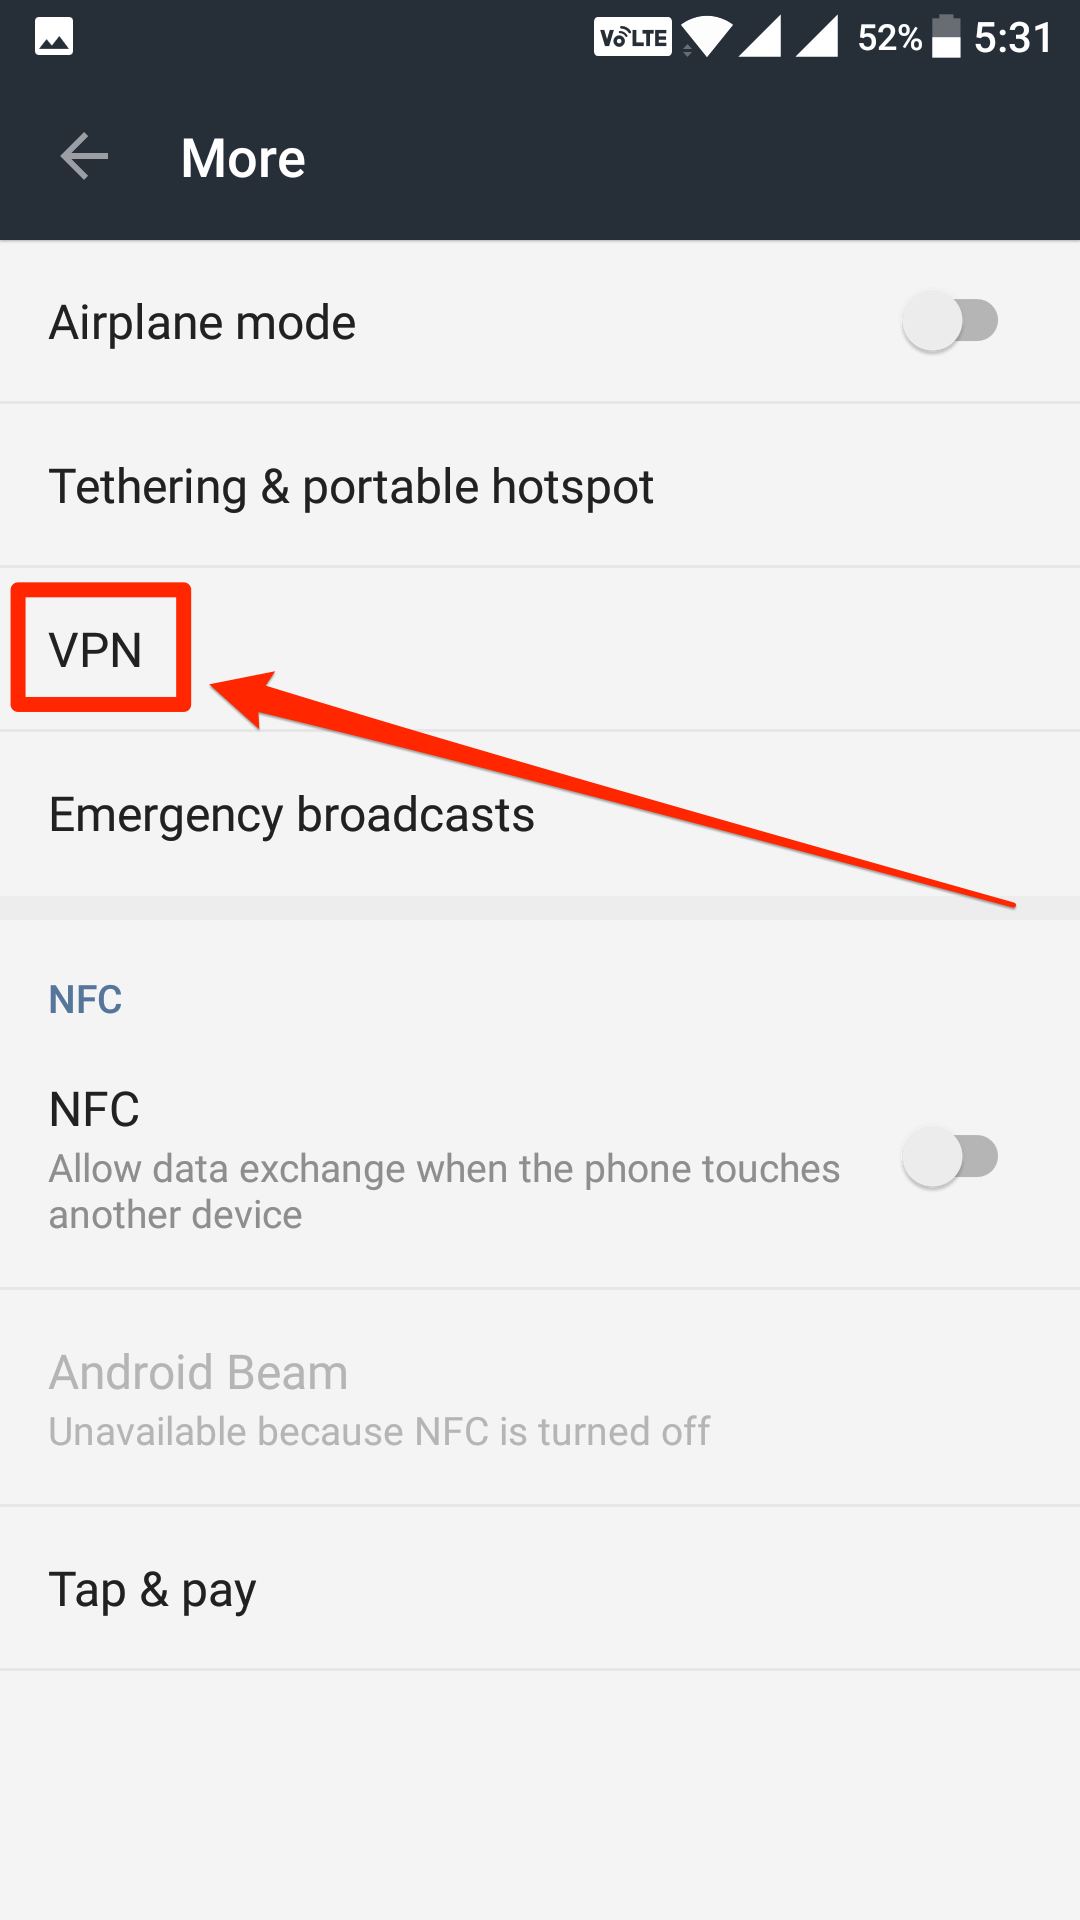
When the More menu opens, you can see all of the wireless and network settings options. Here, you need to find the option saying “VPN” and tap on it. It expands the VPN settings options for you to adjust them.
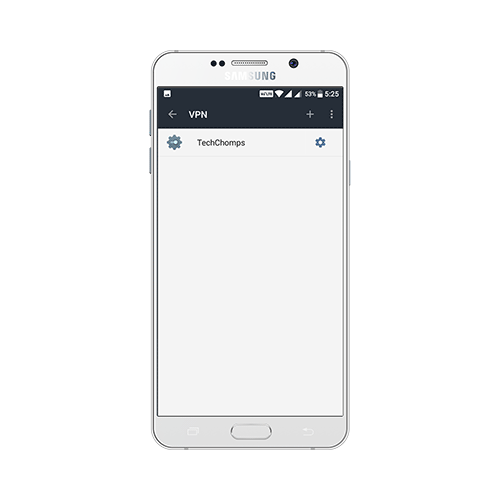
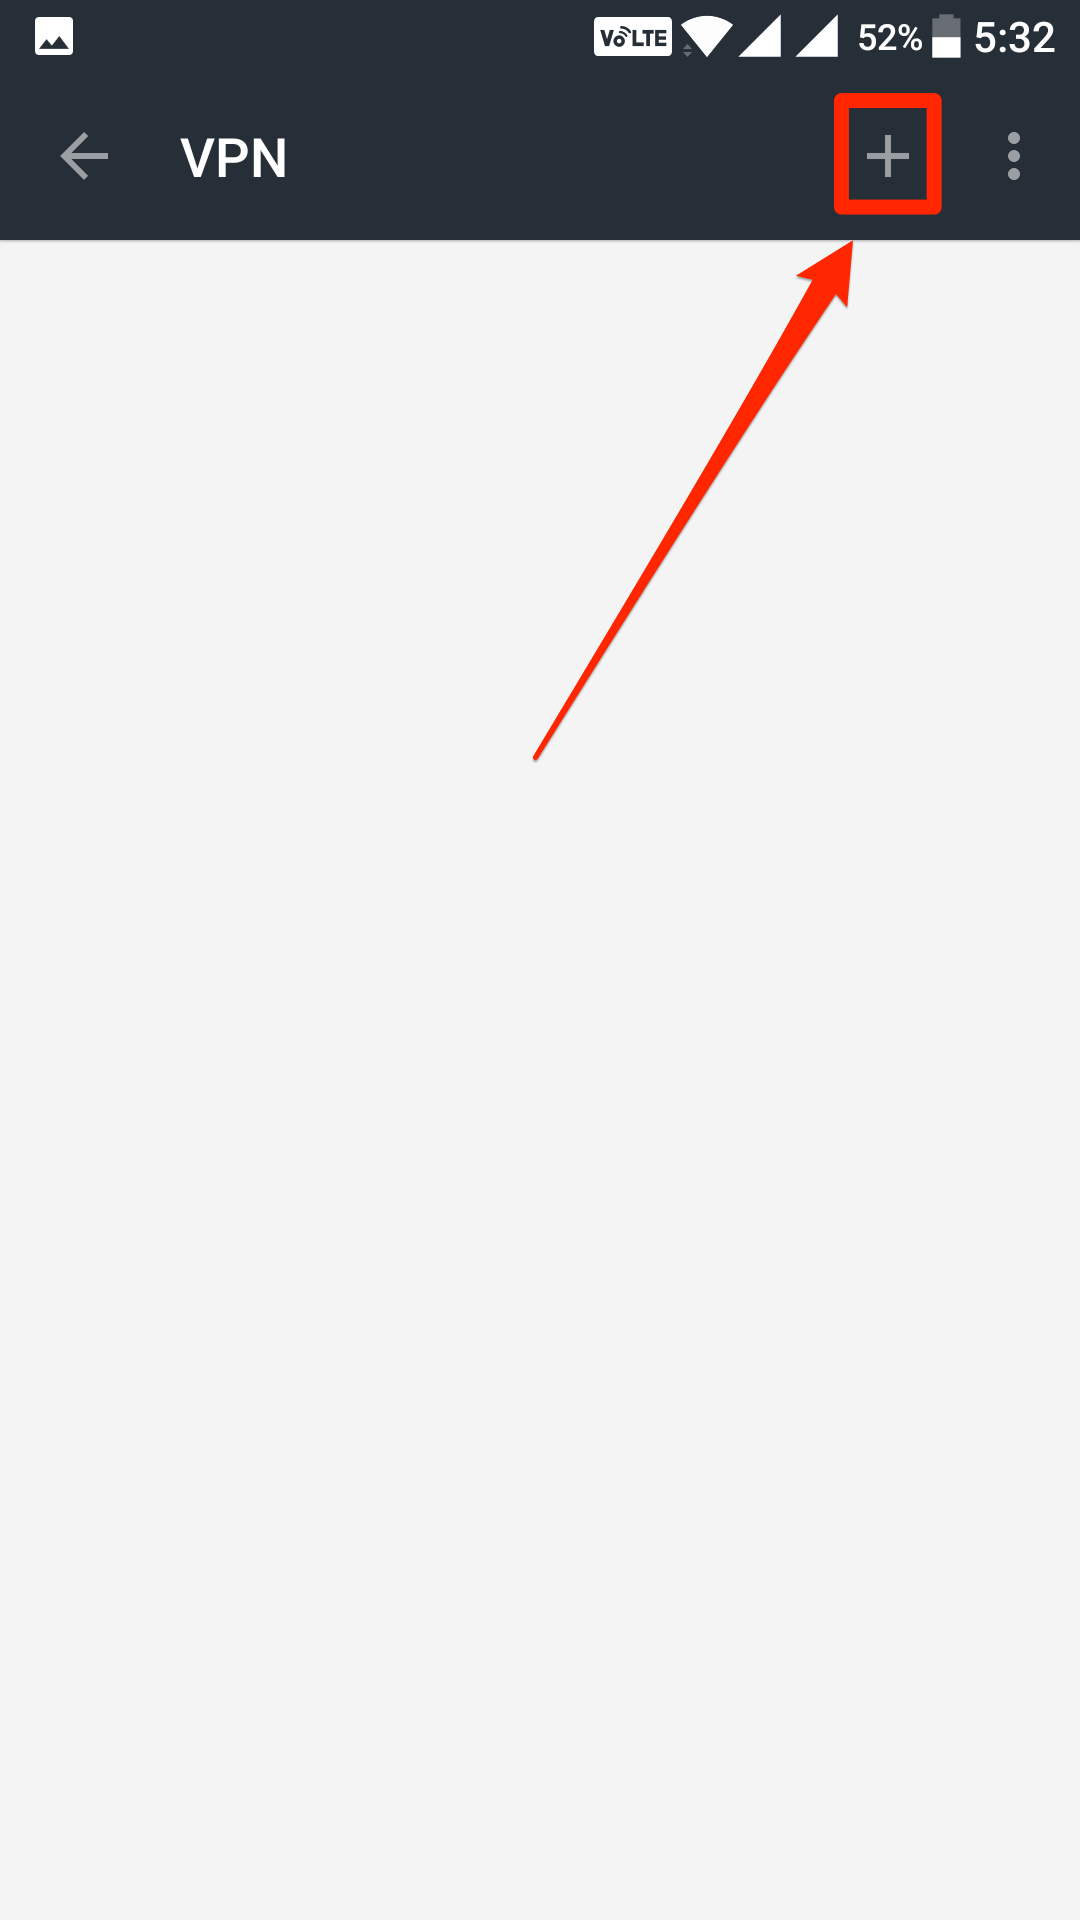
If you have never added a VPN profile to your device, you just see a blank screen. In case you have some VPN profiled added to your device, you see those here.
To add a new VPN, tap on the + (plus) sign in the upper-right corner.
The Edit VPN profile box should open where you can input the VPN settings.
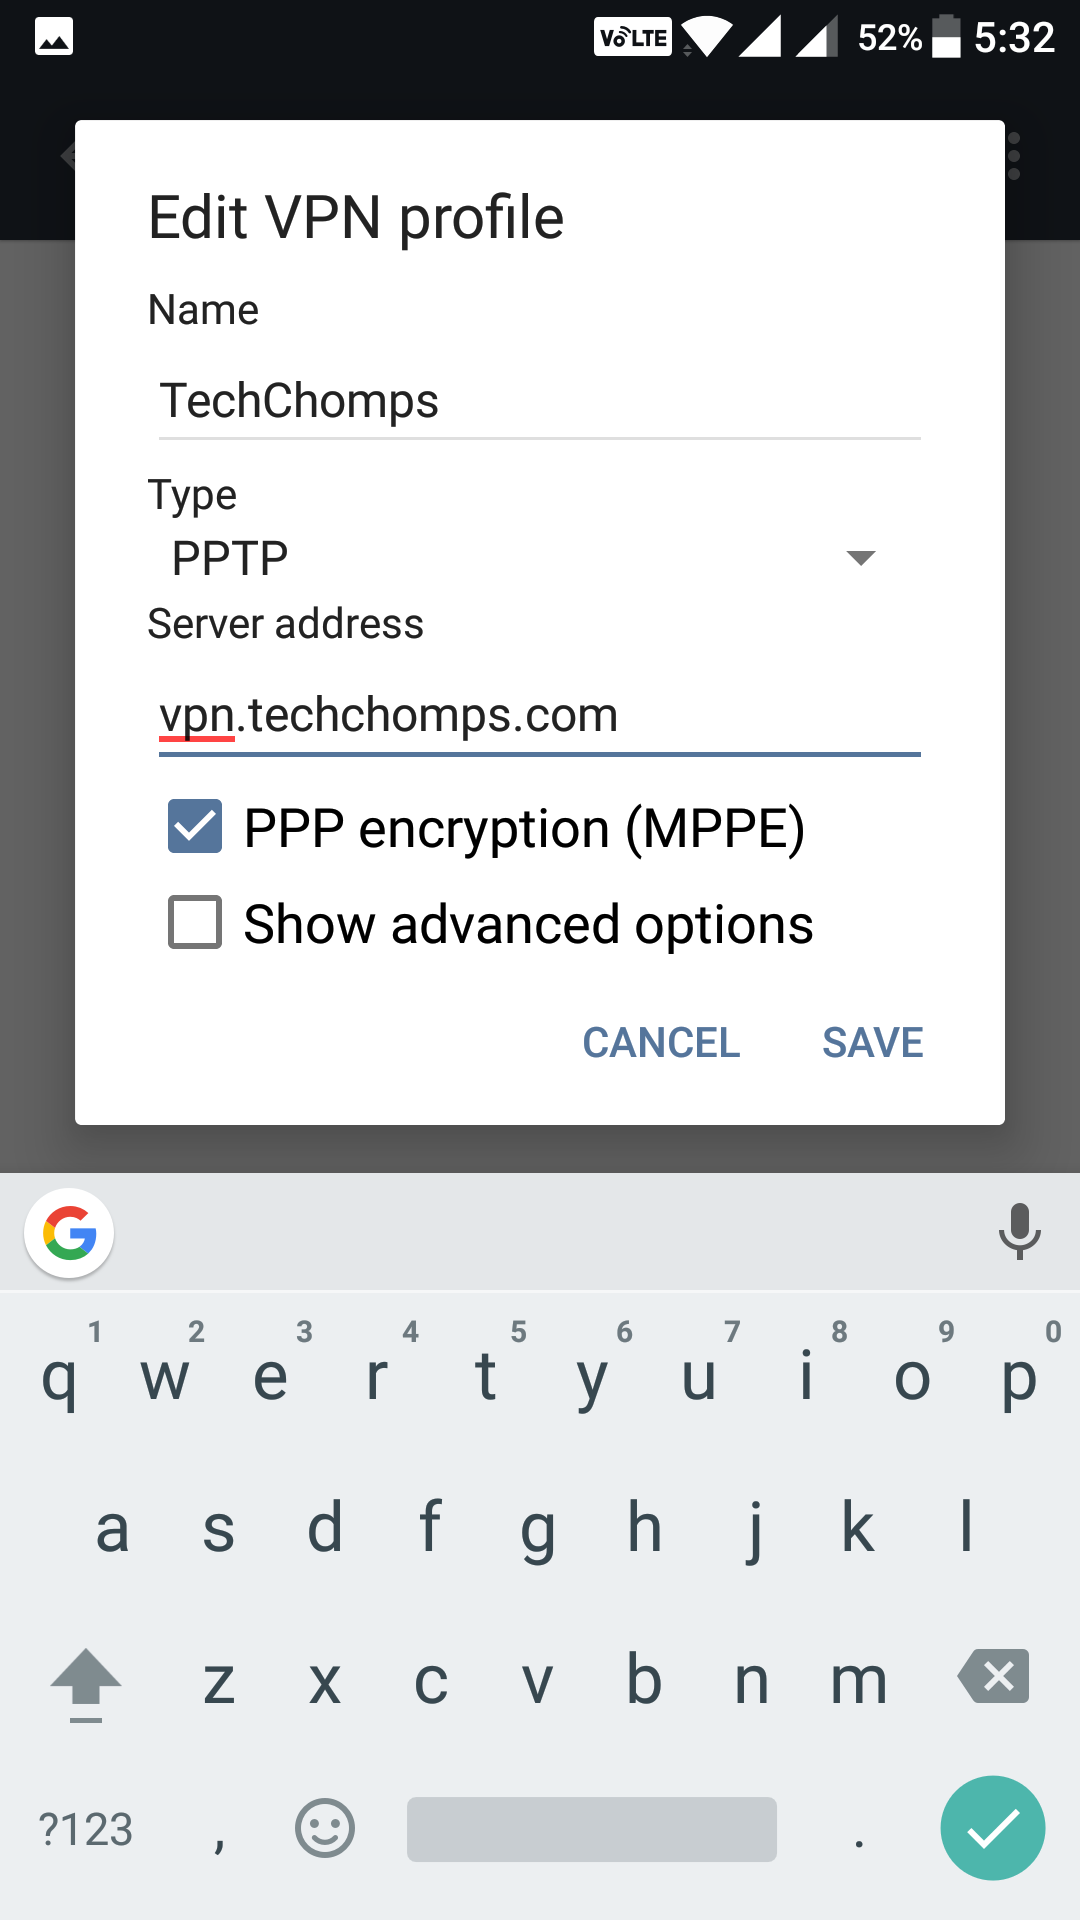
Name: this is the name of the VPN you are adding. It could be anything of your choice but make sure it is something you can recognize.
Type: choose the type of the VPN from the drop-down menu. Your VPN provider will give you information about what type of VPN they are so you can select an appropriate option here. You have a number of types to choose from here so make sure to choose the correct one, or the VPN does not work.
PPP encryption (MPPE): if your VPN supports encryption, checkmark this option. Otherwise, uncheck it.
Show advanced options: if you would like to configure advanced VPN settings, then tap on this option, and you are able to do so.
When you are done configuring the VPN settings, tap on “Save” to save the details.
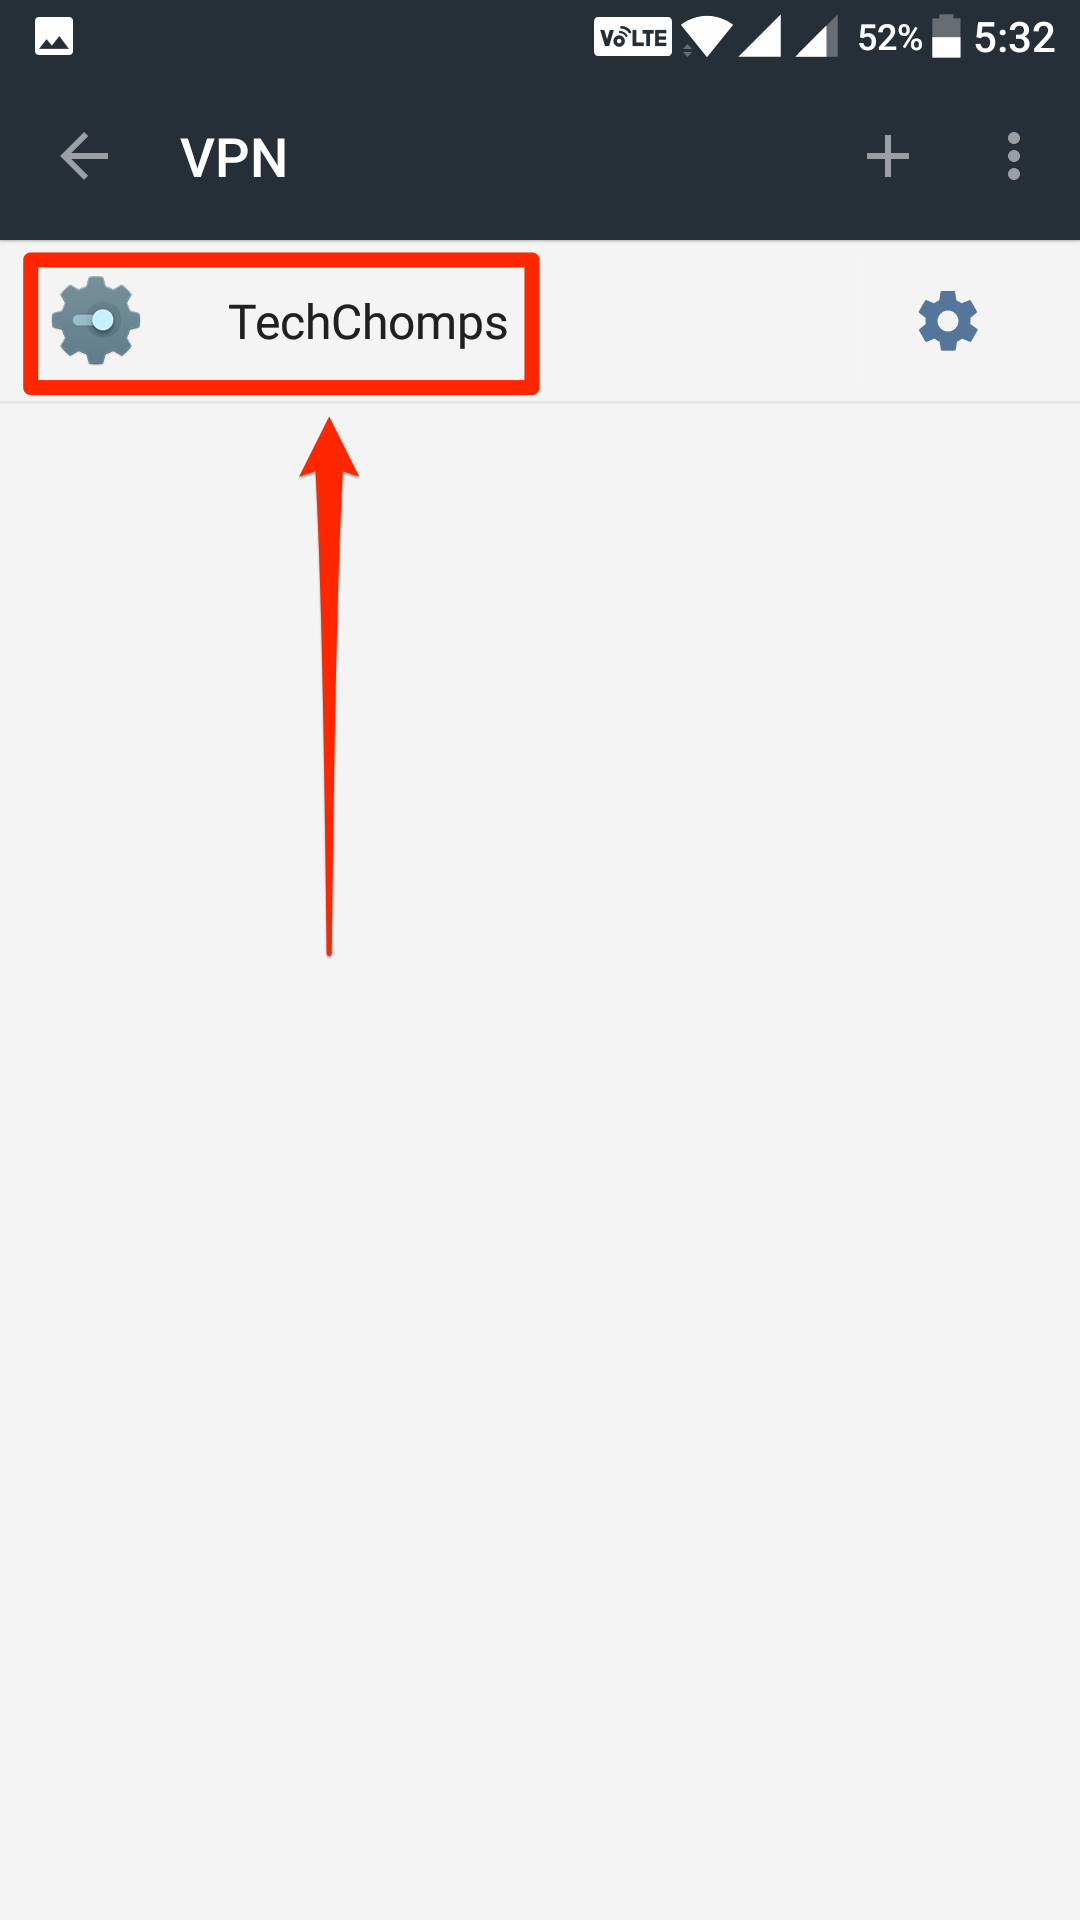
You are back to the VPN list panel where you will now see the VPN you just added. What you need to do now is tap on the VPN you have added to connect to it.
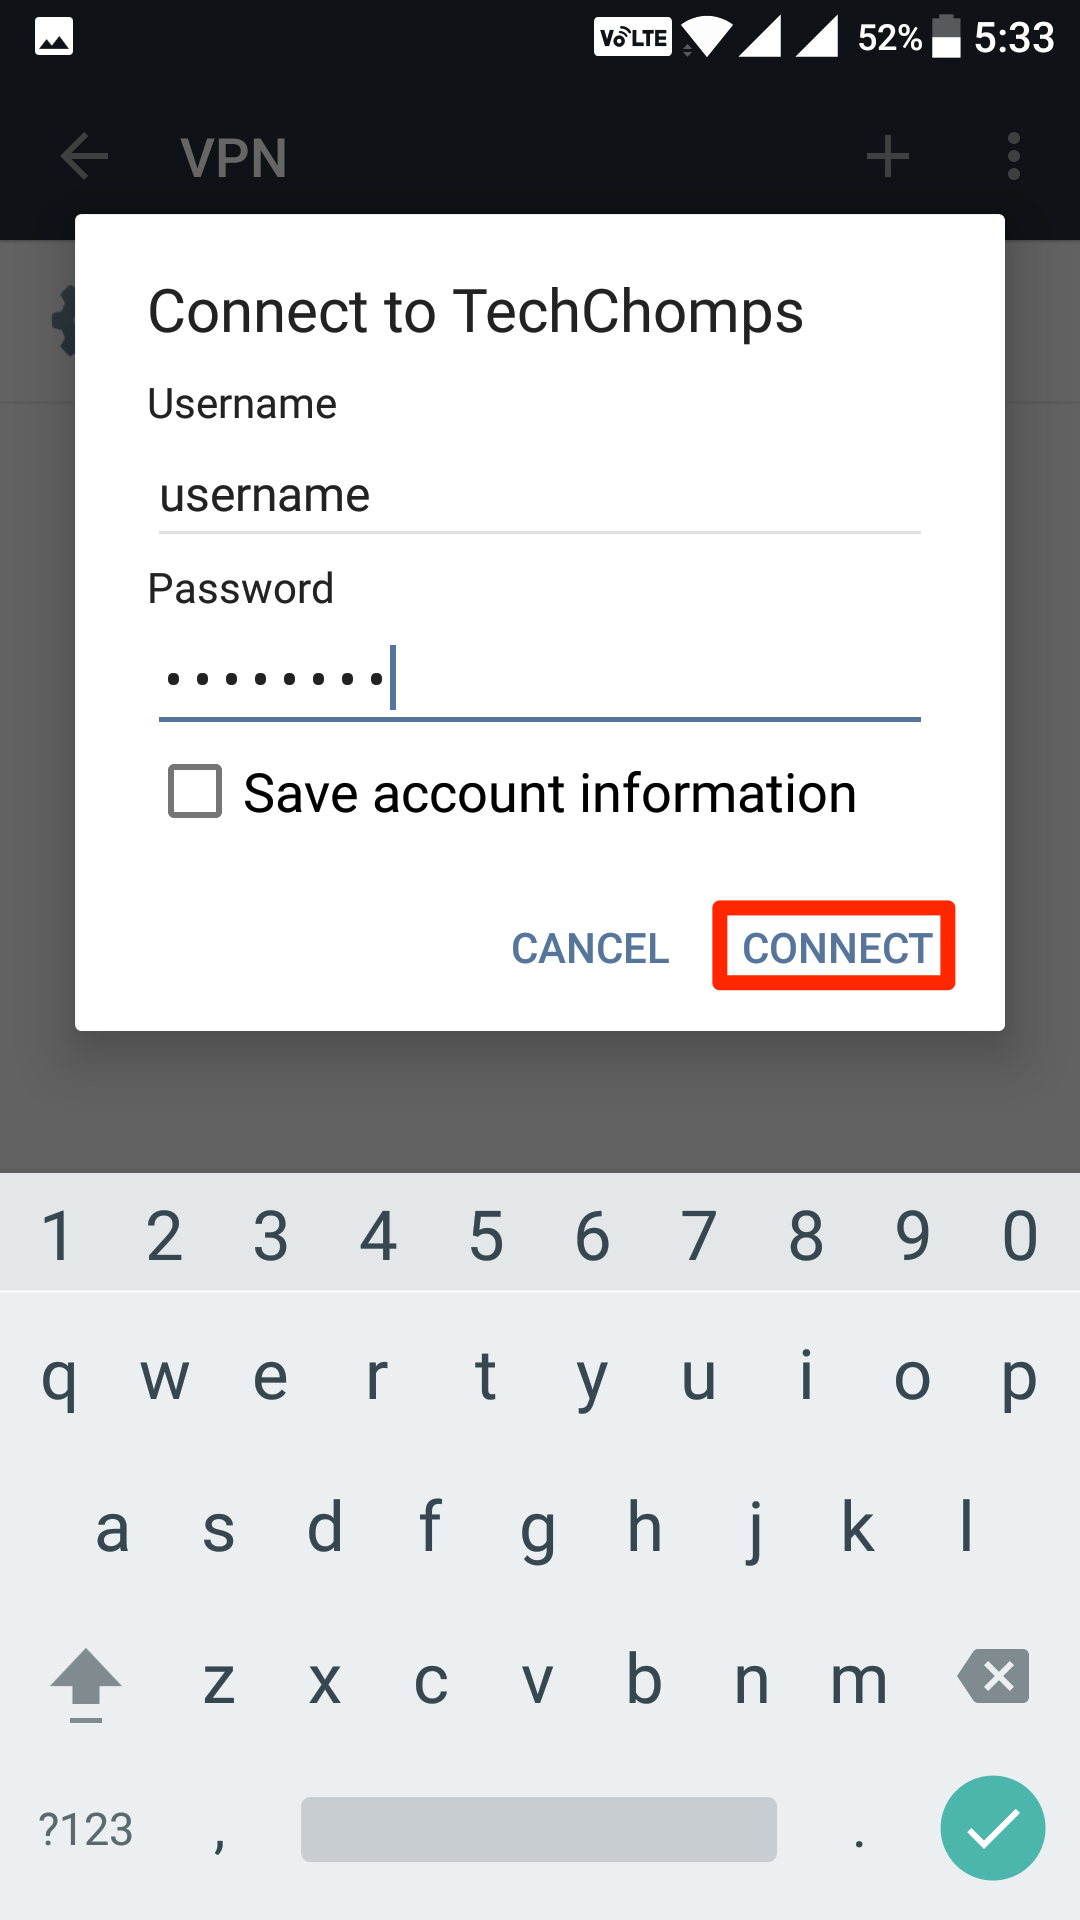
The Connect to VPN-NAME box opens. You will notice it asks for a username and a password before you can connect to the server.
You can get the VPN username and password from your VPN provider and then you need to enter those details in here to be able to connect to your chosen VPN.
Enter the details and then tap on “Connect” to connect to it. Also, if you would like for your device to remember the login details, then checkmark the option that says Save account information and it will save the login details on the device.
You should be now connected to your chosen VPN, and you are all set to transmit data through any network without any worries as all your data is safe and secure.
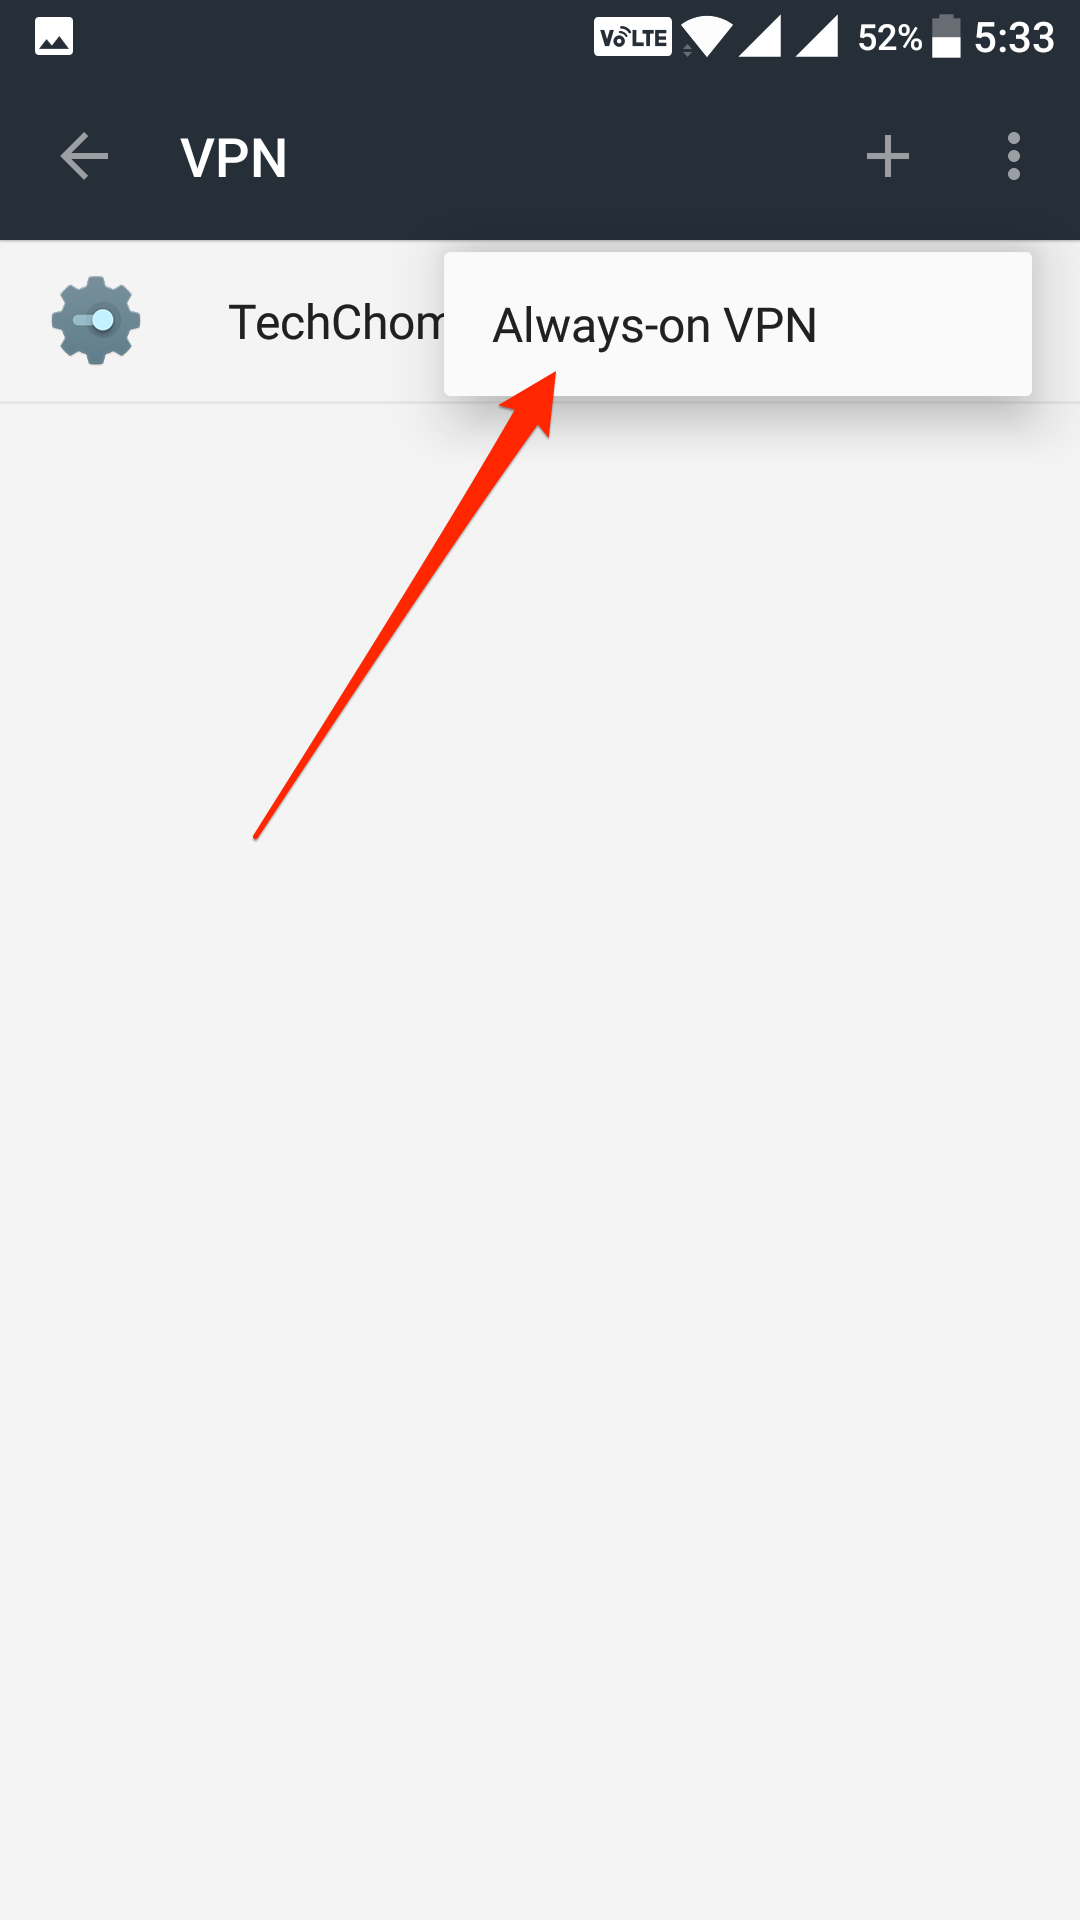
One more option you can configure here is Always-On VPN which makes sure you are always connected to the VPN. You can tap on three dots in the upper-right corner of your screen when you are on the VPN list panel and then tap on “Always-on VPN” to enable the feature.
So, that was how you could connect to a VPN on an Android device. It wasn’t that difficult, was it?
You might also be interested in:
- How To Turn Off App Notifications In Android
- How To Add Tags To Music Tracks That Don’t Have Them In Android
- How To Uninstall Multiple Apps At Once On Your Android Device
- How To Disable Bloatware Without Rooting Your Android Device
Have something to say? You can contribute to this tech article by leaving a comment below.