Windows 7 lets you choose between having the Windows firewall turn on or off, as well as a few additional features if you do decide to have it turned on.
They are as follows:
- Block all incoming connections, including those in the list of allowed programs. If you enable this setting, it blocks all attempts to connect to the computer that you aren’t aware of. You can use this setting when you’re wanting maximum security such as staying overnight at a hotel but using your own computer.
- Notify me when Windows Firewall blocks a new program. If you don’t have Block all incoming connections, including those in the list of allowed programs turned on, then this setting will notify you when a program does try to connect to your computer.
The following tutorial demonstrates how to change the Windows firewall notification settings for every type of network location available for the Windows 7 operating system.
How to Change Windows Firewall Notification Settings in Windows 7
You can change the Windows firewall notification settings from the Control Panel in all versions of the Windows 7 operating system, by going to the Windows firewall settings. Here is how to do that:
1. Open the Control Panel in icons view.
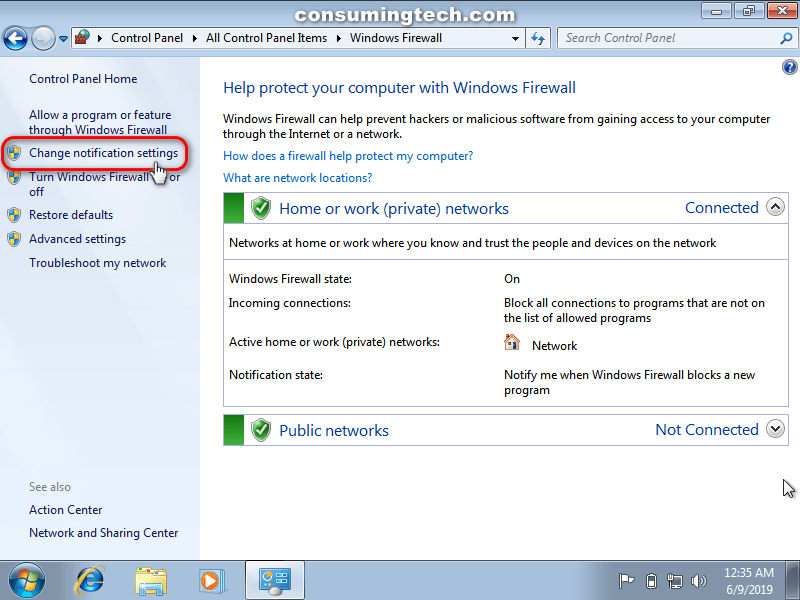
2. Click on the Windows Firewall icon.
![]()
3. Click on the Change notification settings link in the left menu.
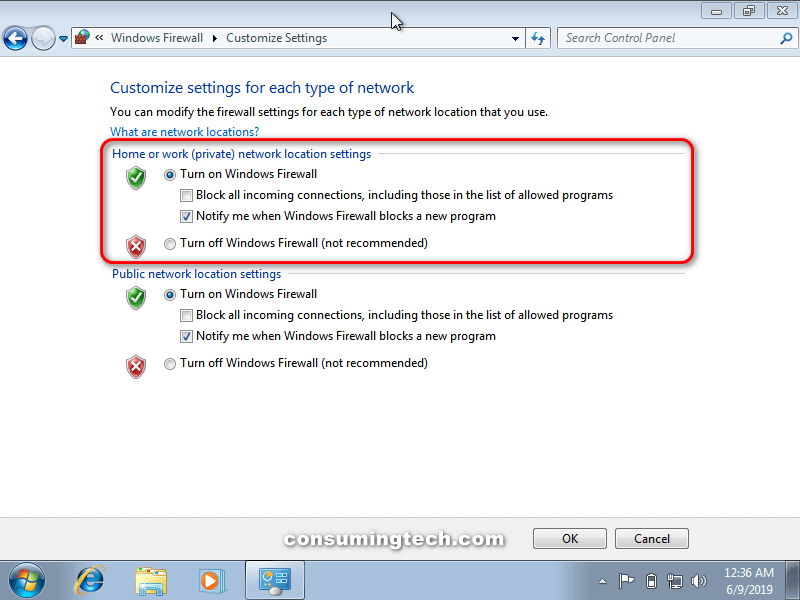
4. For Home or Work (Private) Network Location Settings
a. Under the Home or Work (Private) network location settings subheading, check the Turn on Windows firewall option and then configure the rest of the settings to suit your needs.
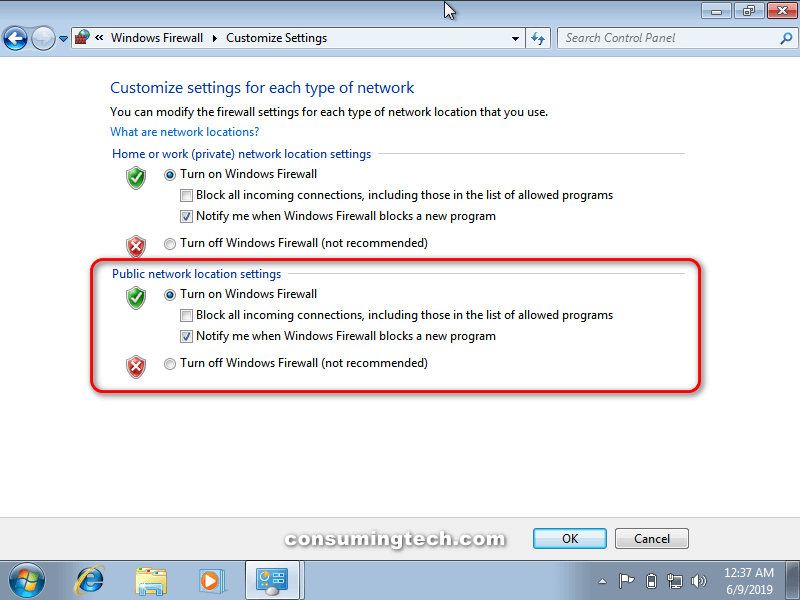
5. For Public Network Location Settings
a. Under the Public network location settings subheading, check the Turn on Windows firewall option and then configure the rest of the settings to suit your needs.
You can now close the Control Panel and continue using your computer if you like.
That’s all.
Related Tutorials
- How to Add/Remove an Internet Explorer Accelerator Add-on
- How to Install Windows 7 Using Unified Extensible Firmware Interface (UEFI)
- How to Create USB Windows 7 Installation Key Drive
- How to Set Default Accelerator in Internet Explorer in Windows 7
- How to Enable/Disable Toolbars and Extensions in InPrivate Browsing in Windows 7
- How to Use Personal and Public User Folders in Libraries in Windows 7
- How to View Reliability and Problems History Details in Windows 7
- How to Show Services Running Under svchost.exe in Windows 7
- How to Turn On/Off Backup Files Schedule in Windows 7
- How to Use ‘Find on this Page’ in Internet Explorer in Windows 7