The user agent in the web browsers on your Mac tells websites what browser you’re using to access the website so that the website can serve you the content that is compatible with your Mac’s browser. For example, some features of a site may only work on a desktop browser so the website will first check if you’re running a desktop browser and only then will it serve its features.
Sometimes you may want to change the user agent in your browser to see how a website looks in another browser. You may want to do this for testing purpose for a website, or you’re just curious about it, and you want to do it. Regardless of the reasoning, changing the user agent in most major browsers is possible and that too without using a third-party extension.

In the following guide, you’ll learn how you can change the user agent in Safari, Chrome, and Firefox browsers on your Mac.
Here you go, folks:
Changing the User Agent in Safari for Mac users
If Safari happens to be your primary browser and you’d like to change its user agent, here’s how you can go about doing that:
Launch Safari on your Mac by clicking on Launchpad in the Dock and searching for and clicking on “Safari.” The browser should launch.
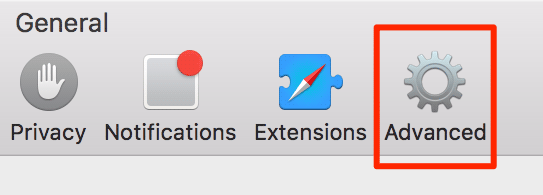
When Safari launches, click on the “Safari” menu at the top and select the option that says “Preferences.” It will take you to the preferences panel for the browser where you can modify all the settings related to Safari.

When the preferences panel opens, click on the “Advanced” tab on the top to launch the advanced settings panel for the browser.
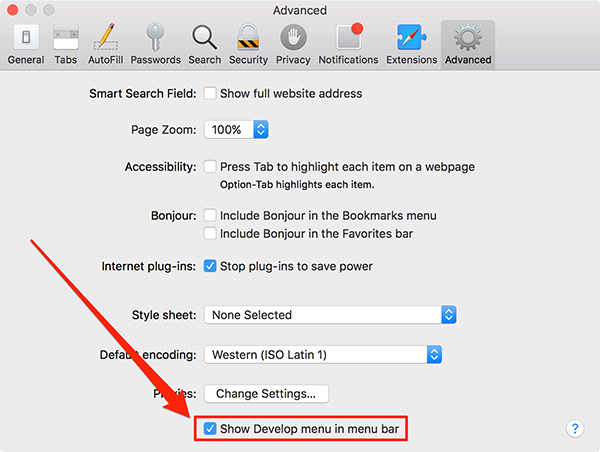
When the Advanced tab opens, you’ll find an option saying “Show Develop menu in menu bar.” Checkmark the option to enable the developer menu in your browser.
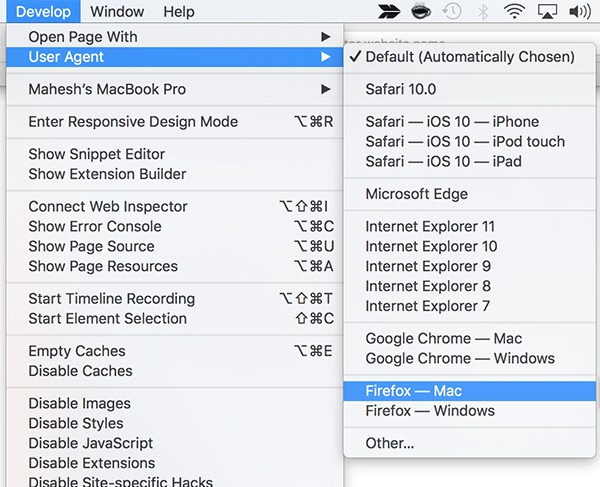
You’ll now find a new menu in the menu bar of your Mac that says Develop. Click on the “Develop” menu and then click on “User Agent.” You’ll then find a number of user agents you can use with the Safari browser on your Mac. Click on any, and it will be set as the user agent for Safari on your Mac.
So, that was how you could change the user agent in Safari on your Mac.
Changing the User Agent in Google Chrome for Mac
Chrome also allows you to change the user agent, but the procedure is a little lengthy than the Safari method.
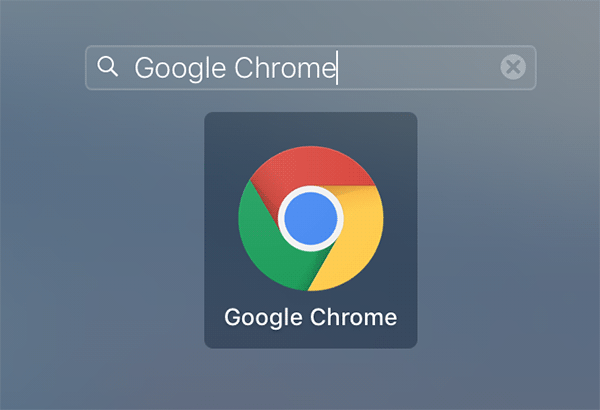
Launch Google Chrome on your Mac by clicking on Launchpad in the Dock and searching for and clicking on “Google Chrome.” The browser should open.
When Chrome opens, click on three horizontal lines in the top-right corner of the screen and then select “More Tools” followed by “Developer Tools.” It will open the developer tools on your screen.

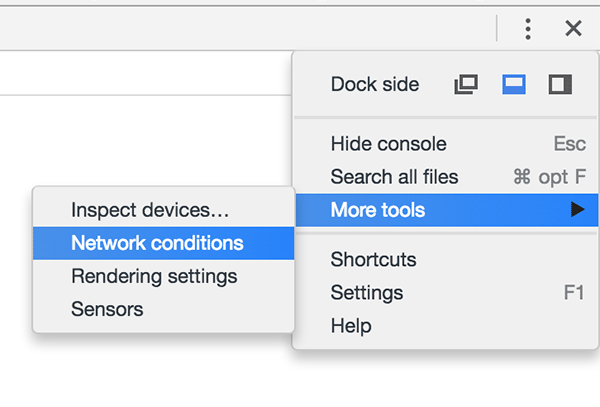
When the developer tools launch and you see the console, click on three-dots in the top-right corner of the console and select “More tools” followed by “Network conditions.”
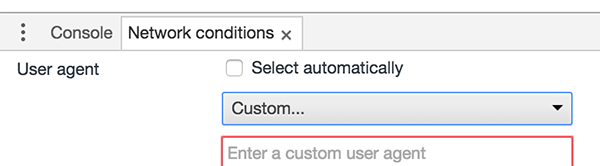
Scroll down in the “Network Conditions” tab, and you’ll find an option saying “User agent.” Uncheck the box for “Select automatically” to allow yourself to select a user agent manually. Click on the “Custom” drop-down menu and select one of the predefined user agents from the list, or you can also enter your own custom agent in the given box.
You should be done.
So, that was how you could change the user agent in Chrome on your Mac.
Changing the User Agent in Mozilla Firefox for Mac
If you use Firefox on your Mac and you’d like to change the user agent, here’s how to do that:
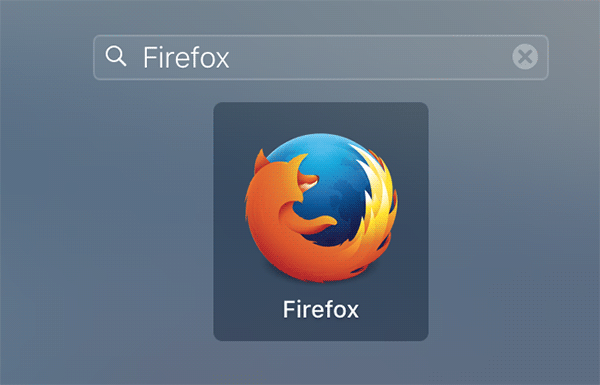
Open Firefox on your Mac by clicking on Launchpad in the Dock and searching for and clicking on “Firefox.” It should open.
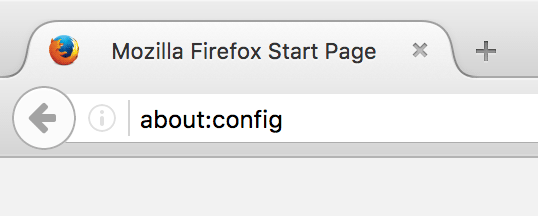
When Firefox opens, enter in following address in the address bar and press Enter. It will open the Firefox settings panel.
about:config
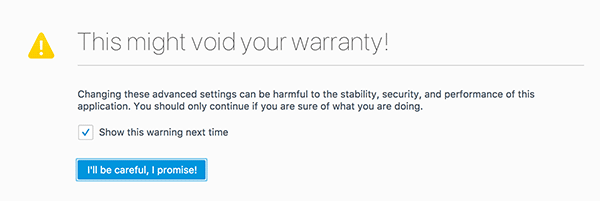
You’ll be prompted if you’d really like to open the settings panel. Click on “I’ll be careful, I promise!” button to move forward.
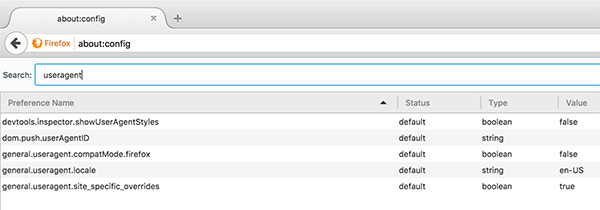
Type in “useragent” in the filter box on the top and press Enter.
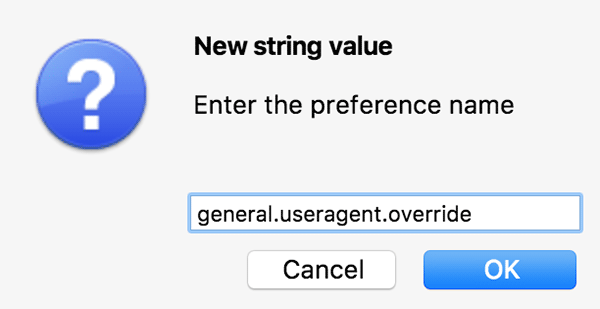
Right-click on any blank space in Firefox and select “New” followed by “String” to create a new value in the Firefox settings panel.
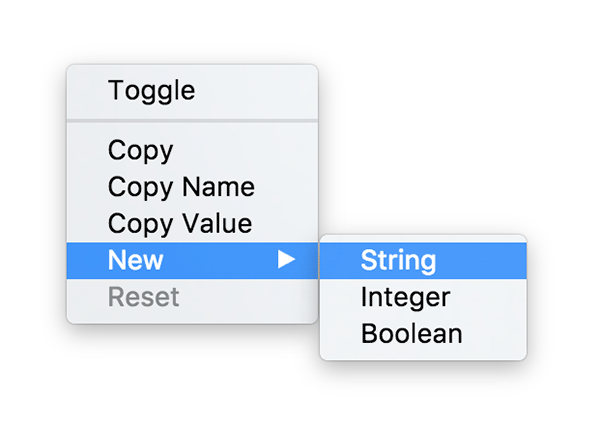
Enter “general.useragent.override” as the name of the string and click on “OK” to save the settings.
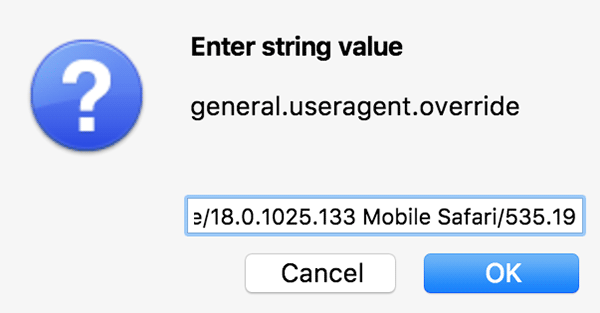
You’ll be asked to enter the value for the string. The value is the user agent that you want to use. You need to get the user agent data from the web as it will be a long string of text.
Once you’ve entered a user agent, click on “OK” to save the settings.
Here’s an example of how a user agent looks like:
Mozilla/5.0 (Linux; Android 4.0.4; Galaxy Nexus Build/IMM76B) AppleWebKit/535.19 (KHTML, like Gecko) Chrome/18.0.1025.133 Mobile Safari/535.19
So, that was how you could change the user agent in Firefox for Mac.
The above methods should help you change the user agent in various web browsers on your Mac. Let us know if this guide helped you!
You might also be interested in:
- How To Merge And Demerge Windows In macOS Sierra On Your Mac
- How To Take A Timed Screenshot On Your Mac
- Some Of The Ways To Take A Screenshot On Your Mac
- How To Turn The Location-based Suggestions Off On Your Mac
- How To Quickly Open The Library Folder On Your Mac
Have something to say? You can contribute to this tech article by leaving a comment below.