Screen savers were popular with older versions of Windows operating systems such as when Windows XP first came out well over a decade ago now. The reason they were popular then was because they prevented screen burn. Since screen technology has changed and screen burns are no longer a thing, the screen saver option isn’t turned on by default when you start a computer that is running on Windows 10. There are other reasons as to why people might want to screen saver than just screen burn though. For example, some people like to use a screen saver because it helps save power.
If you are the kind of person who likes to save every dollar, or you just enjoy the graphics that a screen saver can produce, then you will be pleased to learn that you can still use a screen saver in all versions of the Windows 10 operating system. You just need to turn it on first.
When you get access to the screen saver settings, there is more for you to choose than just turning the toggle on for it, so you can use the guide below to learn as much as possible about screen savers if you prefer.
How to Change Screen Saver Settings in Windows 10
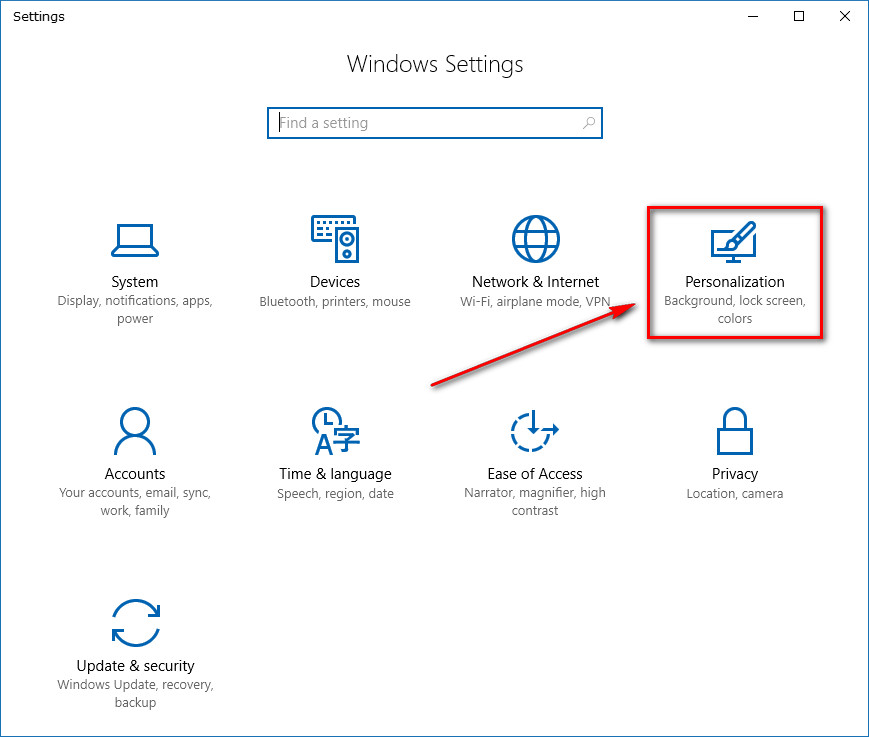
Navigate to the Start menu > Settings gear icon from the left pane and then click on the “Personalization” from the Settings app.
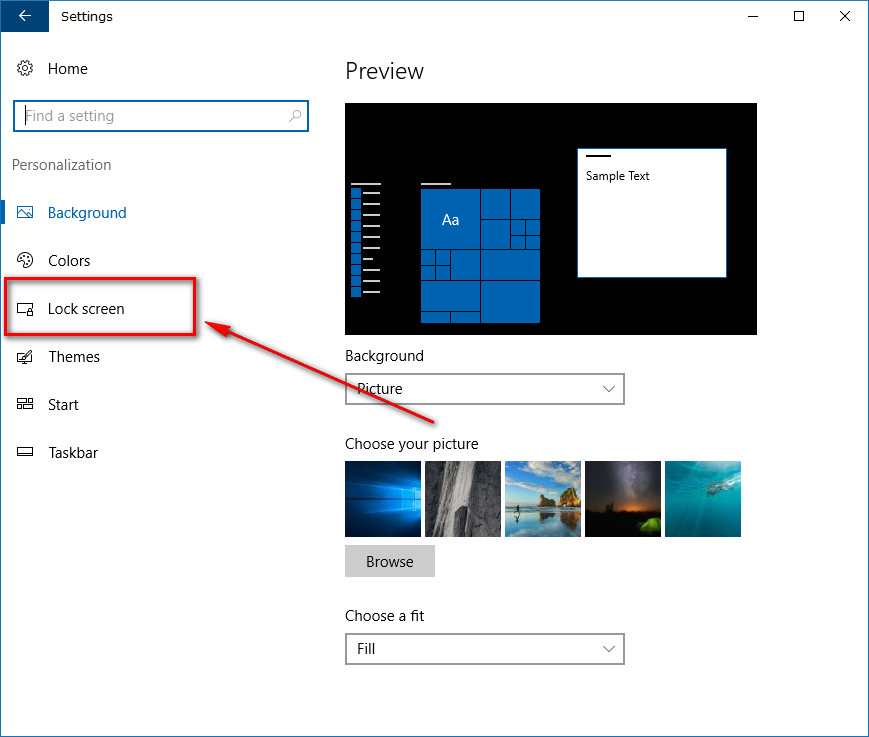
Click on the “Lock screen” link from the left side pane.
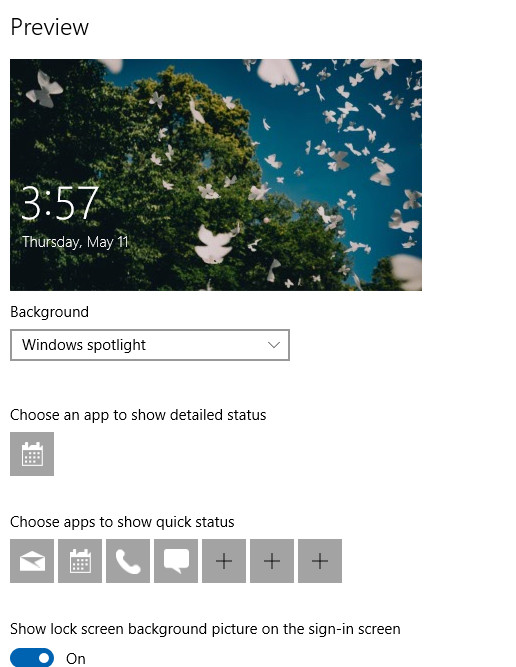
Scroll all the way down past anything that is to do with the lock screen — such as this Windows Spotlight drop-down box. (Anyone interested in learning more about Windows Spotlight might be interested in checking out how to know where the Lock screen pictures were taken or how to turn off the Windows Spotlight advertisements from the lock screen.
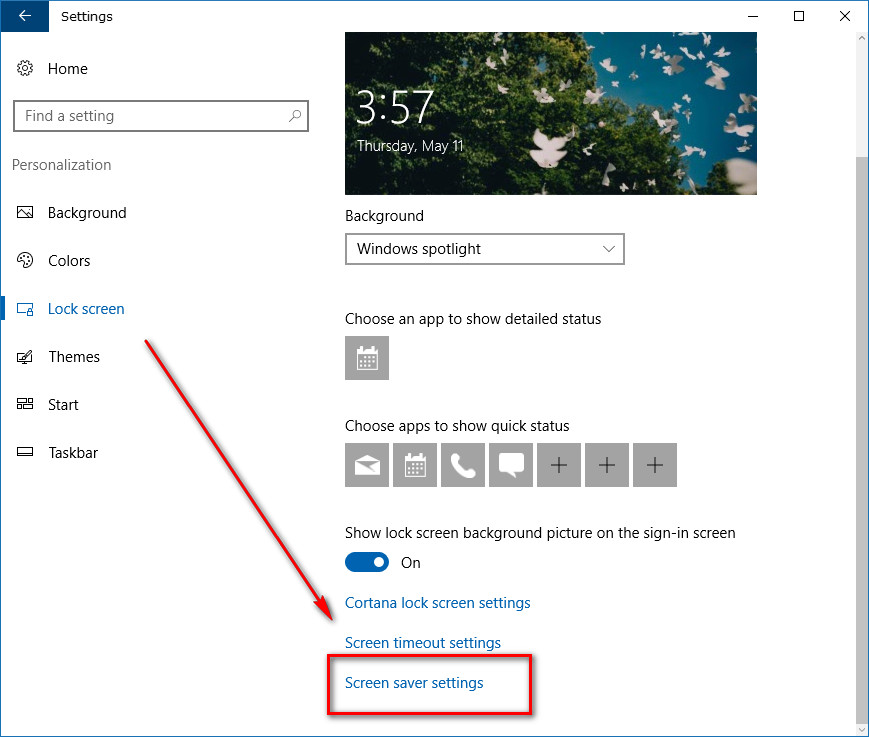
Stop eventually when you get to the “Screen saver settings” link and click on it.
It’s here where you have plenty to choose from for the screen saver settings. Firstly, there is a drop-down menu for you to choose the type of screen saver that you want to have shown. There are a few options there for you to choose, or you can upload one of your own by selecting the “Photos” option.
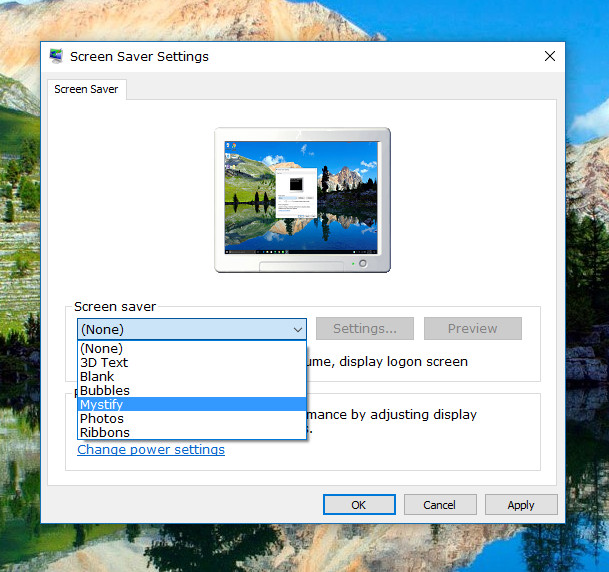
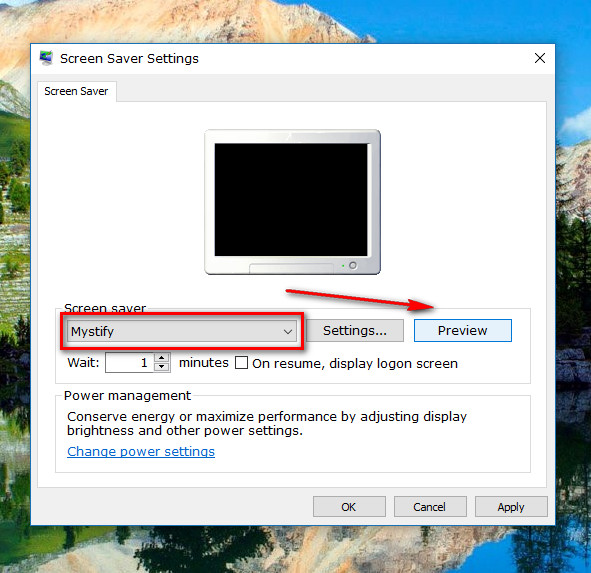
Once you have made your choice from the “Screen saver” drop-down menu, you can then further customize it by clicking on the “Settings” button. After that, there is a “Preview” button that you can click to preview what the screen saver you have been working on will look like when it is live, so you don’t have to wait until you see it in action.
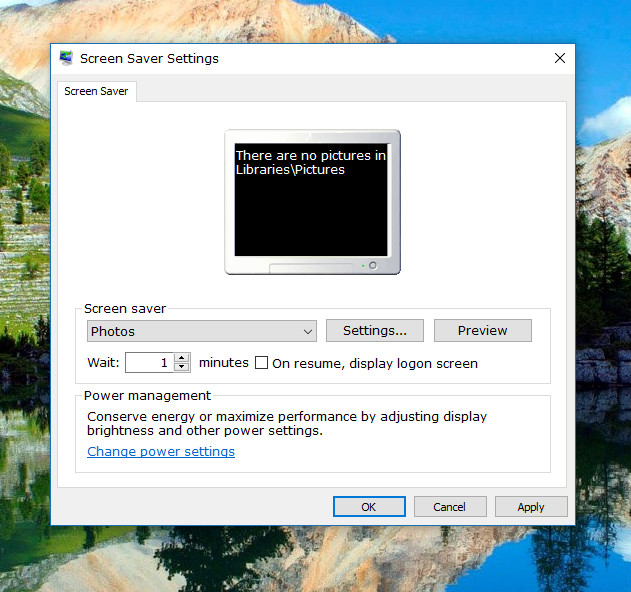
If you want to choose from pictures that are on your computer, then you need to select the “Photos” option from the Screen saver menu. You’ll need to put the pictures that you want to use into the “Libraries\Pictures folder on the computer in order to use them though. We’ll now run through how you can do that in the steps below.
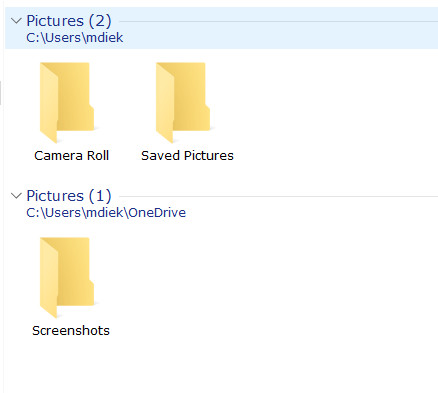
Open up the File Explorer by heading to the Start menu > File Explore from the far left pane and then type “Libraries” into the address bar. That address bar that is showing up at the top of the File Explorer isn’t for any old web address like you would expect from a web browser like Google Chrome or Firefox. It is strictly an address bar that navigates through all of the available folders to be found in the File Explorer.

Click on the “Pictures” folder from the Libraries menu. These don’t have the same appearance as a common folder would in File Explorer, but you do still refer to these as folders.

Inside the “Pictures” folder is now where you would find some other folders (that have the traditional folder appearance). You need to save the pictures into these folders to be able to use them as a screen saver. To do that, find the picture that you want to use and then to go the File ” Save as and choose this folder to save the picture to or you can save the picture that you wanted to any location (such as the desktop on the computer) and then click and drag the image into the folder instead.
Once you have the picture selected, you’ll notice that the settings then become available for that picture. The settings menu isn’t available for all things that you choose from the Screen saver menu, like most of the preexisting option for you to choose. But you will find that it is available when you have selected a picture from the Libraries folder in File Explorer.
The settings that you can change is the speed of the slide show that happens with the images. To do that, just click on the drop-down menu and choose “Slow” “medium” or “fast” depending on your tastes.

Microsoft has an excellent available also for customizing the screen saver you have chosen if you want to get some more options.
When you have everything in place how you want it, all you need to do next is preview your work to make sure that it is going to work the way you had planned.
Most people don’t change the screen saver settings very often because the screen saver is not turned on by default. Since the original reason behind having the screen savers—phosphor burn-in on Cathode Ray Tube and Plasma monitors—is no longer an issue, people don’t value them as much. But a screen saver still does have use thanks to its stunning visuals that it can provide any office, and the security and entertainment purposes. With that said, if you are using an LCD computer monitor, there is no need to have a screen saver a.k.a it does not burn your screen if you leave an image on it unprotected for long periods. There is an added advantage for laptop users who are running on Windows 10 to enable the screen saver option and that it helps save the battery. When the screen is on and using a lot of contrast and color, the battery drains quicker in comparison to a traditional screen saver which often is an animation with a black background. That black background is there to save the battery since nothing can preserve the battery as well as black since there is no contrast involved in displaying it.
You might also be interested in:
- How to Open a Command Prompt in Windows 10
- How to Start, Stop, Disable and ReStart Services in Windows 10
- How to Link Microsoft Account to Digital License for Windows 10 Activation
You can subscribe to our RSS, follow us on Twitter or like our Facebook page to keep on consuming more tech.
November 8, 2017 @ 16:29
when I get on the internet with a project, I would like to have that screen stay on for 30 min before it returns to my password screen. I have a windows 10 Lenovo flex 4. Every direction I look up never works. I even tried to turn password off. that didn’t work. Can you help me plz?
November 9, 2017 @ 06:20
Hi Carole,
Sure. You can do that by heading to the Start menu > Settings > System > Power and Sleep > Additional Power Settings > Change plan settings (for the one you are currently using, which is signified by the checkbox it’s set on). You’ll then see the Change settings for the plan heading. Directly beneath it is the chance to change your “Turn off the display” and “Put the computer to sleep” settings. Click the drop-down menu for each and set it to 30 minutes. You can get pictures from here: https://consumingtech.com/reset-restore-power-plans-to-default-settings-in-windows-10/
Your logon screen should automatically appear after waking up from Sleep mode. If it does not, you can follow some of the suggestions here found on the Microsoft Technet website: https://answers.microsoft.com/en-us/windows/forum/all/unable-to-see-login-screen-after-waking-up-from/932c7c6c-10c8-4d4a-8477-8283cb3f06c9?auth=1
Hope that helps,
Mathew