When you buy a new computer that comes with Windows 10 already installed, you’ll notice when you use the computer that sometimes the computer’s name is identifiable by programs, apps, and even by yourself if you browse the operating system in the right place. Each computer that runs on Windows 10 is given a uniquely identifiable name that typically consists of a bunch of letters and numbers and might say something like “Desktop” in front of them.
Some of you might enjoy the name that your computer has already been given, and others might hope for a way to get it changed.
There are two ways of changing the computer’s name in Windows 10. There are no limits as to how many times you can name it, so don’t worry about taking your time when selecting the name.
How to Change Name of Computer in Windows 10 Using Settings App
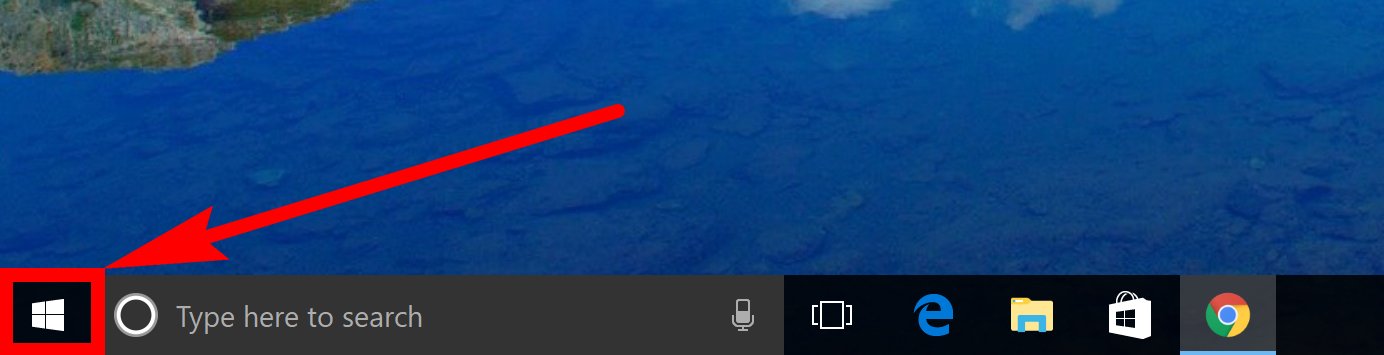
One of the ways you can change the name of your computer in Windows 10 is by visiting the Settings application. To get there, click on the “Start” button in the taskbar
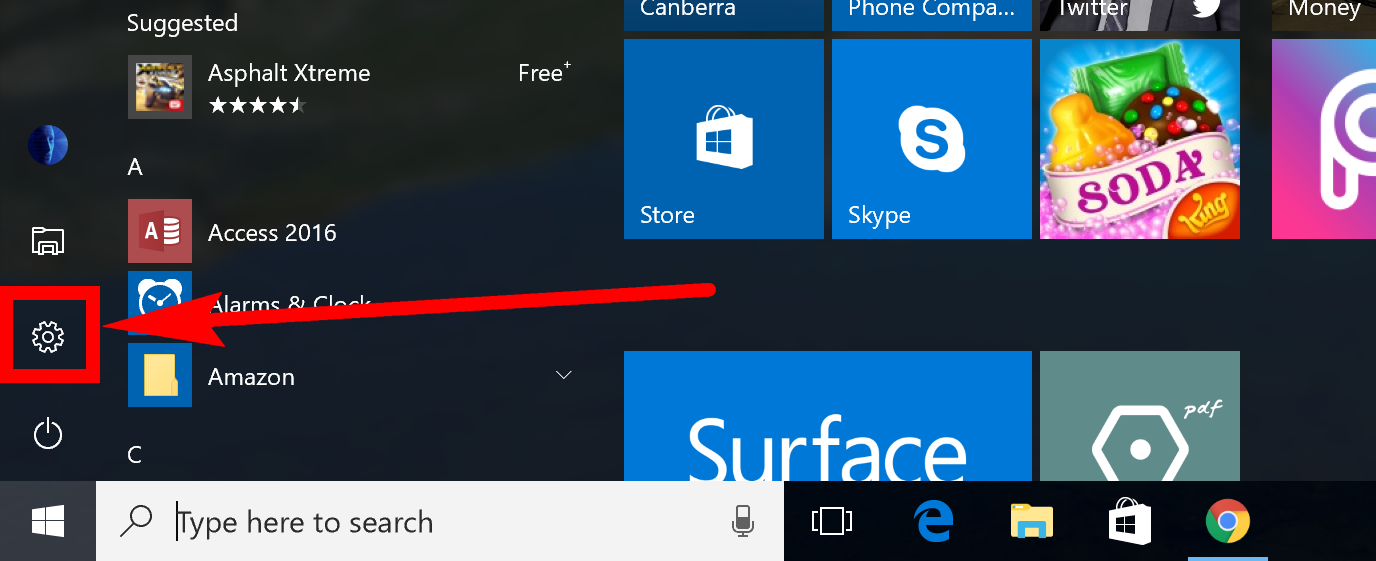
Next, click on the “Settings” gear icon in the far left pane.
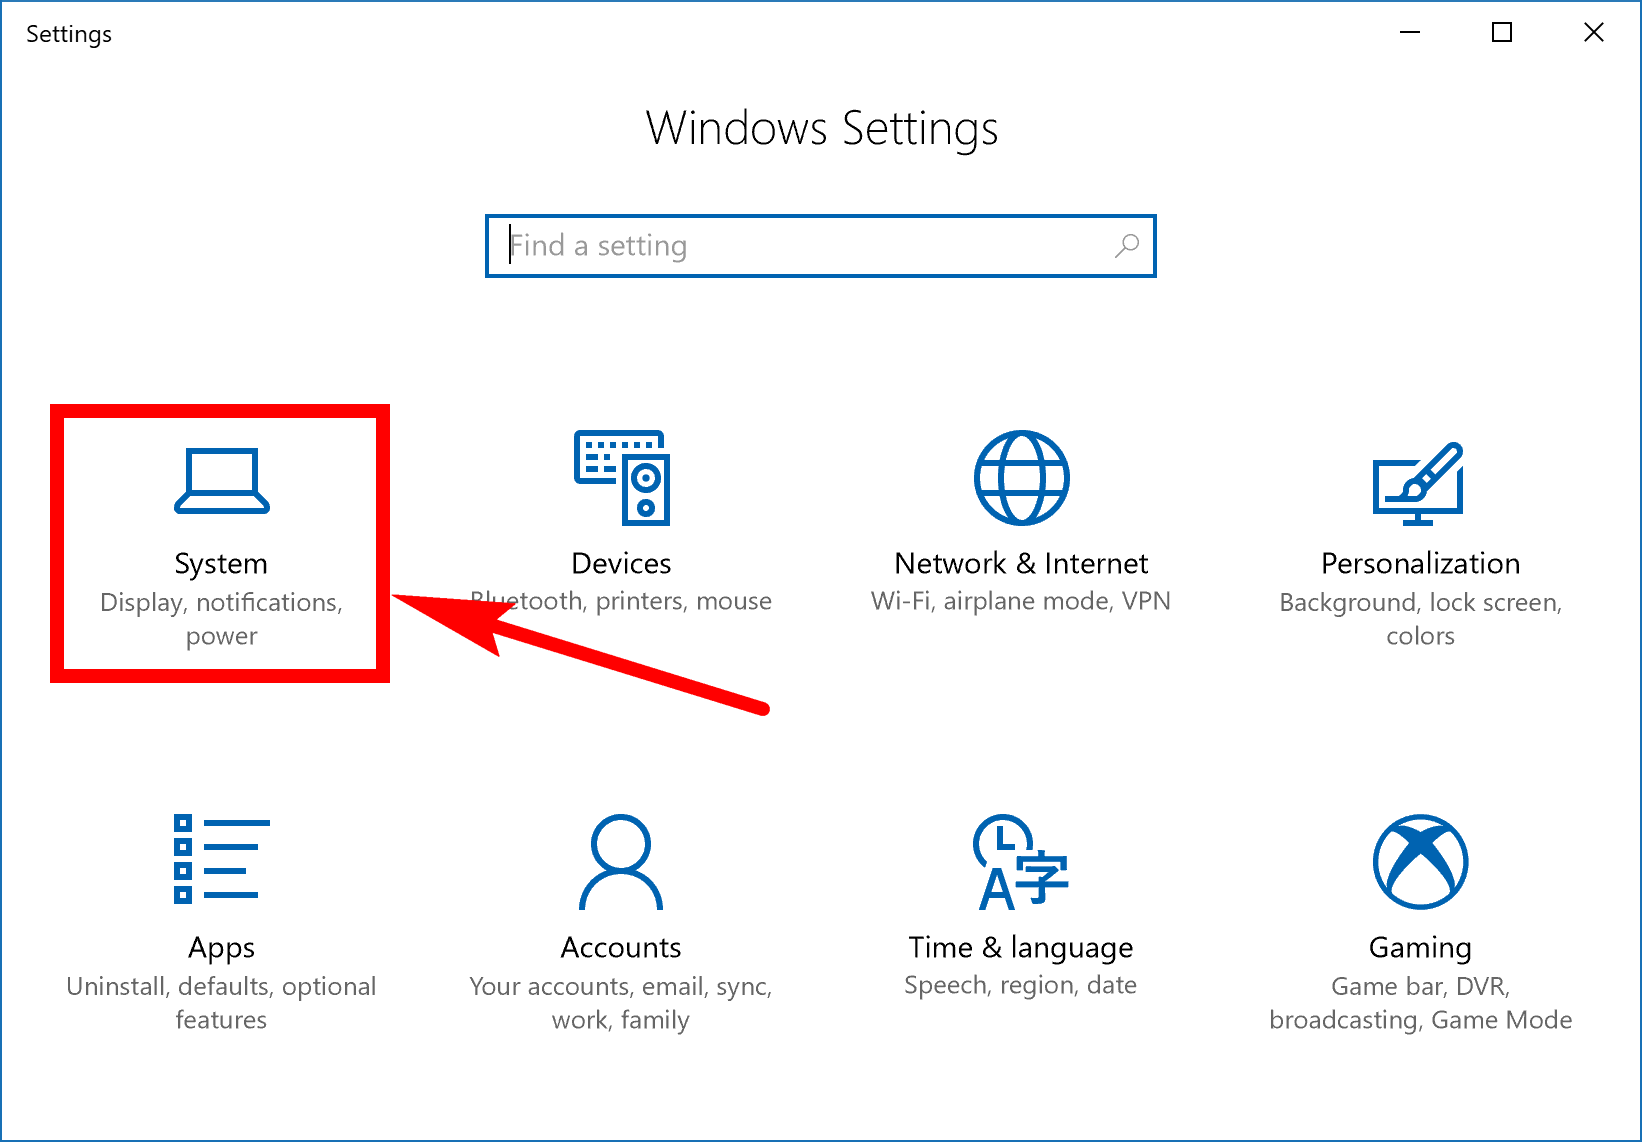
Click on the “System” link from the Windows Settings menu.
You won’t be able to see the link you are looking for yet, so you’ll need to scroll down to the end of the left side pane by moving the mouse into that area and then scrolling down, or you could click on the little line on the right side of the left pane.
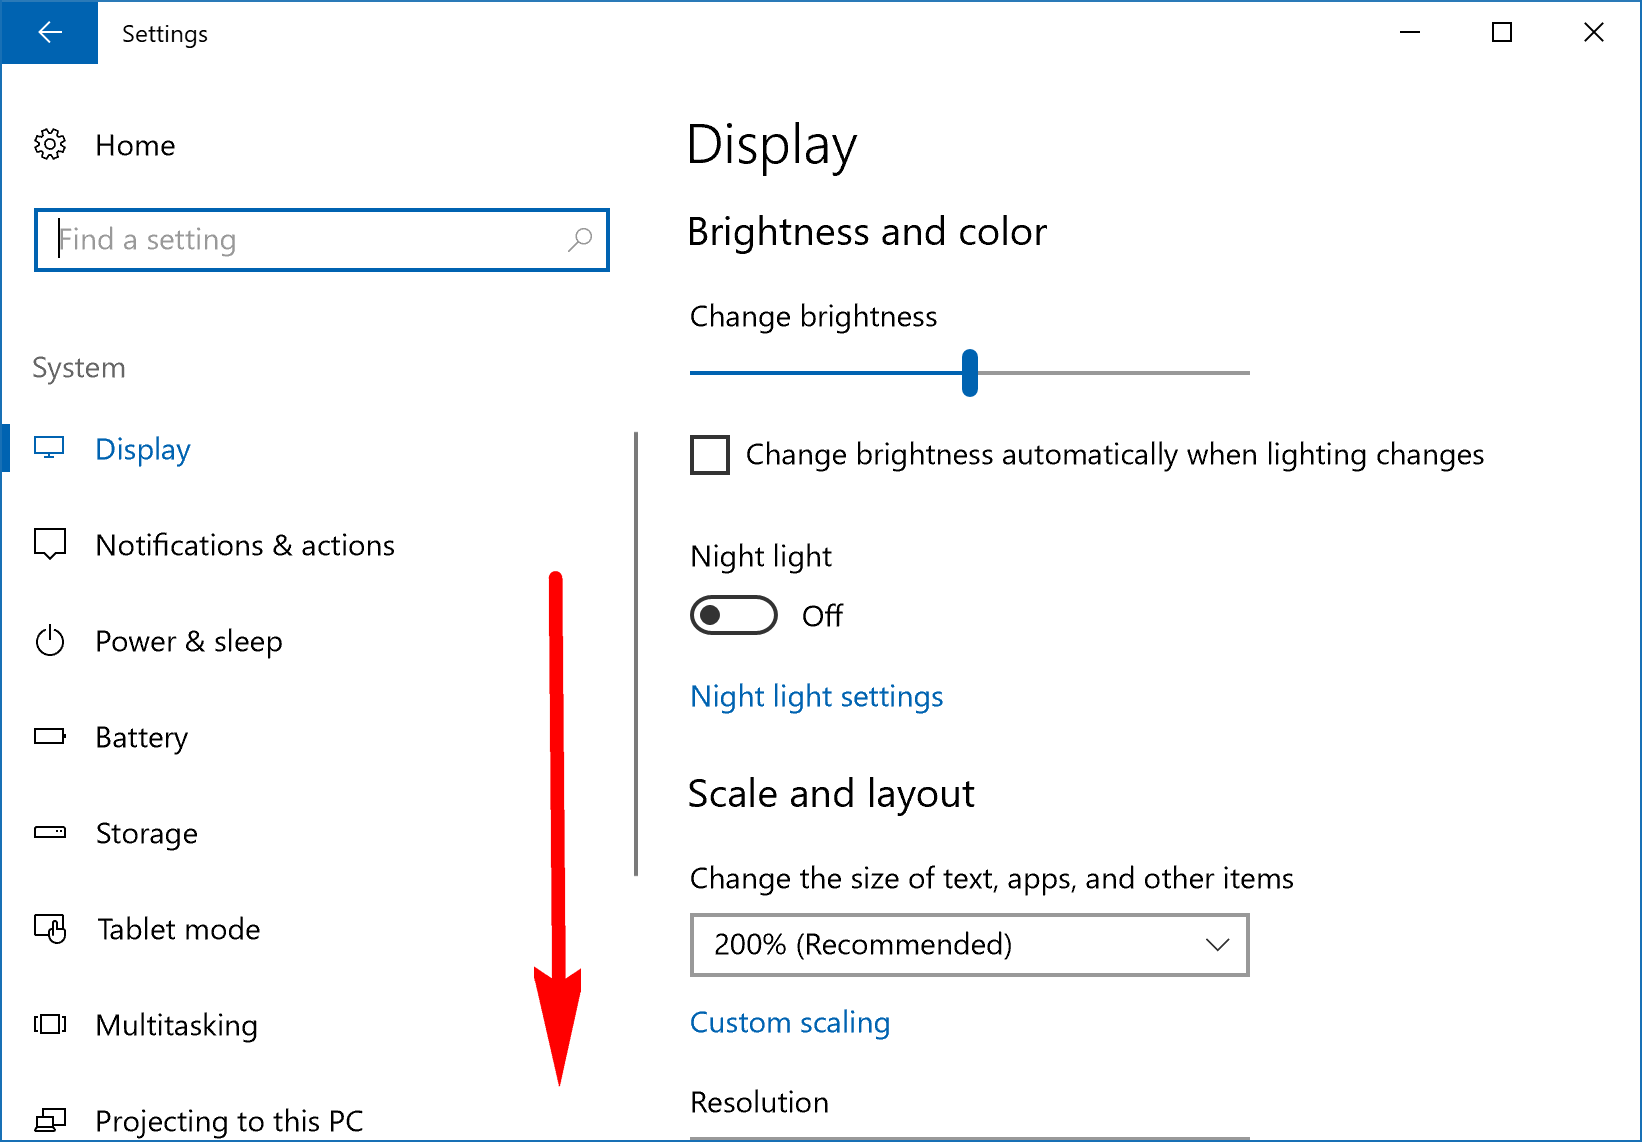
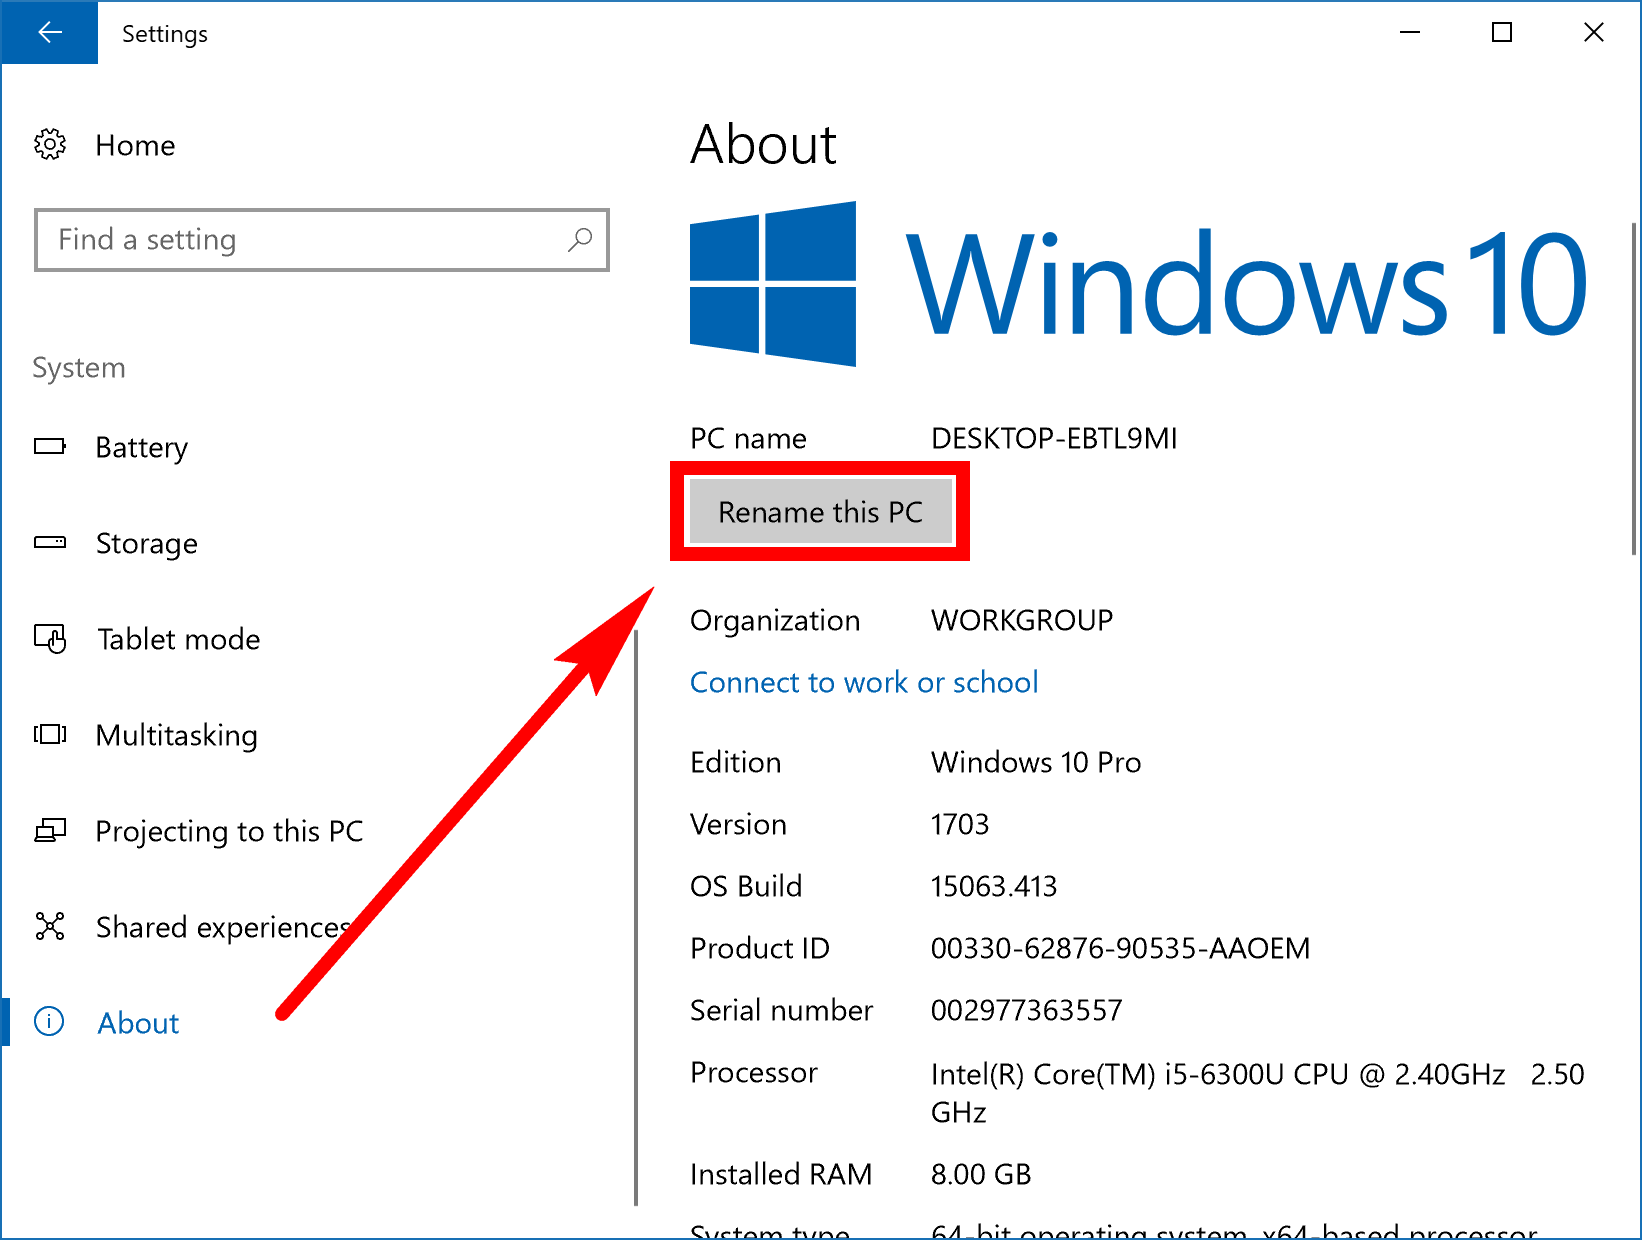
When you can see the “About” link, click on it. Now click on where it says “Rename this PC” in the right side pane.
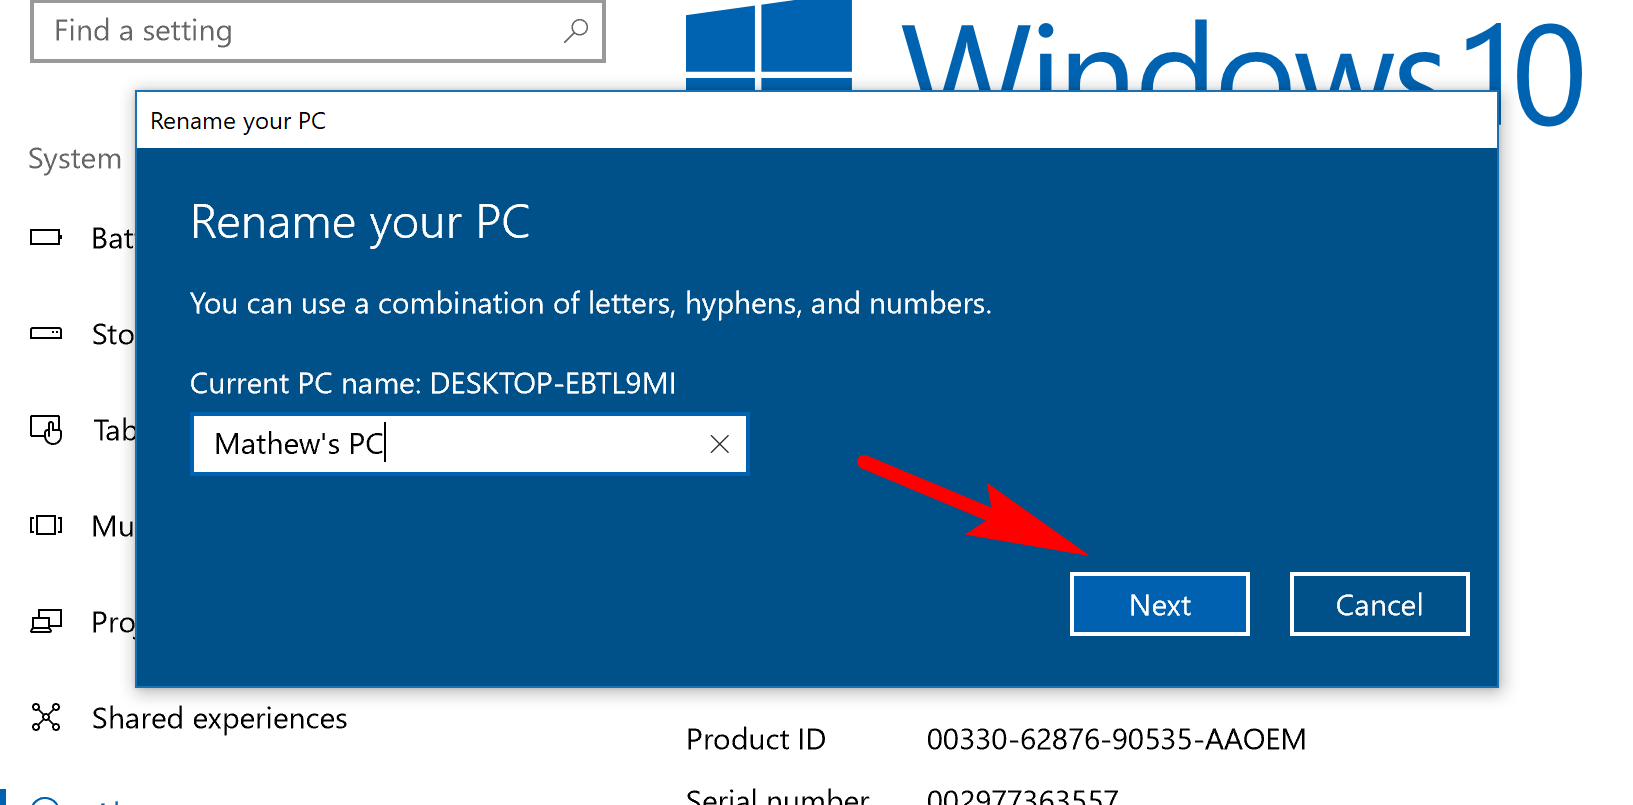
You’ll see an available field for you to enter a name into. Click on the “Next” button once you have chosen your name.
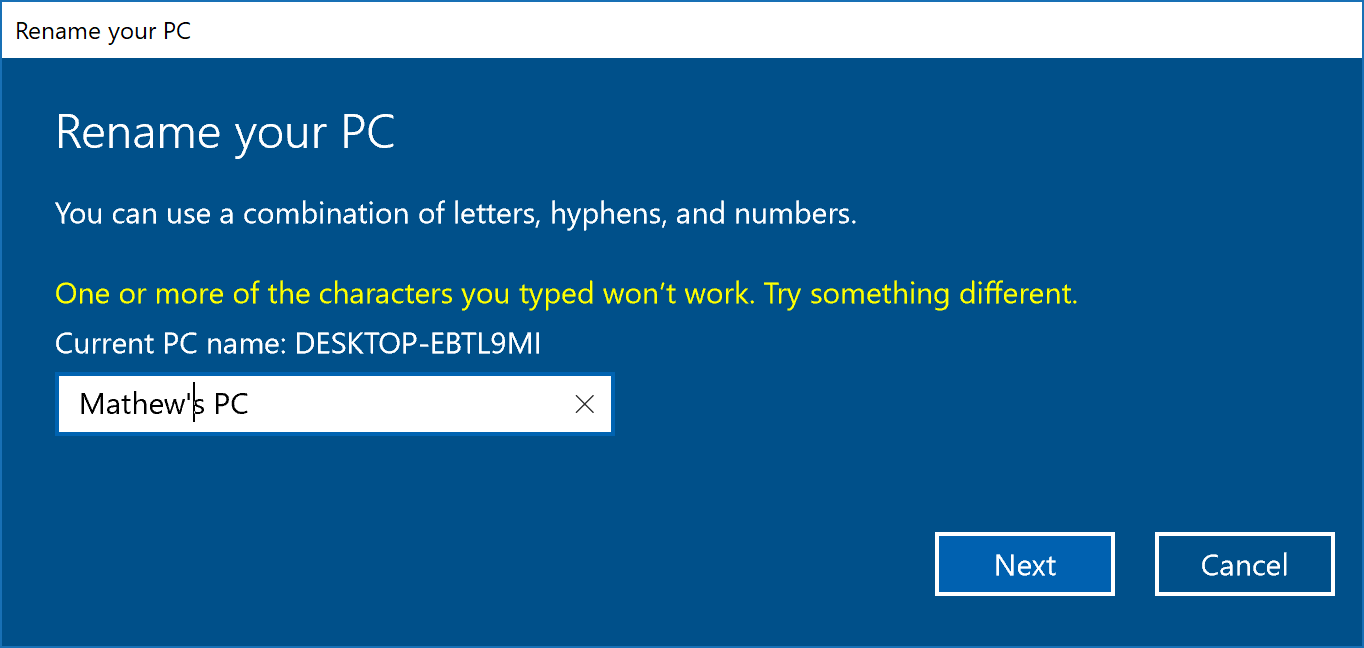
If you chose a name that includes an apostrophe or has a space between two words, you’ll need to fix those by removing them.
Once you get a message on the computer’s display letting you know that the computer’s name has been successfully changed, you’ll get another two buttons. One of those is for restarting the computer now, and the other is for not restarting the computer until later. You’ll need to reboot the computer before the name change can take effect. If you aren’t too fussed about when that name change occurs, then just put it off until later so you can continue with what you were doing.

How to Change Name of Computer in Windows 10 Using System Properties
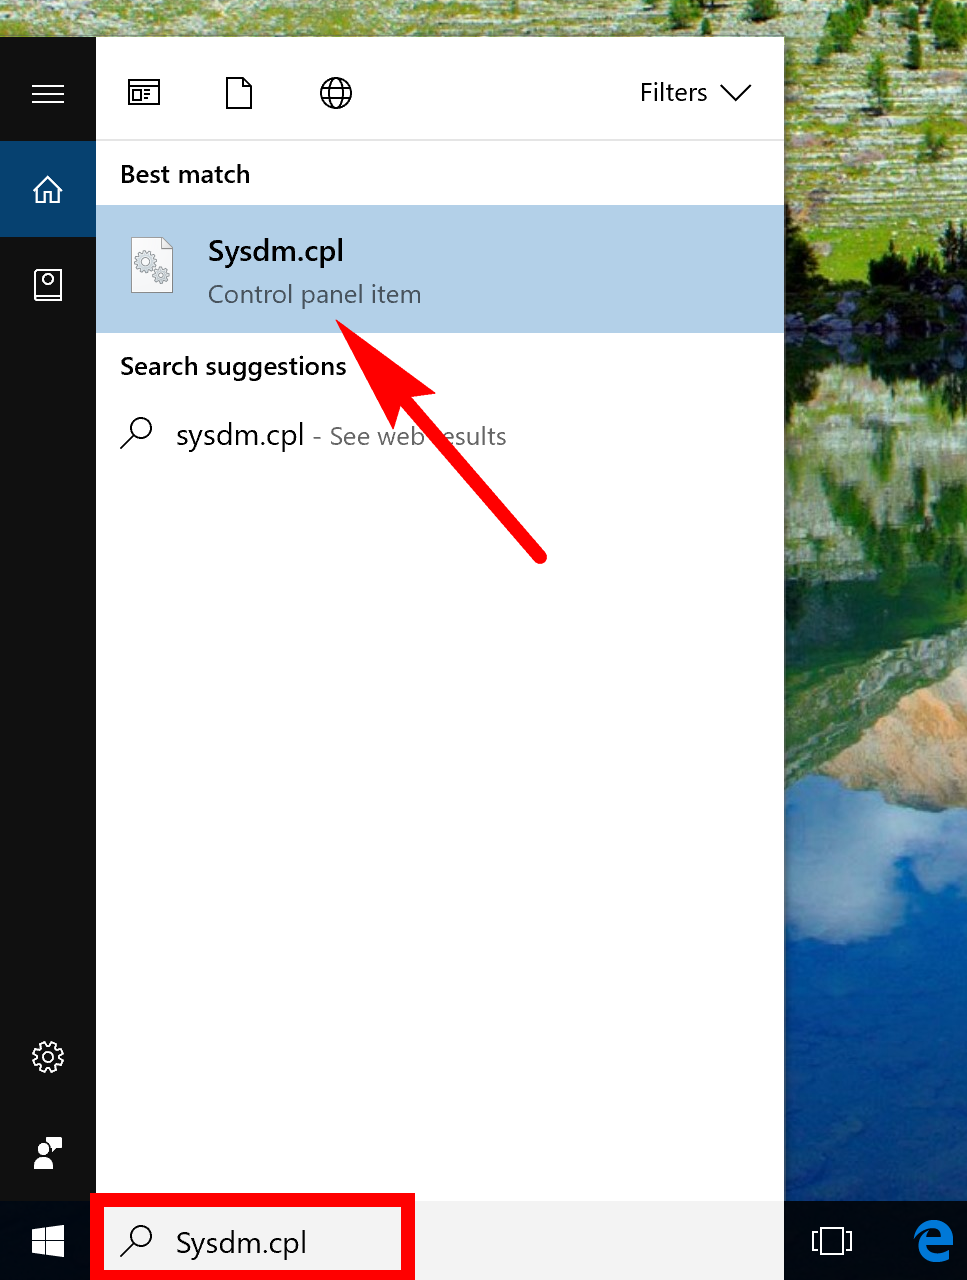
It’s also possible to change the name of your computer by getting access to the System Properties dialog box. This method has been around since Windows 7 and is still going strong today for Windows 7, Windows 8/8.1 and Windows 10. To get started, type “Sysdm.cpl” into the search field in the taskbar and then click on the “Sysdm.cpl Control panel item” that is available under the Best match section.
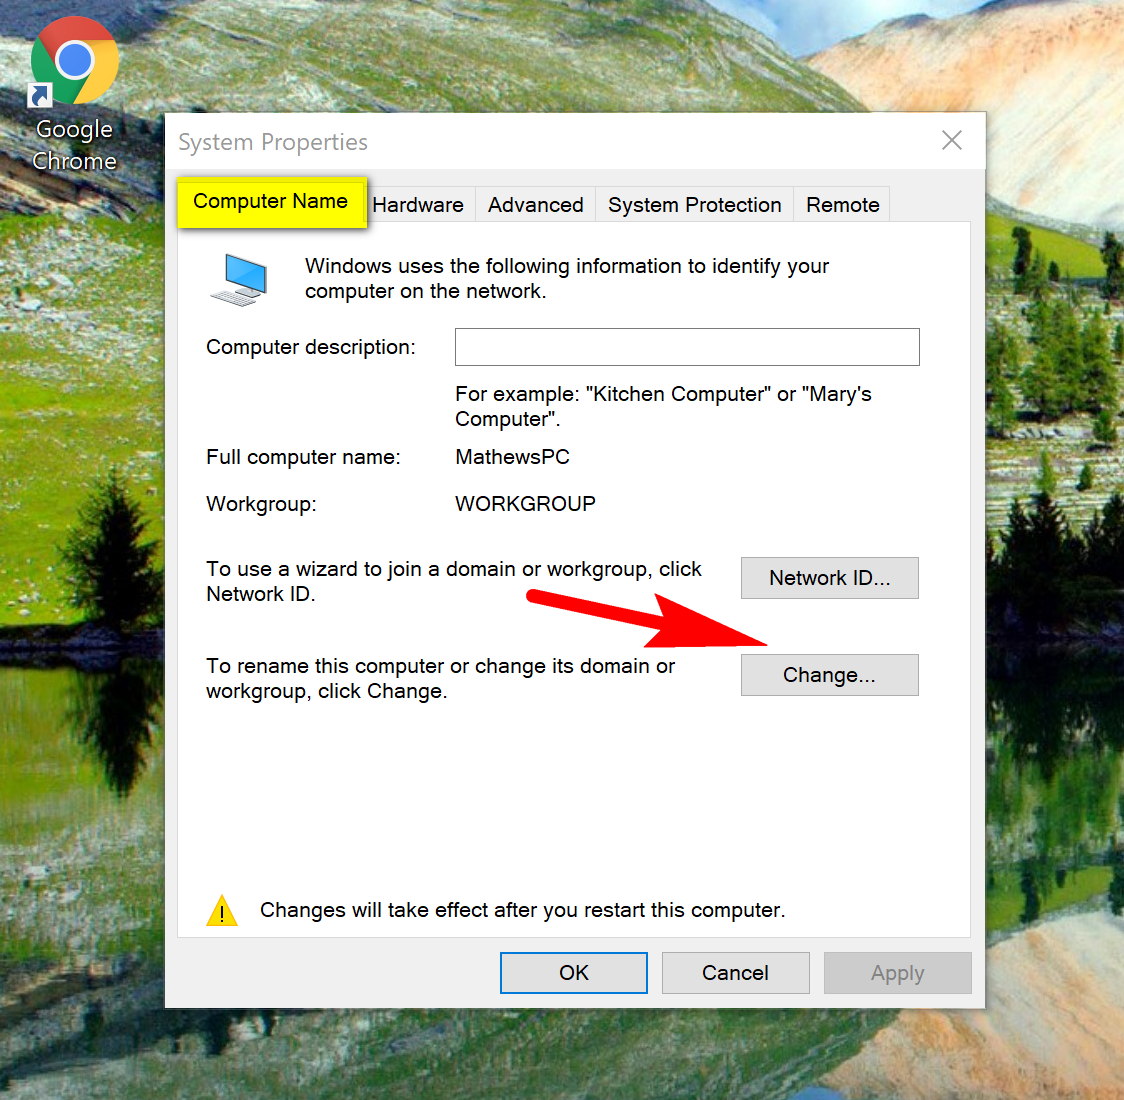
It opens up the System Properties box, and, more specifically, the Computer Name tab. Keep it on that same tab and then click on the “Change” button next to where it says “To rename this computer or change its domain to workgroup, click Change.”
Enter the name you want to have the computer known as in the available field directly beneath where it says “Computer name.” Once the name has been entered, the “OK” button will no longer be grayed out, and you can click on it. Do that now to confirm the name change and close the System Properties dialog box.

Changing the name of your computer doesn’t have much importance to anything relating to the operating system. There are times when you might need to identify the computer in question, and those are the times when the unique name comes in handy, but those times are only related to you personally, and thus the name doesn’t have to be a unique name out of all the computers running Windows 10 in the world. You can change the name to anything that you like, and that makes sense to you personally.
You might also be interested in:
- How to Repair Windows 10 Image with DISM
- Microsoft Garage Mouse without Borders for Windows 10
- How to Turn On/Off System Icons on Taskbar in Windows 10
You can subscribe to our RSS, follow us on Twitter or like our Facebook page to keep on consuming more tech.