Many of you are likely using the Finder’s search feature to search for files on your Mac. Although Spotlight brings up usually anything you want with its quick search features, Finder is also a great way to search for files on a Mac.
One of the things that Finder does when you search using it is it searches your entire Mac for the files you are looking for. While that is a good thing it does and there is no harm in it, some of you may prefer if Finder just searched the folder you wanted it to. Maybe you know the folder where the files you want are located, but you simply can’t find them, and you want for Finder to only search that particular folder for your files. In such cases, you can direct Finder to do that for you.
However, if you happen to do that a lot, you will want to set that as the default location for searching files in the Finder app. The following guide teaches you just that. So, follow it, and you should be able to set a default location for Finder searches on your Mac.
Changing the Default Search Location for Finder Searches on a Mac
To do the task, you are going to use the Finder app itself as it allows you to customize how the search feature works.
First of all, get yourself inside a Finder window on your Mac. There are multiple ways to do it, and the easiest one is to just go to your desktop, and you should be inside a Finder window. Also, if a folder is open on your Mac and you have your focus there, you are already inside a Finder window.
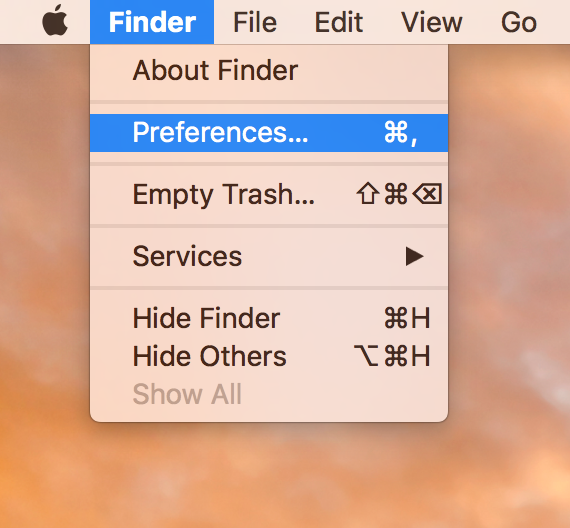
Once you are inside Finder, click on the “Finder” menu at the top and then select the option that says “Preferences.” The option will take you to the preferences panel for the Finder app on your Mac. That panel is where you can customize how Finder works on your Mac.
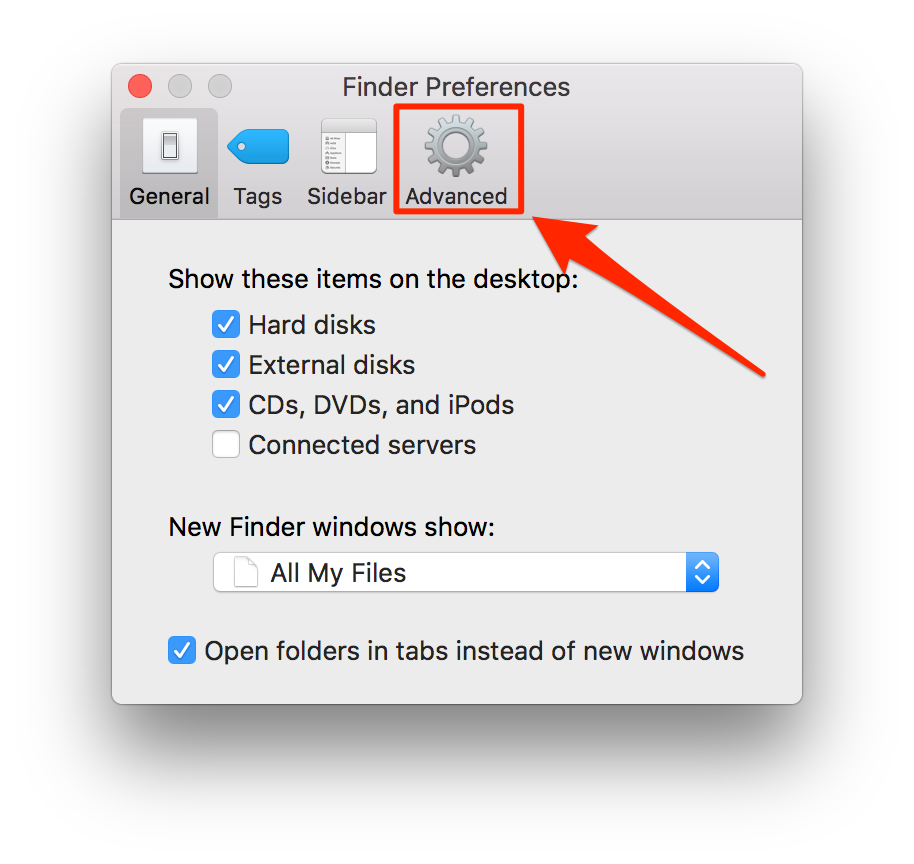
When the preferences panel opens, you should find yourself in the General tab. Well, that is not where the option we want to change is located. So, click on the tab that says “Advanced” at the top, and it will change your tab from General to Advanced.
In the advanced tab, you will find a couple of options that you can change for the Finder app. The option that we want to change is called “When performing a search.” There is a drop-down menu beneath the option in which there are three options that you can choose from.
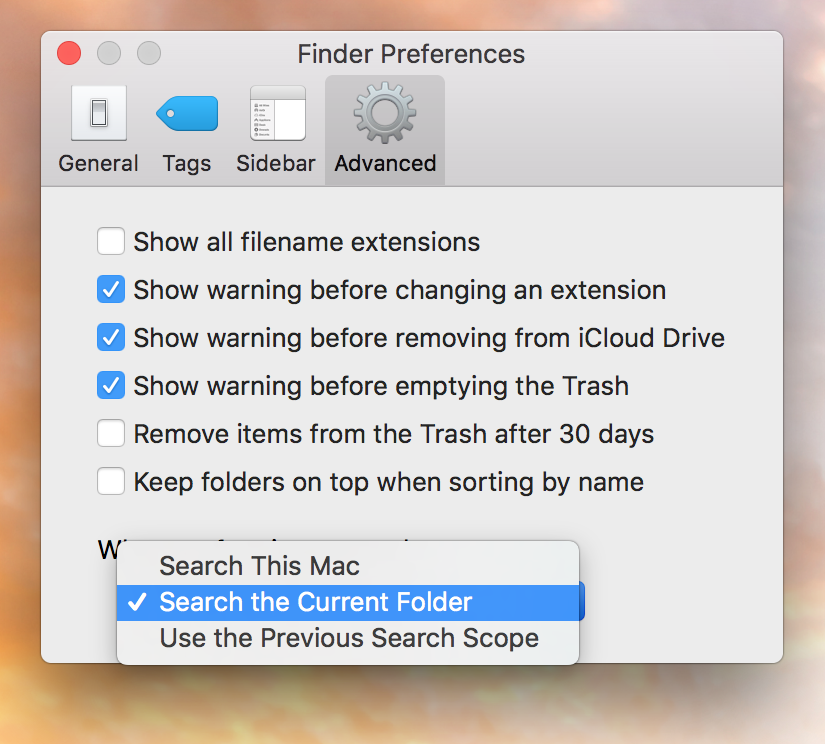
Using this drop-down menu, you can change what location or folder to be searched by default when you initiate a Finder search. If you choose “Search This Mac,” the whole of your Mac will be searched when you perform a search using the Finder app.
If you select “Search the Current Folder,” the current folder that you have opened using Finder will be searched. You are free to choose any option that you like.
Once you have selected an option, the changes will quickly be made to your system, and you do not have to reboot your Mac for the changes to take effect. The changes are real-time, and you can now begin to search your Mac using the Finder search feature, and your selected location will now be searched when you search for something.
So, that was how you could change the default search location in Finder on your Mac.
You might also be interested in:
- How to Delete Contacts in Bulk on Mac and iCloud
- How to Show Mac Information on Login Screen of Mac
- How to Enable Night Mode in macOS Sierra
- How to Password Protect a PDF File on Mac
- How to Stop Apps Automatically Updating in Android
You can subscribe to our RSS, follow us on Twitter or like our Facebook page to keep on consuming more tech.