I’ve been using file sharing over a network for my small company, and we have put in quite a bit of effort setting up all of our different permissions. As the administrator who is in charge of everyone’s roles, I would like to back up the network shares and permissions that have been created. Resolution:
Windows 10 allows you to share files and folders over a network. This means you can share those files and folders with other users who will then have the necessary permissions to view the files and folders that you have chosen to share. In some earlier versions of Windows, Microsoft made some pretty drastic changes which include the complete removal of the Homegroups; however, the basic principle behind sharing files and folders still exists for everyone else.
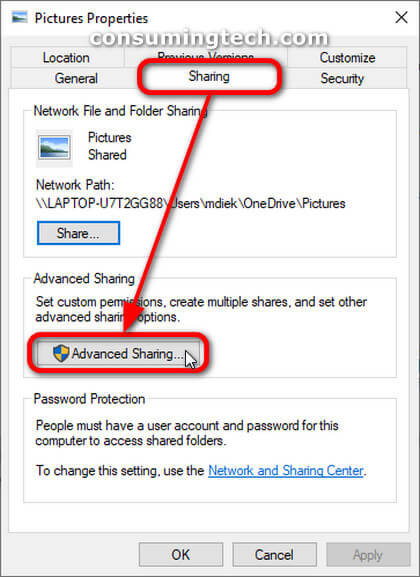
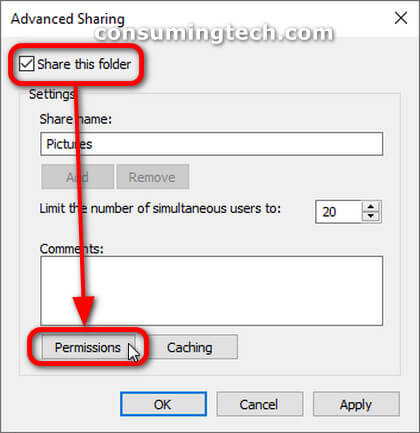
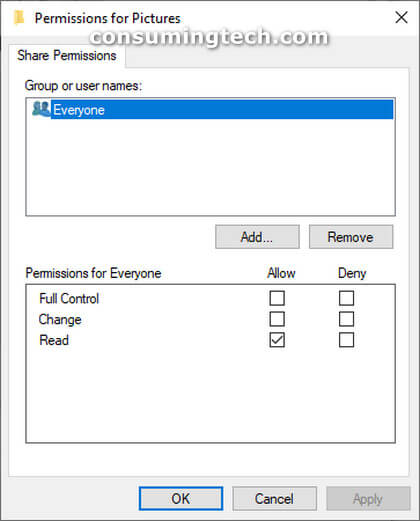
The backups of your network shares and permissions will not include the shared files or folders themselves. Rather, you get the existing share names and the permissions that have been assigned to those shares. To make changes to your shares, you can navigate to the properties of the file or folder and then open the Advanced Sharing section, as shown below.
An example of the network shares and permissions in Windows 10:
The following tutorial demonstrates how to backup and restore network shares and permissions when you are using a version of the Windows 10 operating system.
Part One: How to Backup Network Shares and Permissions in Windows 10
There are two ways in which you can backup network shares and permissions: one is directing from the elevated Command Prompt window, and the other is via the Registry Editor app. Here are both methods:
Method One: How to Backup Network Shares and Permissions via Command Prompt
Note: You need to be signed in using an administrator’s account for you to be able to backup and restore network shares and permissions.
1. Open the elevated Command Prompt window. This tutorial shows you all the different ways in which you can open the elevated Command prompt window when you are using a version of the Windows 10 operating system: How to Open Elevated Command Prompt in Windows 10 [Tutorial]
2. Type the following command into the command line within the elevated Command Prompt window, and then press the Enter key on your keyboard to execute it: (Click to enlarge the screenshot below.)
REG EXPORT HKLM\SYSTEM\CurrentControlSet\Services\LanmanServer\Shares “%UserProfile%\Desktop\MyNetworkShares.reg”
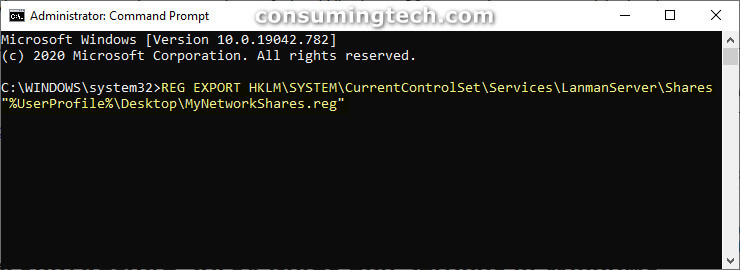
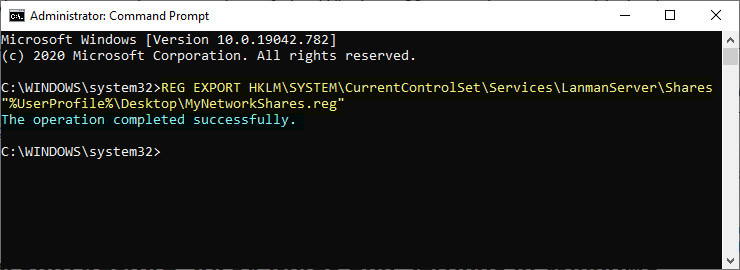
3. You will now find the MyNetworkShares.reg file on your desktop which has just been created by the Command Prompt command you entered. This MyNetworkShares.reg file is your backup.
You can now close the elevated Command Prompt window and continue using the computer.
Method Two: Backup Network Shares and Permissions via Registry Editor
Note: You need to be signed in using an administrator’s account for you to be able to backup and restore network shares and permissions.
1. Open the Registry Editor application. This tutorial shows you all the different ways in which you can open the Registry Editor app when you are using a version of the Windows 10 operating system: How to Open and Use Registry Editor in Windows 10 [Tutorial]
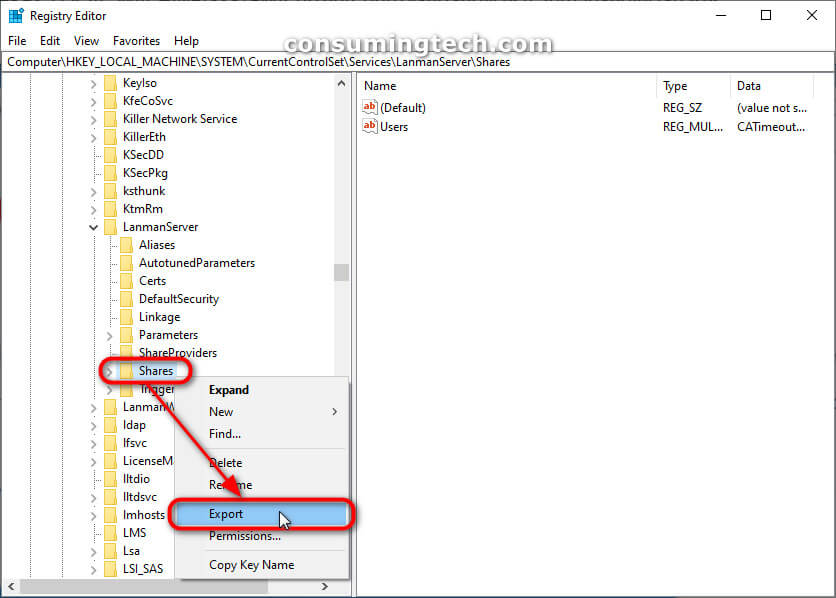
2. Using the Registry Editor’s left pane, navigate your way through to the following key:
HKEY_LOCAL_MACHINE\SYSTEM\CurrentControlSet\Services\LanmanServer\Shares
3. Right-click on the Shares key, and then click on Export. (Click to enlarge the screenshot below.)
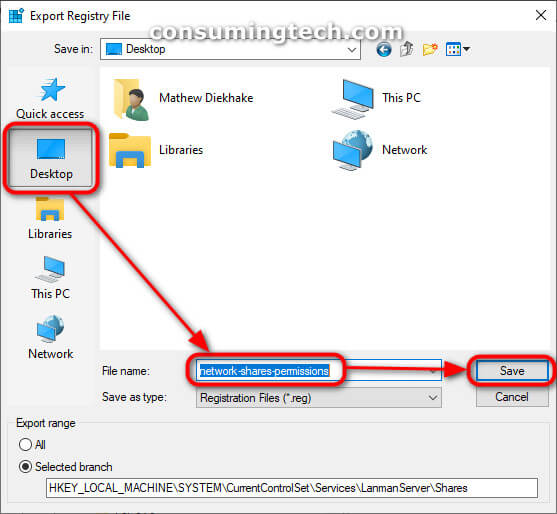
4. Choose the location on the computer you wish to save the file and then click on the Save button. If you are unfamiliar with File Explorer and the Windows operating system in general, you can choose to save it to the desktop, and then the file will be available when you minimize or close your web browser. (Click to enlarge the screenshot below.)
You can now close the Registry Editor window and continue using the computer.
Part Two: Restore Network Shares and Permissions in Windows 10
1. Double-click on the Windows Registry file from backup methods one or two listed above that you used to back up the network shares and permissions, and merge the file with your operating system.
2. Click on Run if Windows needs to run the file.
3. If you are prompted by User Account Control (UAC), click on the Yes button to continue.
4. Lastly, navigate to Start > Power menu > Shut down or Restart for the changes to be applied.
That’s all.
Related Tutorials
- How to Exclude Folders from File History in Windows 10 [Tutorial]
- How to Change Windows Backup Settings in Window 10 [Tutorial]
- How to Backup and Restore Sticky Notes in Windows 10 [Tutorial]
- How to Backup and Restore with Macrium Reflect [Tutorial]
- How to Backup/Restore Sticky Notes App Settings in Windows 10 [Tutorial]
- How to Reset Sticky Notes in Windows 10 from System Settings [Tutorial]
- How to Automatically Create System Restore Point on Schedule in Windows 10 [Tutorial]