If you only use your Windows 10 operating system at home, then you might not know anything about Group Policies. If your Windows 10 computer happens to be at work, then the likelihood if you or your administrator knowing about a Group Policy.
The Local Group Policy Editor, otherwise known as just “gpedit.msc” for short, is a Microsoft Management Console (MMC) snap-in to get access to the Computer Configuration and User Configuration settings.
There are typically two types of configurations within a Group Policy: Computer Configuration and User Configuration. You’ll find both of them available from the left side pane for you to manage after you’ve opened the Local Group Policy Editor.
An administrator of the system can use the Computer Configuration to set different policies based on the computers no matter what person ends up sitting behind that computer. On the other hand, an administrator can also use User Configuration which is for setting different policies based on the users no matter what computer they are logging on to. That’s why the Group Policy is so popular for businesses and anything relying on networks.
Both the computer and Group Policy are automatically updated in the background every 90 minutes. In addition to having the timed updates, the Group Policy is updated every time the computer reboots.
Note: You’ll need to be using a Windows 10 Pro, Education or Enterprise edition of Windows 10 for this guide to work. You can’t make policy changes in the Local Group Policy Editor using the Windows 10 Home. You can upgrade from Windows 10 Home to Windows 10 Pro by heading to the Settings application if you want to be able to make changes to group policies.
How to Apply Local Group Policy to Non-Administrators in Windows 10
You can apply the Local Group Policies to administrators in Windows 10 by using the Group Policy Object Editor. To get started, open the Run dialog box by pressing the Windows logo + R keys on your keyboard and then type “MMC” and click on the “OK” button. You’ve now opened the Microsoft Management Console.
You’ll probably get prompted by User Account Control. Just click or tap on the “Yes” button when that happens.
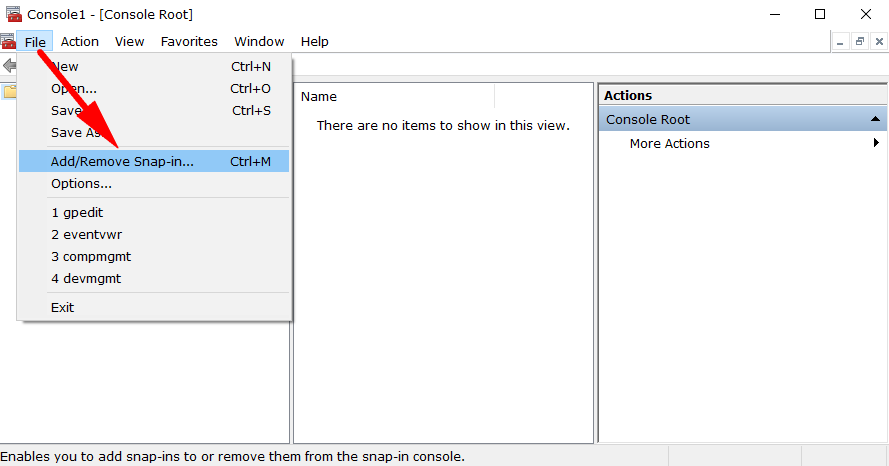
With the Microsoft management Console open (it just says Console in the top left corner of the window) click on the “File” and then the “Add/Remove Snap-in from the menu.
Click on the “Group Policy Object Editor” entry just once so that it is highlighted and then click on the “Add” button.

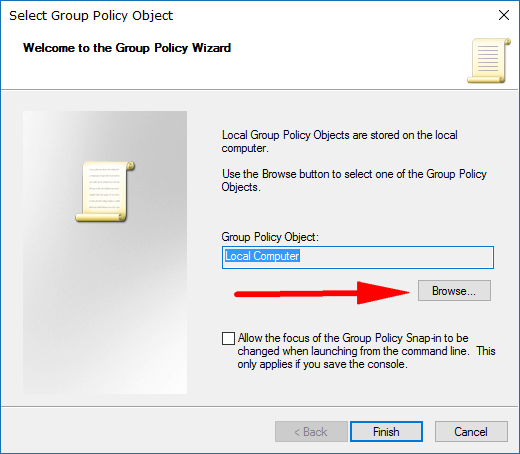
Click on the “Browse” button.
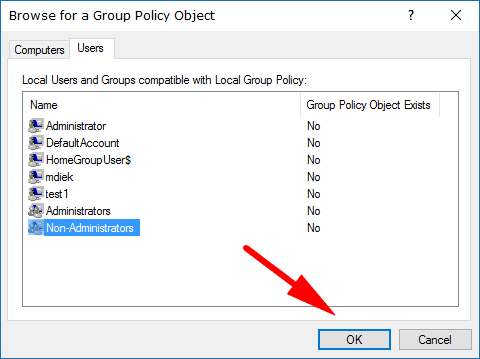
Select the “Non-administrators” from the list of users and then click on the “OK” button at the bottom of the window.
Click on the “Finish” button and close the Group Policy Wizard window.

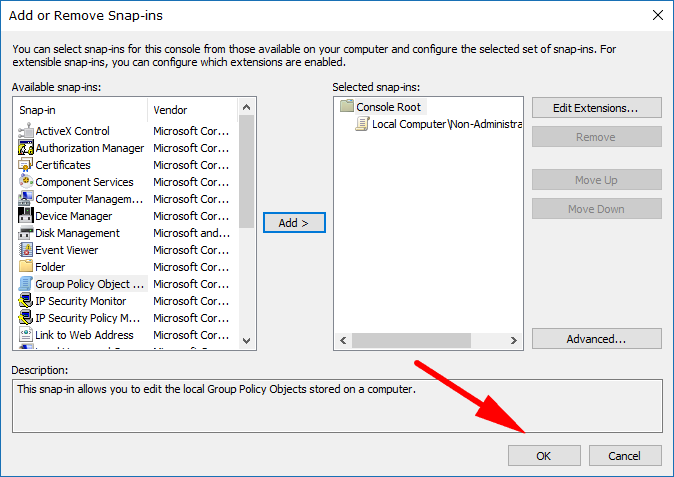
You’ll still have the snap-ins window open. You can close that now as well by clicking on the “OK” button.
Leave the Microsoft management console open and click on the “File” and then “Save As” link from the menu so you can save the new group.
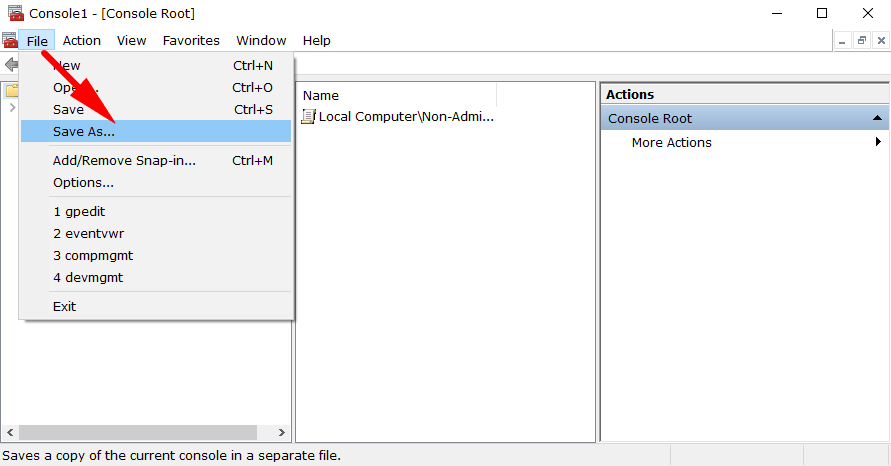
The file will automatically get saved as a .msc file, but you’ll want to name the file something along the lines of “Local Group Policies for non-Administrators” so that you can identify and use it later. Click on the “Save” button when you’ve finished giving the file a name. You can save the file to any location that suits you, including somewhere in File Explorer that you might have set up or you could just use the desktop for now and drag it into the File Explorer at a later date.
You’ll need to open up this saved policy whenever you want to apply policies to the people who are part of the Non-administrators group.
You might also be interested in:
- How to Add/Remove Network in Navigation Pane of File Explorer in Windows 10
- How to Add/Remove “This PC” in Navigation Pane of File Explorer in Windows 10
- How to Add/Remove File Explorer Default Context Menu in Windows 10
- How to Enable/Disable Numerical Sorting in File Explorer in Windows 10
You can subscribe to our RSS, follow us on Twitter or like our Facebook page to keep on consuming more tech.