Windows 10 comes with a default avatar for all users. As far as default avatars go, this one isn’t too bad to look at, being just white lines representing the outline of a human body and then a gray background to go with it.
Windows 10’s default profile picture is better than some other famous ones, such as Twitter’s egg or more current blob human shape. But for many, the immediate idea will be to change it to something of their choice, be it a picture of themselves or something they like the idea of representing them. You can choose any image you can download from the internet, or that’s on your hard drive to replace the default profile image in Windows 10—that is unless your administrator has something to say about it.
Should an administrator choose, they can force the default user profile picture for all people who have accounts on the computer, effectively erasing any personal profile pictures that may have been uploaded by non-administrators.
Here’s what you need to apply a default user picture for all users when you’re using a version of the Windows 10 operating system.
How to Apply Default User Picture for All Users in Windows 10
1. You can set a default user account profile picture for all users from the Registry Editor application.
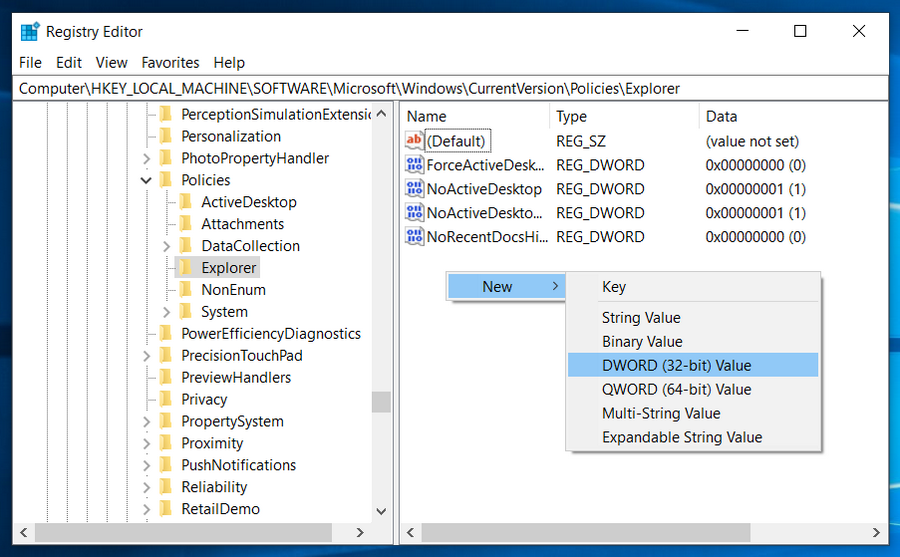
2. Get started by opening the Registry Editor app. And when you’ve got it open, use the left pane to expand the following keys: HKEY_LOCAL_MACHINE\SOFTWARE\Microsoft\Windows\CurrentVersion\Policies\Explorer
Note: You all should have that key already, but if you don’t you can create it so you have the same path.
3. Right-click in the right side of the Explorer pane and then create a new 32-bit DWORD value.
4. Call the new value that you’re creating “UseDefaultTile.” (You can always right-click on the value and choose to rename it if you missed your chance.)
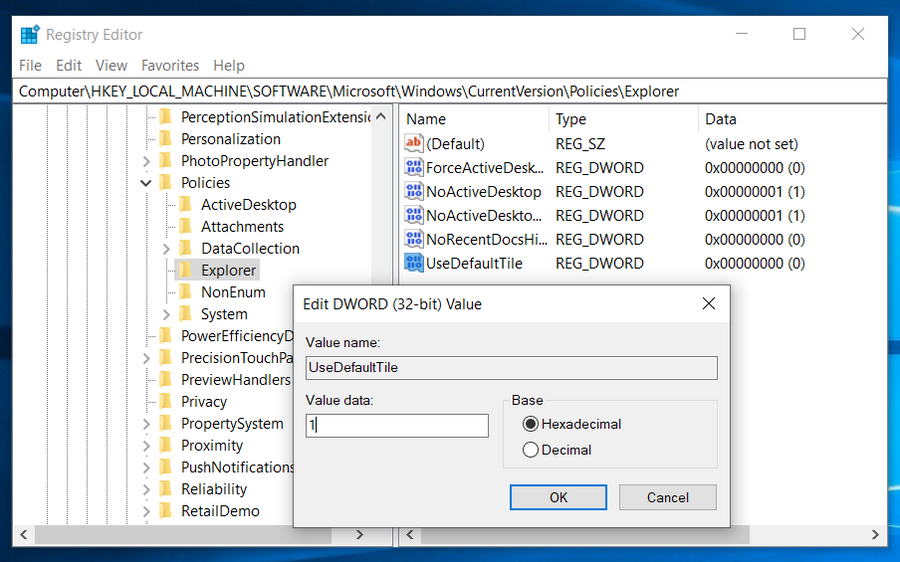
5. Restart the Windows 10 operating system for the changes to be able to take effect.
How to Apply Default User Picture Using Local Group Policy Editor
Windows 10 Pro users can also set the default user account picture from the Local Group Policy Editor if they prefer.
1. To do it this way, press the Windows logo + R keys to bring up the Run dialog and then type “gpedit.msc” and hit the “OK” button. The chance to make changes to the group policies from the Group Policy window is now available.
2. Using the left side pane, expand the following folders: Computer Configuration\Administrative Templates\Control Panel\User accounts
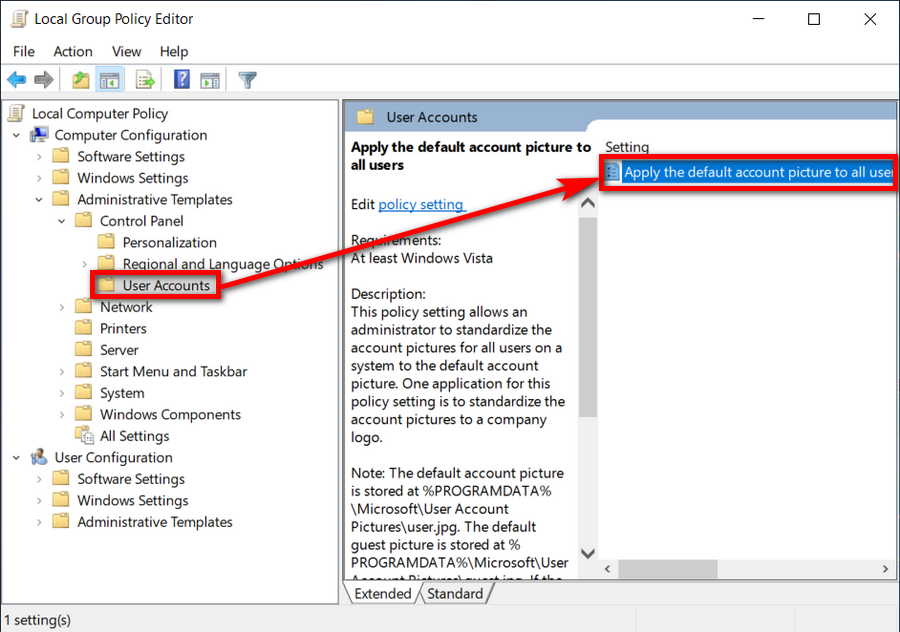
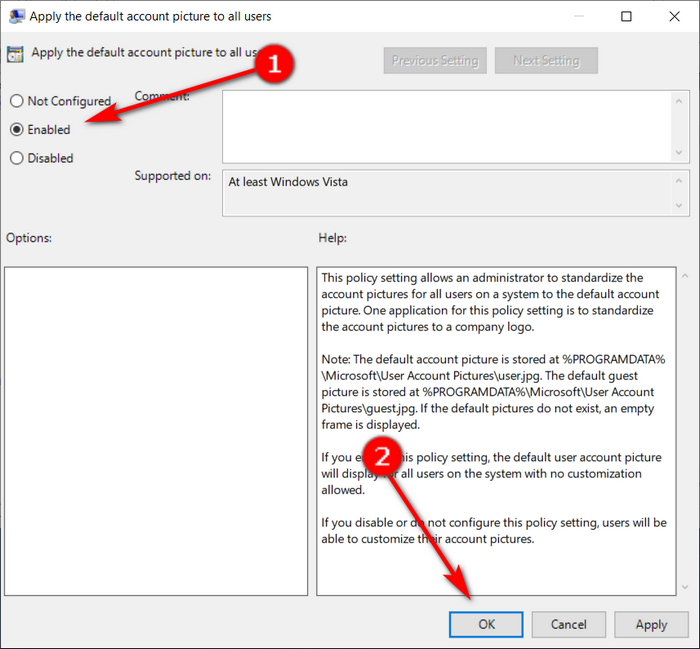
3. Enable the Apply the default account picture to all users Group Policy and then click on the “OK” button at the bottom of the window to apply the changes and close the window.
You can now close the Local Group Policy Editor.
That’s it.
Related Tutorials
- Reset Password of Local Account or Microsoft Account in Windows 10
- How to Add/Remove PIN From Your Account in Windows 10
- How to Switch User Accounts in Windows 10
- How to Add and Manage New User Accounts in Windows 10
- How to Change Account Type in Windows 10
- How to Change Your Account Picture in Windows 10
- How to Turn On/Off Sync Settings for Microsoft Account in Windows 10
- How to Change Account Username in Windows 10 When Signed In to Microsoft Account or Local Account