When you are watching a movie that is in the language you speak, you usually don’t require subtitles as you can just understand everything the characters say in the film. However, when you are watching a video or a movie that is not in the language you speak, you do need the subtitles so you can understand what the characters are saying in that movie.
More often than not, when you download a movie from the Internet, the subtitles for this film do not come embedded with it. That means you can play the movie using any of the media players on your Mac, but you won’t see the subtitles as they just don’t exist.

There are many websites from where you can download the subtitles for any of your movies to help you with this problem. That way you are getting a movie from one source, and you are getting its subtitles from another source. It’s all fine until at this stage, and then you need to have the understanding of how to use a subtitle file with a movie. That’s where most users get stuck.
A subtitle file can’t be launched by just double-clicking on it, and the video file will not open it either. It’s you who has to mix them together so you can watch the movie as well as subtitles on the screen of your Mac.
There are two ways to use a subtitle file with a movie, and I am going to show you both of those ways in the following guide. Both the ways do the same task of adding subtitles to a video file on a Mac. So, here you go folks:
Adding Subtitles to a Movie by Renaming the File
What most media players do is they look for the subtitle file in the directory where the video you’re currently playing is located. So, for example, if you have a video file called video.mp4 located on your desktop, then the media player looks for the subtitle file named video.srt on your desktop. If it finds it, it loads it up for you.
In case it fails to find the subtitle file (it happens when the name of the subtitle file is different from the video file name), it starts playing the video without the subtitles although those exist in the same directory but with a different name. So, what you can do is you can rename the subtitle file and have it use the name of the video file. That should get the job done for you.
Here’s how to do that:
1. Copy both the video file and the .srt subtitle file in the same directory. If they are in different directories, this procedure won’t work.
2. Right-click on the subtitle file and select “Rename” to rename the file.
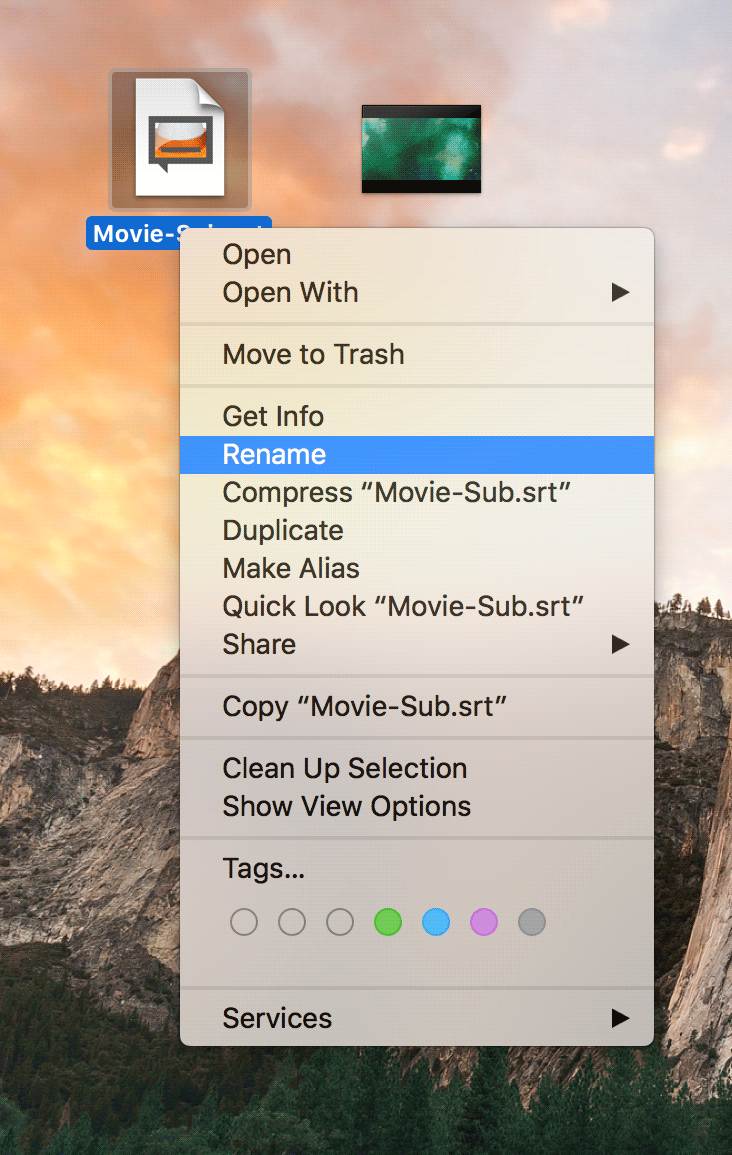
3. As for the new name of the file, enter the exact name of the video file leaving out the format at the end of the name. Don’t include formats such as AVI, MP4, MKV, etc. The subtitle file must have SRT as its extension.

4. Once you have renamed the file, open the video file using a media player on your Mac, and you should be able to see the subtitles loaded up in.
So, that was one way to add subtitles to a movie on your Mac.
Adding Subtitles to a Movie Using VLC Media Player
If you don’t like the method given above of renaming the file, then you can use the VLC Media Player that does the job of adding subtitles to a movie but without requiring you to rename any files. Here’s how:
Head over to the VLC Media Player website and download and install the app on your Mac if you haven’t already done so.
When the app has been installed, click on Launchpad in the Dock and search for and click on “VLC” and the app launches.

When the app launches, you will see the following interface that asks you to drop a file onto it, and it will play it for you. What you need to do here is click on the option that says “Open media” to open the movie you want to play with subtitles.

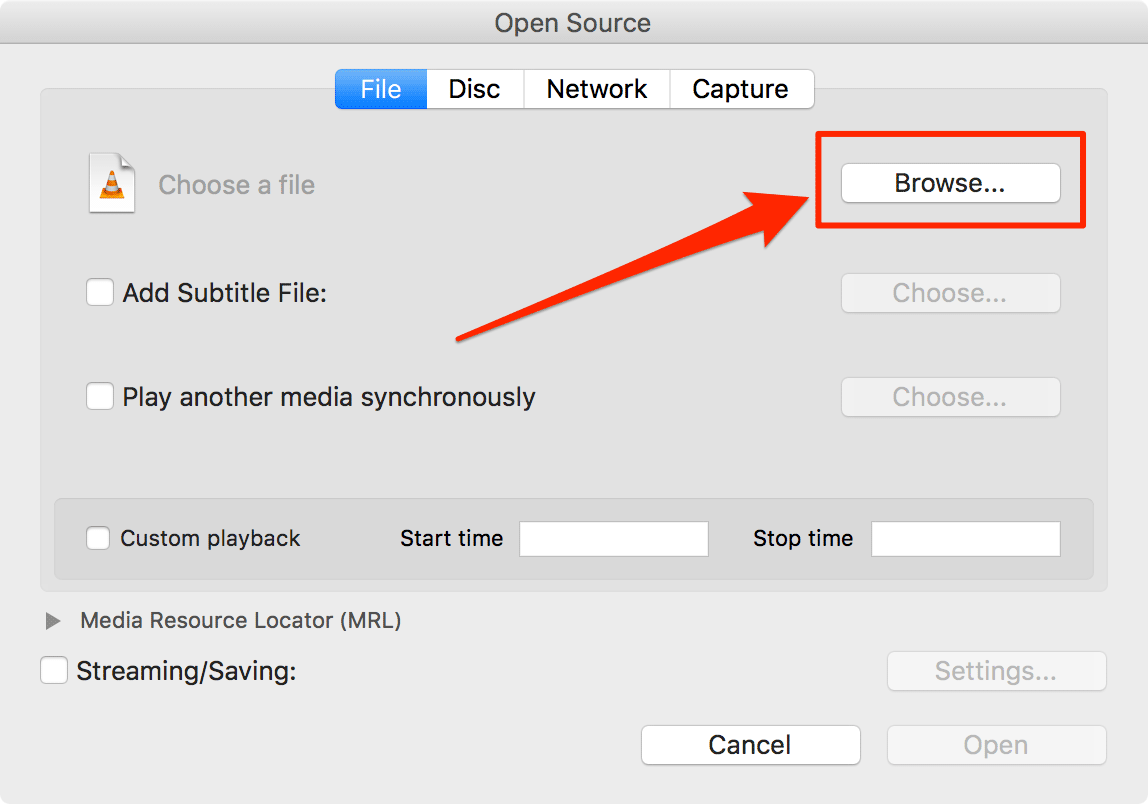
On the following screen, you can choose the media file you wish to play, and you also have the option to pick a subtitle file that should play along.
First, browse for the media file by clicking on the button that says “Browse” as shown below.
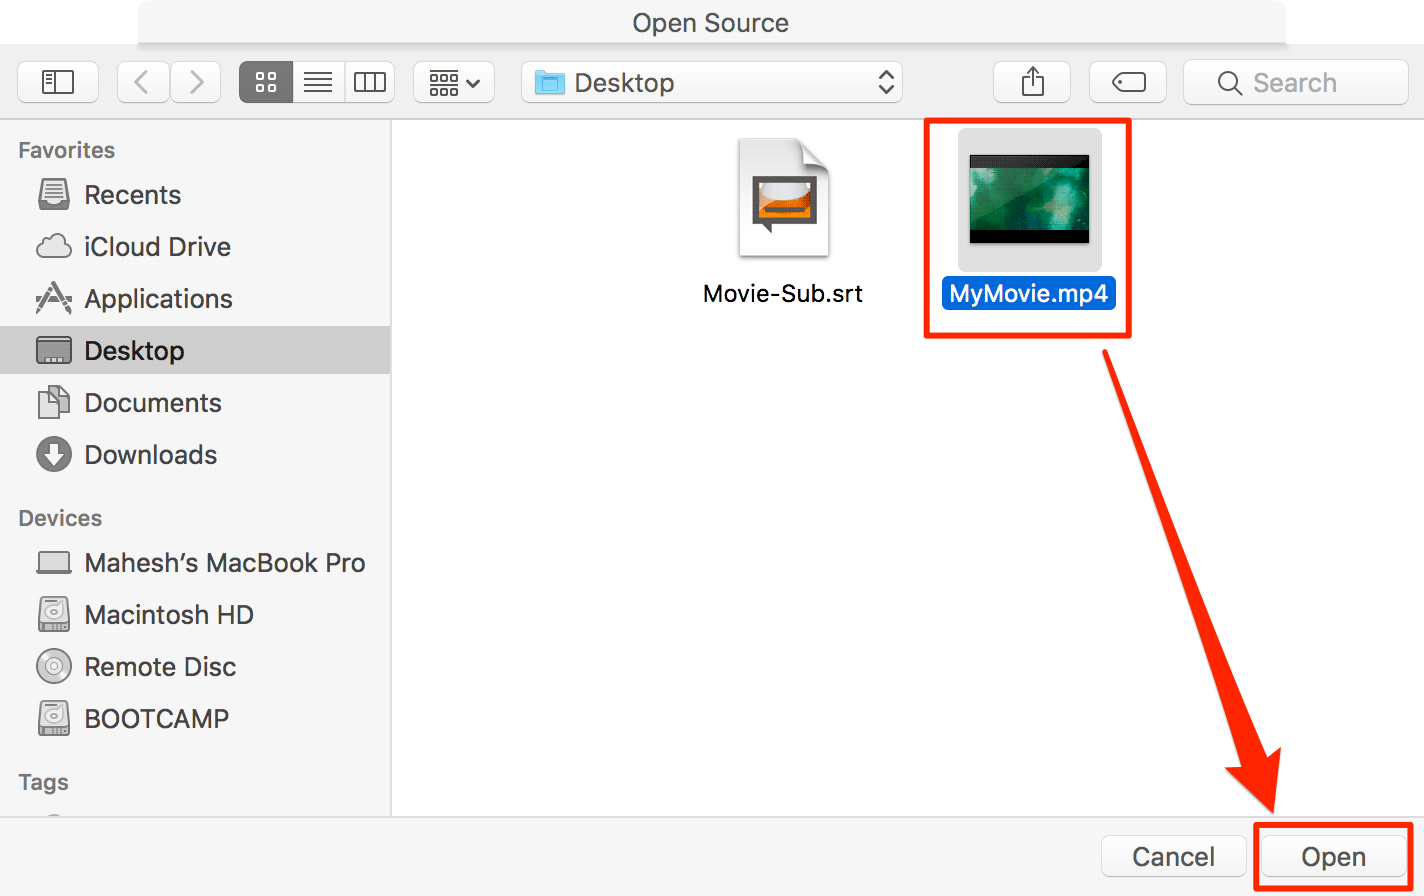
Navigate to the folder on your storage where the movie you want to play is located. Once you have found it, click on it to select it and then click on “Open” to open it with VLC.
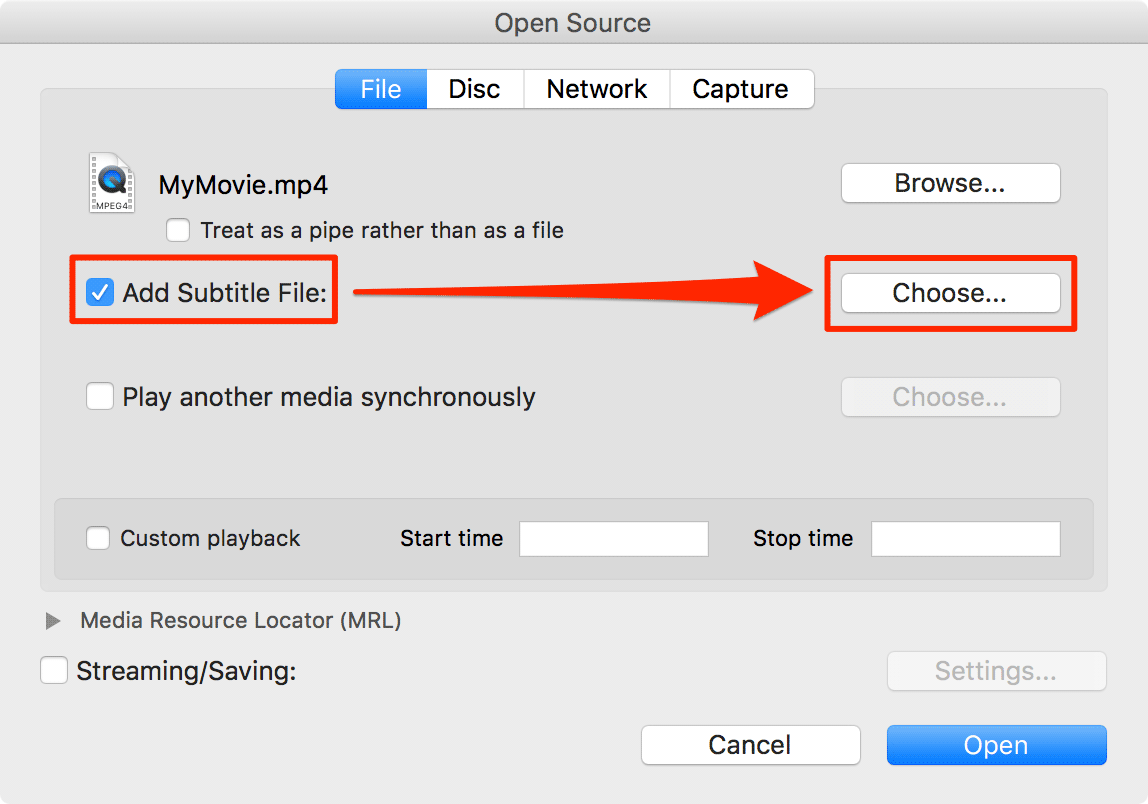
After selecting the media file, you are taken back to the open media file panel. Now, checkmark the box that says “Add Subtitle File” which will allow you to load a subtitle file to play along with the video file.
After checkmarking the box, click on “Choose” to choose the subtitle file on your Mac.
Click on “Browse” on the screen that follows to browse for the subtitle file on your Mac.
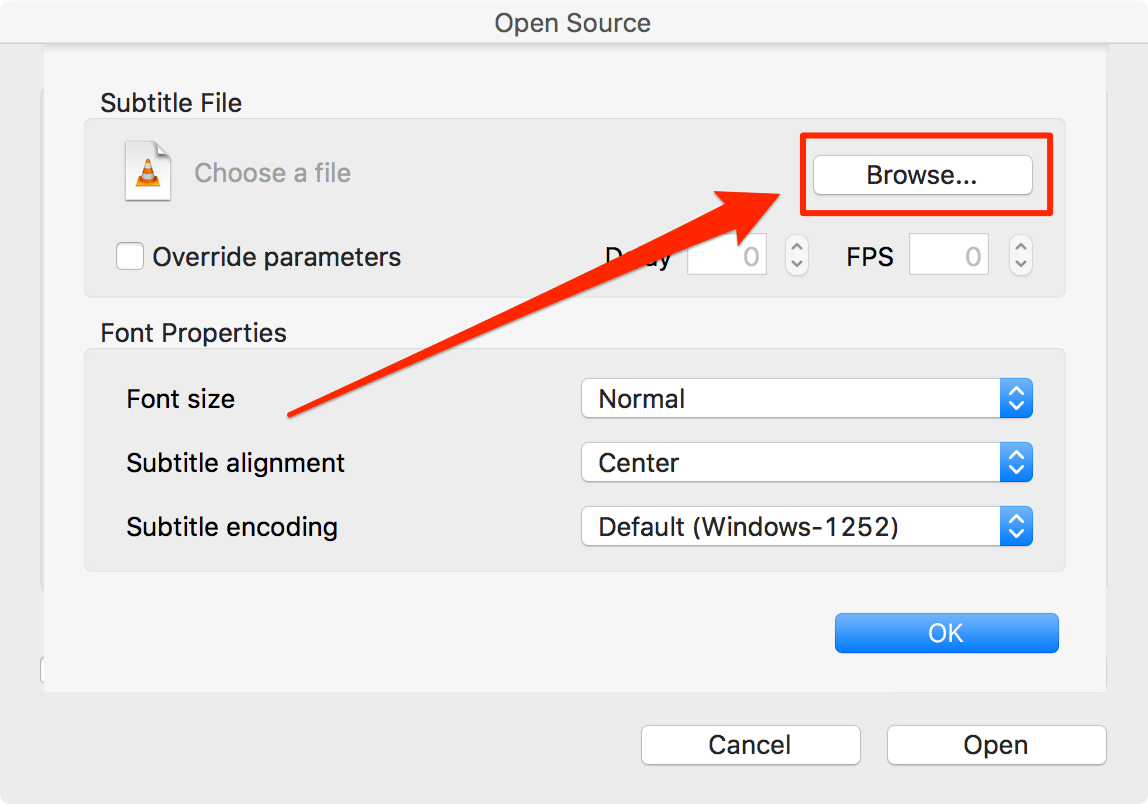
Find the subtitle file wherever it is located on your Mac and click on it and then click on “Open” to open it with VLC.

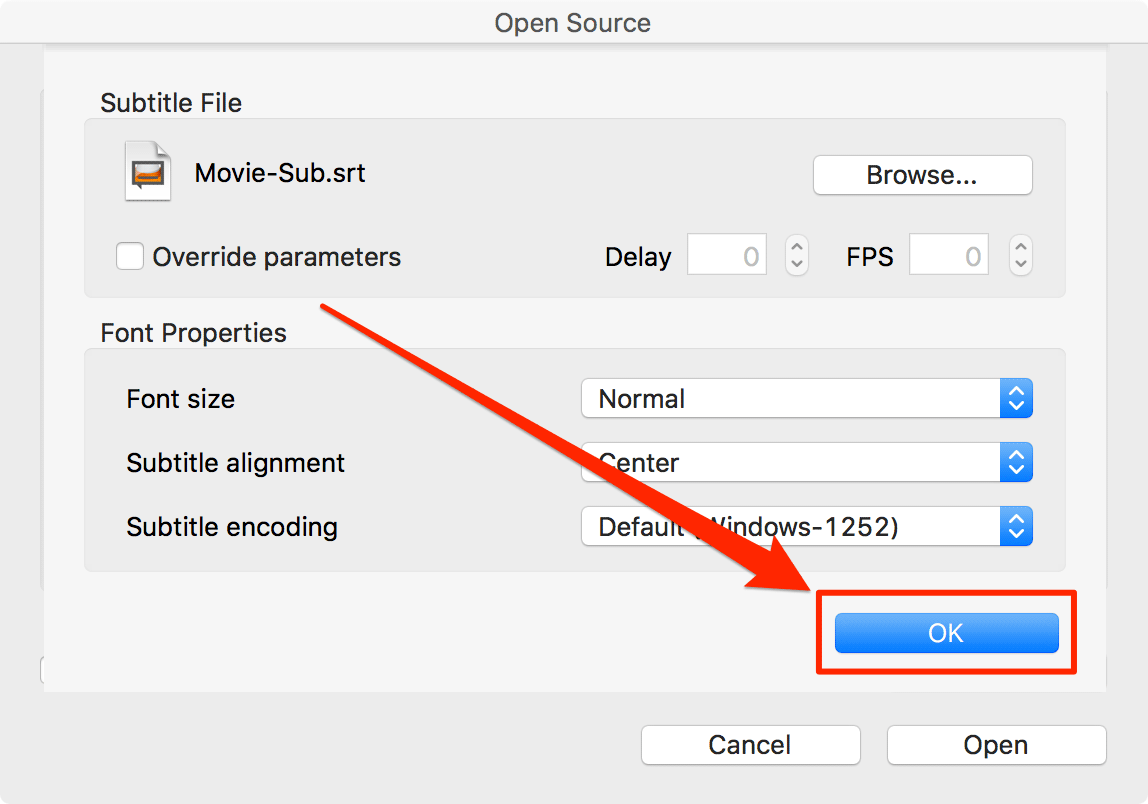
Not only can you add subtitles to your video file using this panel, but you can also change some of the settings related to the subtitles using this panel.
You can choose from a number of font sizes, you can change the alignment of the subtitles, and you can also choose an encoding type for the subtitles.
Click on “OK” to save the changes.
You are back to the main panel, and you now need to click on the button that says “Open” to open the selected media file and the selected subtitles file with the app.
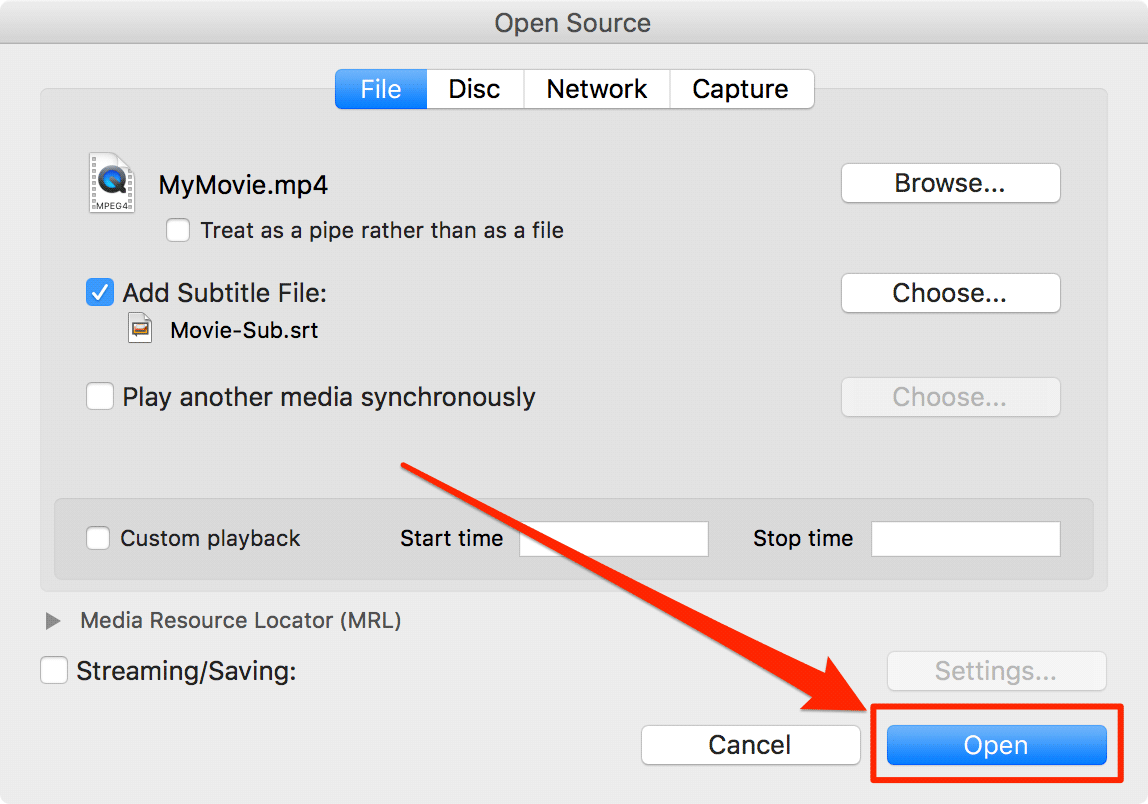
The video should begin playing along with the subtitles you have chosen in the above steps.
So, that was another way of watching your favorite movie with subtitles on your Mac.
You might also be interested in:
- How To Remove Settings Icons From The Preferences Panel On A Mac
- How To Run A Terminal Command Using A Keyboard Shortcut On Your Mac
- How To See If Your Mac Supports Auto Unlock Feature
- How To Enable Or Disable Inertial Scroll On Your Mac
Have something to say? You can contribute to this tech article by leaving a comment below.