The following tutorial demonstrates how to add and remove User Program Groups from the Start Menu when using a version of the Windows 11 operating system.
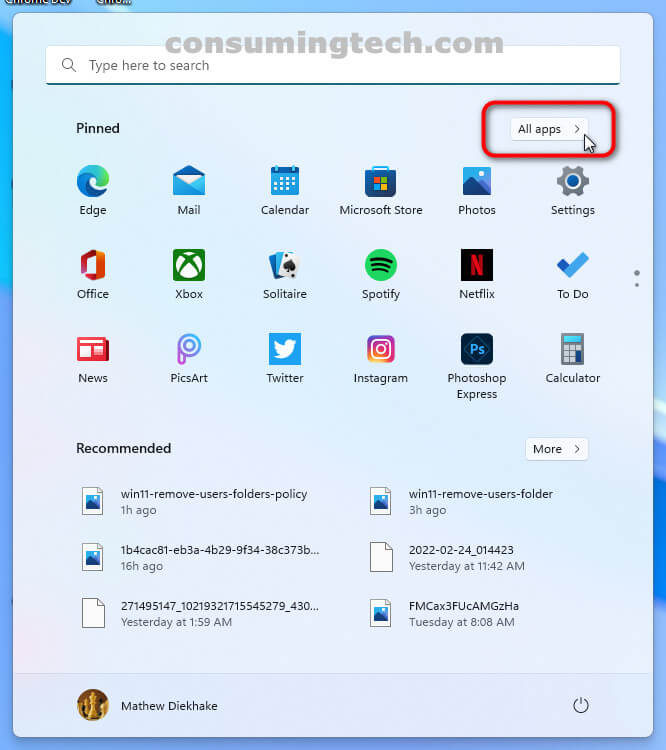
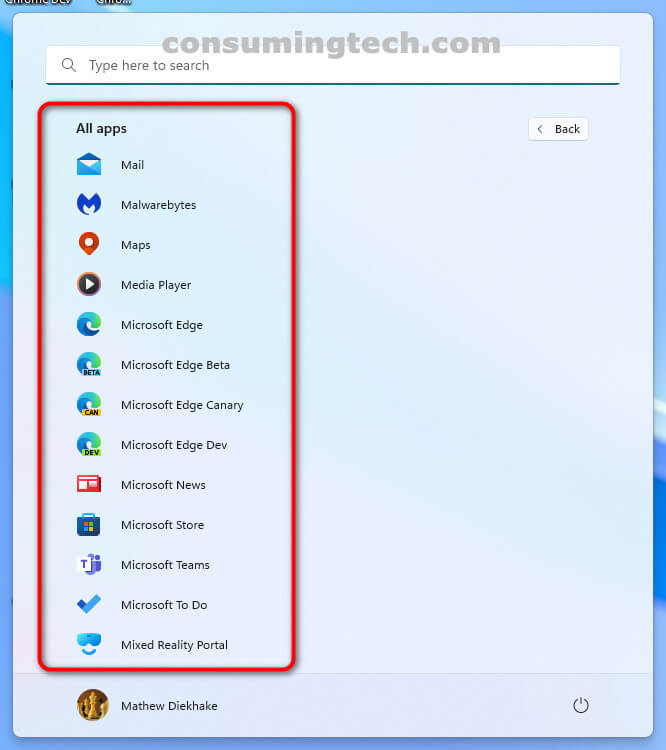
The Start Menu in Windows 11 has been divided into three headings. Of the three, only two of them are found on the first Start Menu page. The third is the All Apps section which requires an extra click to reveal the entire list of All Apps or what you would have known to be the typical Start Menu appearance in older Windows versions such as Windows 10.
Microsoft makes it possible to remove the User Program Groups folder from the list of All Apps in Windows 11. This means you can remove the data pertaining to new users, all users, and the current user.
How to Add or Remove User Program Groups from Start Menu in Local Group Policy Editor
You can add and remove User Program Groups from the Start Menu in Windows 11 from the Local Group Policy Editor. Here is how to do that:
1. Open the Local Group Policy Editor. See this tutorial for all the different ways in which you can open the Local Group Policy Editor in Windows 10/11: How to Open Local Group Policy Editor in Windows 10/11 [Tutorial].
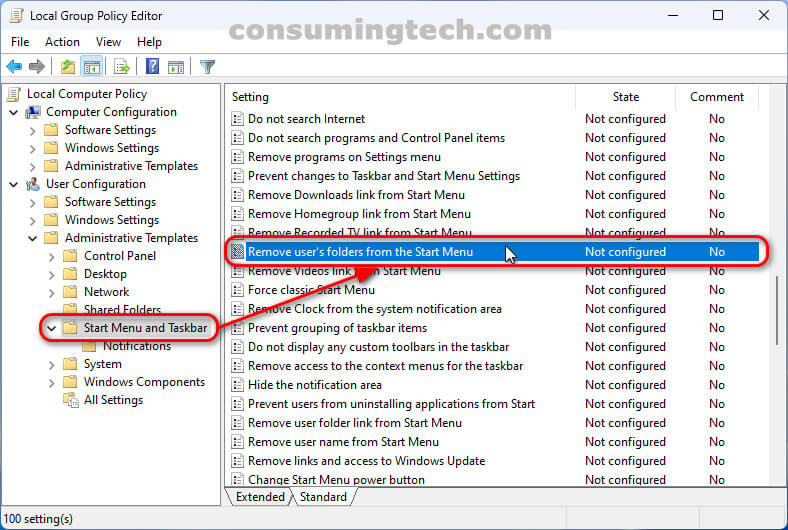
2. Using the Local Group Policy Editor’s left pane, navigate through to the following policy location:
User Configuration/Administrative Templates/Start Menu and Taskbar
3. With the Start Menu and Taskbar selected, click on Remove user’s folders from the Start Menu in the right side of the same window.
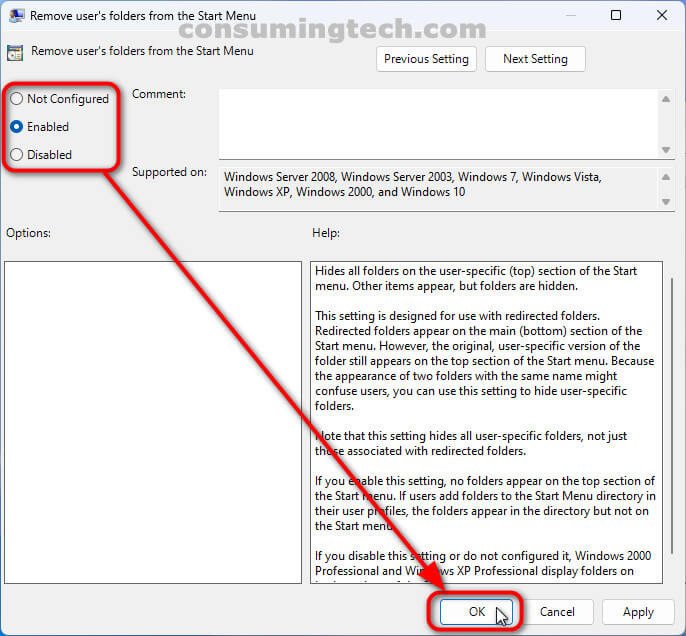
4. From the Remove user’s folders from the Start Menu policy, select either Not Configured (to add User Program Groups), Enabled (to remove User Program Groups), or Disabled (to add User Program Groups), and then click on the OK button at the bottom of the policy window to save the changes.
An example of where the list of All Apps are in the Windows 11 Start Menu:
In conclusion, that’s how to add and remove User Program Groups from the Start Menu in Windows 11.
Related Tutorials
- How to Pin/Unpin Items on Jump Lists in Windows 11 [Tutorial]
- How to Add/Remove Common Program Groups from Start Menu in Windows 11 [Tutorial]
- How to Enable/Disable Reload in Internet Explorer Mode in Microsoft Edge [Tutorial]
- How to Add/Remove Internet Explorer Mode Button on Toolbar in Microsoft Edge [Tutorial]
- How to Change Maximum Number of Items in Jump Lists in Windows 11 [Tutorial]
- How to Enable/Disable Shared Experiences in Windows 11 [Tutorial]
- How to Enable/Disable Suggested Content in Settings in Windows 11 [Tutorial]
- How to Add/Remove Quick Access in Navigation Pane of File Explorer in Windows 11 [Tutorial]
- How to Turn On/Off Show Accent Color on Title Bars/Windows Borders in Windows 11 [Tutorial]
- How to Enable/Disable Pin and Unpin Items on Jump Lists in Windows 11 [Tutorial]