The taskbar is your gateway to using the Windows operating system. From the taskbar is where you’ll find access to the Start menu which offers many ways to branch out and explore the rest of the operating system, including getting access to File Explorer and the Settings app, plus the list of All Apps and Start menu tiles. The taskbar also shows you applications that you have open so you can switch between different apps without having to close them, and a few default apps that Microsoft thinks you may frequent which are pinned to the taskbar. You also have the option to customize the taskbar by pinning your choice of applications to it instead. The taskbar is also home to the notification area, known as the system tray in earlier versions of Windows, which shows you other useful app icons that give you direct access to opening apps and receiving notifications from them. Windows Defender is an example of an application that you will find available from the notification area.
The taskbar itself is also highly customizable. You can move it from the bottom of the computer’s display (default) to the left, right, and top instead if you prefer. You can configure and remove Cortana from the taskbar, or just minimize search to the Cortana icon instead of the search box. Remove the Taskview button. Hide any system icons that you don’t want appearing in the notification tray. Hide application icons from the notification area. Change the size of the taskbar by dragging it and choose to show labels for the taskbar icons. Change the colors of the taskbar. Automatically hide the taskbar. Lock and unlock the taskbar. And still much more useful stuff such as rearrange the taskbar buttons.
Another feature the taskbar has on offer to its users is toolbars. By default, the Windows 10 taskbar has three toolbars: the Address, Links, and Desktop toolbars. However, you can also create new toolbars if you wanted to have something extra. A toolbar that is commonly installed after setting up Windows 10 by users is the Quick Launch toolbar—a toolbar that was available in earlier versions of Windows but has been left out of Windows 10.
The following tutorial demonstrates how to add or remove the Quick Launch toolbar to the taskbar when you’re using a version of the Windows 10 operating system.
How to Add Quick Launch Toolbar to Taskbar in Windows 10
Here is how you can add the Quick Launch toolbar by creating a new toolbar from the taskbar right-click menu in Windows 10:
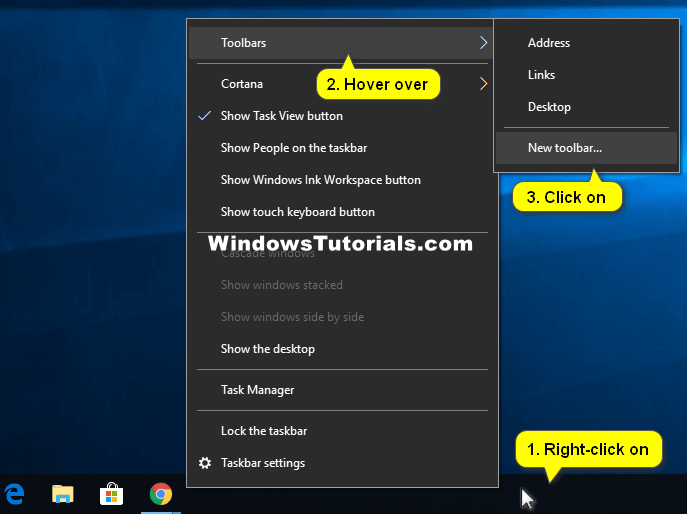
1. Right-click a spare space on the taskbar where there are no icons and then hover the cursor on Toolbars followed by New toolbar. (click to enlarge screenshot below)
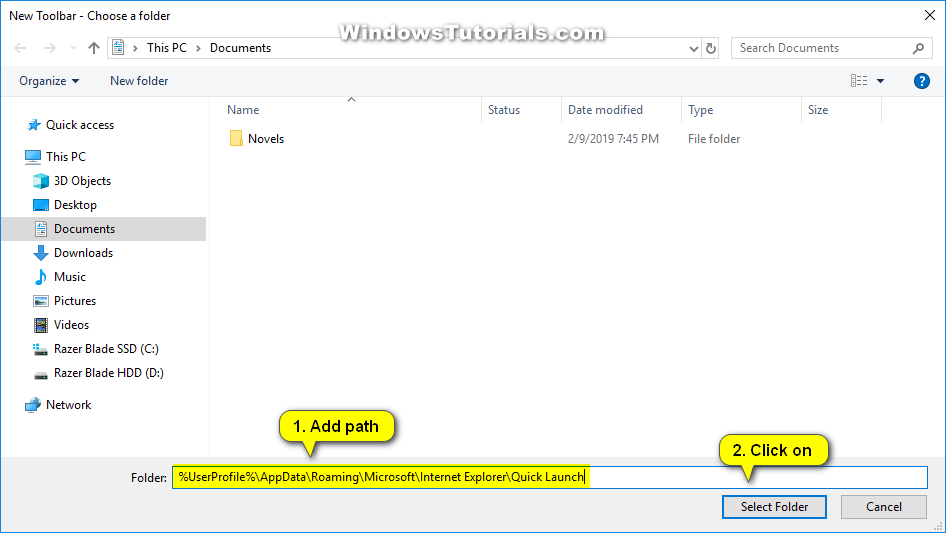
2. Type %UserProfile%\AppData\Roaming\Microsoft\Internet Explorer\Quick Launch into the Folder field at the bottom of the window and then click Select Folder. (click to enlarge screenshot below)
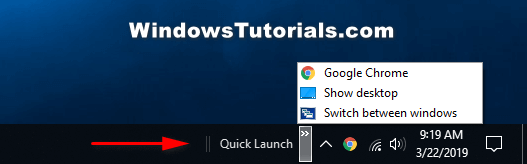
3. You will see the Quick Launch toolbar now available next to the notification area on the taskbar.
4. How to Move Quick Launch Toolbar
Note: You’ll need to unlock the taskbar for this to work.
a. To the left side of the Microsoft Edge browser icon is a dotted line. Click and drag the dotted line to the right side of the taskbar and stop when you get to the Quick Launch toolbar. Before letting go of the mouse when you drag, the operating system will give you a preview of what you’re dragging is going to let go when you release, so always use that as a guide. Once you see the Quick launch icons change to the left side of the taskbar, then you know it is safe to stop dragging the dotted line.
How to Remove Quick Launch Toolbar from Taskbar in Windows 10
Here is how you can remove the Quick Launch toolbar from the taskbar right-click menu in Windows 10:
1. If you want to restore the Quick Launch toolbar to its default settings, which is to have it removed, then you can do that from the taskbar as well.
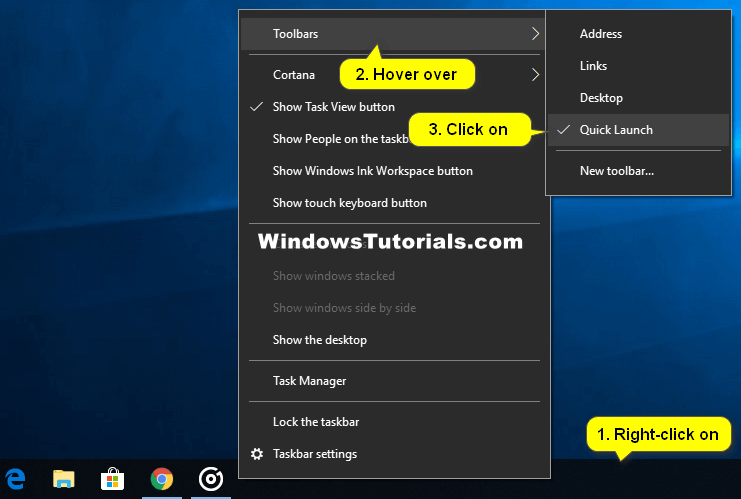
2. Right-click a spare space on the taskbar where there are no icons and then hover the cursor on Toolbars and then click on Quick Launch to remove the tick. (click to enlarge screenshot below)
That’s all.