One of the selling points for Windows 10 Pro is the Remote Desktop app coming on your device natively. What many Home and Pro users don’t know, however, is that anyone can actually install the Remote Desktop application from the Microsoft Store and start using it.
Microsoft commercials suggest that the Remote Desktop app is most useful for getting access to your work PC from home just in case you have an idea or two that needs to come to fruition before you get back to the office. More practical in my life though has been using a remote desktop connection to gain access to friends’ PCs to help them troubleshoot problems that may be having.
It’s understandable that Microsoft doesn’t want to suggest that you will need to remote connect to other people’s computer and help them fix their computer related problems because they probably don’t want to be mentioning computers troubleshooting being necessary unless they have to. But as far as troubleshooting goes, it is a great app to have.
If troubleshooting or accessing your own computer at work from home doesn’t interest you, you still might enjoy the Remote Desktop app for its ability to use virtual apps.
This tutorial demonstrates what you need to add a remote desktop connection from the Remote Desktop application when you’re using a version of the Windows 10 operating system. The Remote Desktop app comes on your version of Windows by default if you’re using Windows 10 Pro but needs to be installed from the Microsoft Store if you’re using Windows 10 Home.
How to Add a Remote Desktop Connection in Remote Desktop app on Windows 10 PC
1. Open the Start menu and then scroll down the list of All apps until you can see the Remote Desktop application and double-click to open it.

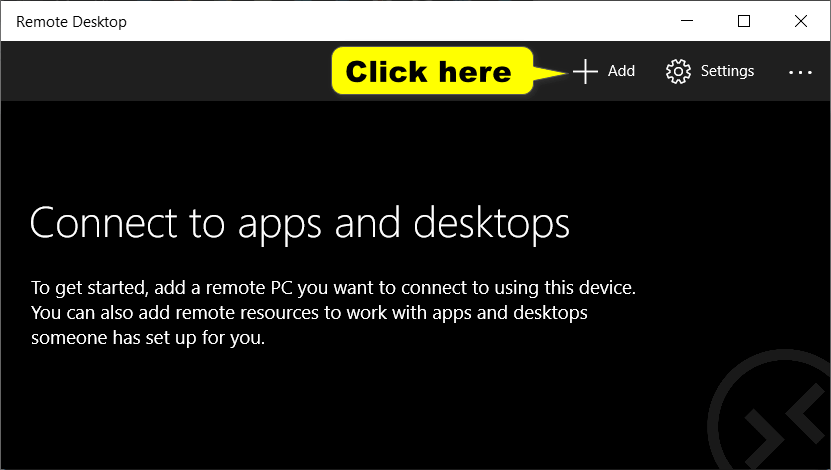
2. Click on the Add button at the top of the Remote Desktop window.
3. Click on the Desktop Connect to a PC link.

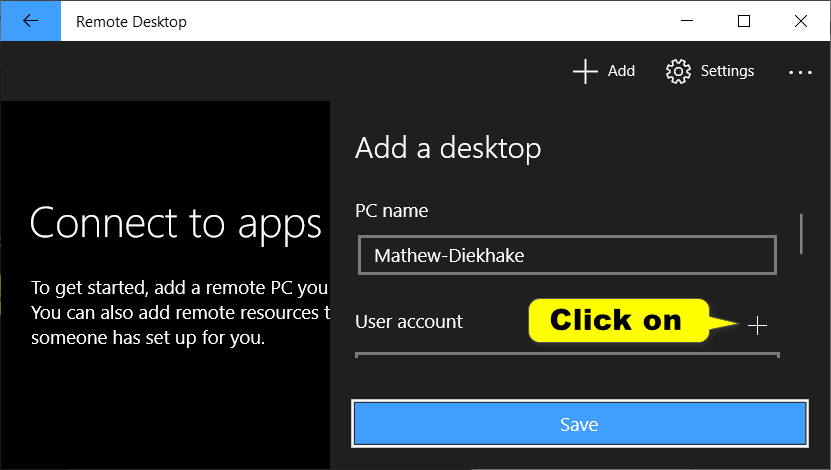
4. Under where it says PC name enter the name of the computer or the IP address of the computer that you want to connect to. (Every Windows 10 computer is given an official name, and you’ll need to input the accurate name for this to work.)
The name can be a Windows computer name, internet domain name, or an IP address. You can also append port information to the computer name—for instance, Mathew-Desktop:10.0.0.138 or 10.0.0.138.
Note: You can find the computer name and the IP address from the Settings app. To find the computer name, navigate to the Start menu > Settings > System > About > Device name. To find the computers IP address, head to the Start menu > Settings app > Network and Sharing > WiFi.

5. Click on the plus symbol next to where to says User account to add your user account.
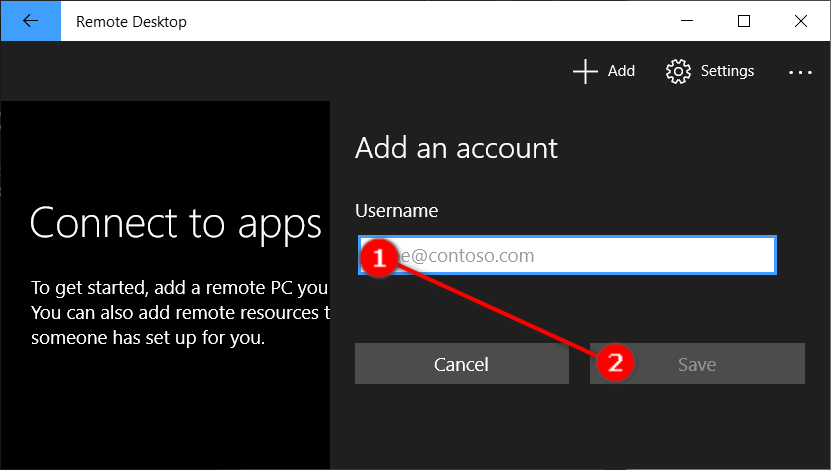
6. Add the username of the user account that you want to connect to remotely and then click on the Save button.
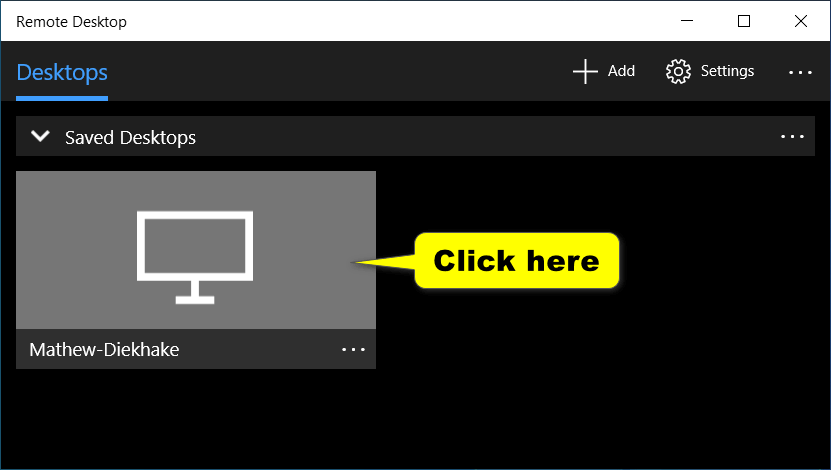
7. The remote desktop connection has now been created. To use it, simply click on the icon for the remote desktop that you created which can be found under the Saved Desktops heading.
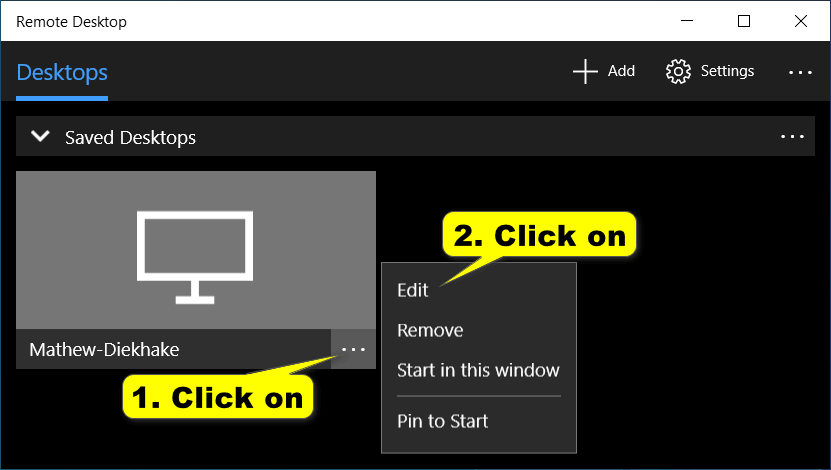
8. You can at anytime edit the details for the remote desktops that you’ve created, just in case they’re not working as planned, by clicking on the three dotted menu and then clicking on the Edit button.
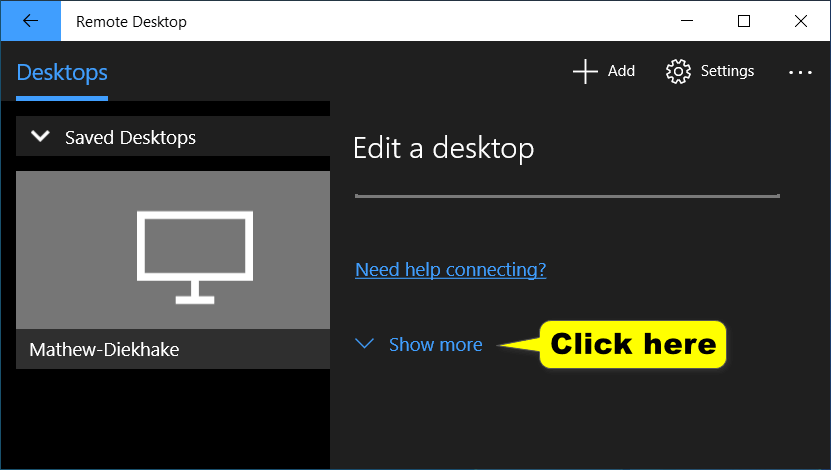
9. From the same Edit menu you can also find Group settings which allow you to assign your remote desktop creations as groups which can make it easier to find individual remote desktops if you’ve created numerous connections.
That’s it.
Related Tutorials
- How to Erase Disk using Diskpart Clean Command in Windows 10
- How to Collect System Specifications in Windows
- How to Change Default Sound Input Device in Windows 10
- How to Choose Default Operating System to Run at Startup in Windows 10
- How to Turn On/Off Bluetooth in Windows 10
- How to Turn On/Off Allow Pen to Act as a Mouse in Windows 10
- How to Set Preferred GPU for Apps in Windows 10
- How to Turn On/Off Mouse ClickLock in Windows
- How to Open Elevated Command Prompt in Windows 10
- How to Reset Windows 10
- How to Enable/Disable Automount of New Disks and Drives in Windows
- How to Install Windows 10 Virtual Machine in VirtualBox